A Linux operating system is the perfect platform to understand, master, and implement ideal user and group management footprints. Also, a Linux operating system is attributed as a multi-user platform. The latter statement implies that various remote users can concurrently access and utilize the resources of a single Linux machine.
As a security precaution, such users are discouraged from sharing their access credentials while at the same time these users share access to prioritized system resources. Only a Linux operating system can accomplish such user and group management milestones.
Managing user and group actions in a Linux operating system environment can be tedious for any Linux system administrator. For instance, a Linux system in a production or commercial environment with a growing number of users might pose a challenge to a system administrator that is yet to master the hacks and tweaks related to efficient user and group management.
What is ugm?
When it comes to the efficient user and group management in a Linux operating system, knowing linked user and group information of all registered users helps determine:
- who is active in the system.
- what groups are associated with each user in the system?
- which user has questionable credentials in the system.
To effortlessly accomplish the above-stated objectives, we need the help of ugm (a terminal-based user interface program). This tool eases the effort needed to view user and group information on a Linux system such that we do not need to master too many command tweaks.
This article will walk us through the installation and usage of ugm on Linux.
Install and Use ugm in Linux
Before installing ugm on our Linux systems, we need to first install the Go programming language. Visit the go download page and grab the latest Go binary (.tar.gz) file or download it with the wget command as demonstrated below:
$ wget https://go.dev/dl/go1.19.linux-amd64.tar.gz
We need to make sure that no previous Go installation is on our system (delete /usr/local/go directory) before extracting the new Go version download to the /usr/local directory. A fresh Go tree should then be created in the directory /usr/local/go.
$ sudo rm -rf /usr/local/go && sudo tar -C /usr/local -xzf go1.19.linux-amd64.tar.gz
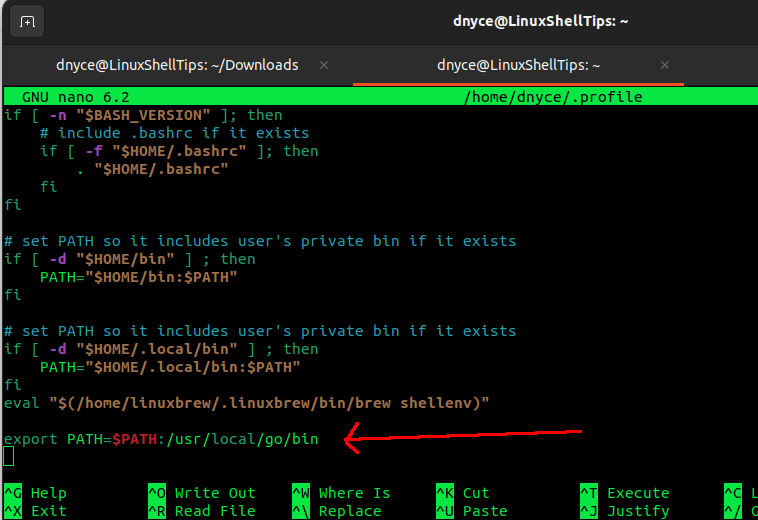
Next, open the file $HOME/.profile and add the following line for /usr/local/go/bin directory to be included in the PATH environment variable.
$ nano $HOME/.profile
Add the following line.
export PATH=$PATH:/usr/local/go/bin

Save the file and close it. You might need to log out and log in again for the above profile changes to take effect.
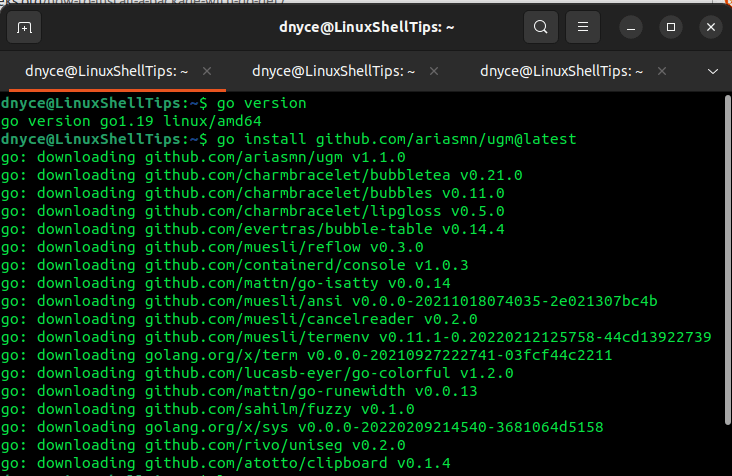
Confirm the installed Go version with the following command:
$ go version

Once the Go programming language is installed, we are now ready to install ugm on our Linux system.
$ go install github.com/ariasmn/ugm@latest

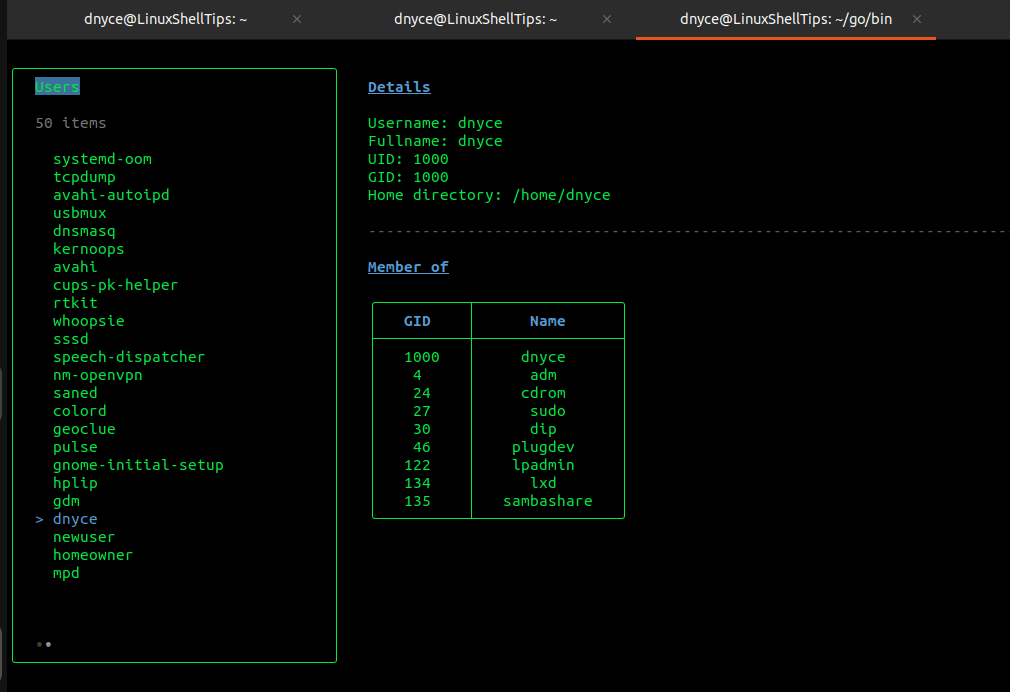
Once ugm is installed, you can start it with:
$ ugm
If the above command does not work, launch its binary file directly.
$ cd $HOME/go/bin
$ ./ugm

Using the keyboard arrow keys, you should be able to preview all the users, users’ details, and user-linked group information on your Linux system.
The ugm utility makes Linux user and group management tasks less tedious since we are able to preview all the user and group information of our Linux systems at a glance.
