SSH keys are cryptographic keys that are used for authenticating and securing traffic or communication between two servers or systems. They provide a more secure authentication method as opposed to the traditional password authentication which is prone to brute-force attacks.
In this tutorial, we will walk you through how to set up SSH keys on Rocky Linux.
Create RSA SSH Key Pair in Rocky Linux
To get started with creating an RSA key pair on our local system run the following command:
$ ssh-keygen
OR
$ ssh-keygen -t rsa
By default, this creates a 2048-bit RSA key pair which is considered secure enough to encrypt traffic between the client and the remote host.
Optionally, you can create a 4096-bit key pair that is larger and more secure by passing the -b option as follows:
$ ssh-keygen -b 4096
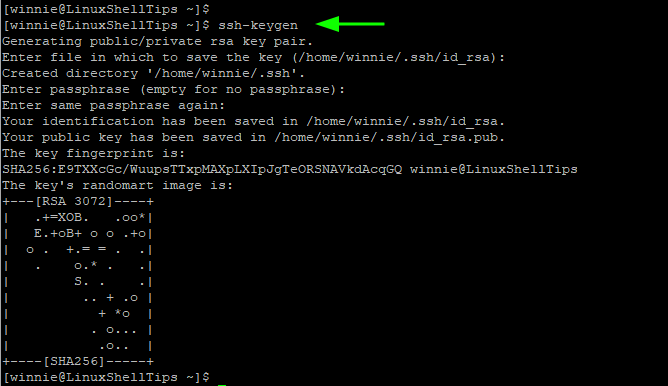
After running the ssh-keygen command, a series of prompts will follow. You will first be required to provide the file in which the keys will be saved. By default, the keys are saved in the ~/.ssh directory on your home directory. You can define your custom file, but in this illustration, we will go with the defaults
So, press ENTER to save the keys in the ~/.ssh directory on your home directory.

If SSH keys already exist, you will get the following prompt and you will be prompted to overwrite it. Exercise caution here. Overwriting the keys means that authentication will not be possible using the previous keys. Selecting ‘Yes’ destroys the current keys and generates new ones.

Next, you will then be prompted for a passphrase. This is an optional step and it provides an added layer of protection to bar unauthorized users from using the keys for authentication. However, you can leave this blank if your intention is to configure passwordless SSH authentication between your local system and other remote hosts.
For now, we will leave this blank and press ENTER.

Finally, the SSH key pair (public and private keys) will be saved on your local system on the specified path. This is the output generated after successful command execution.

With the default options, the SSH keys are saved in the ~/.ssh directory inside your home directory. To confirm this, run the command:
$ ls -la ~/.ssh

- The id_rsa is the private key and should be kept secret and confidential. Divulging it can lead to a serious breach of your remote server.
- The id_rsa.pub is the public key and it is saved on the remote host that you want to connect to.
With the SSH keys successfully created, the next step will be to save the Public key to the remote system in readiness for authentication.
Copy SSH Public Key to Remote Linux Server
The ssh-copy-id command provides an easy and convenient way of copying the public SSH key to a remote host. It takes the following syntax:
$ ssh-copy-id user@remote-host-ip-address
We have a remote system with a regular user called bob already configured. To copy the public SSH key, run the command:
$ ssh-copy-id [email protected]
If you are connecting to the host for the first time, you will see the following output. To proceed, type ‘yes’ and hit ENTER to proceed.

The command probes your local system for the public key id_rsa.pub and once it establishes its presence, it prompts you for the remote user’s password.

Type the password and press ENTER. The public key is copied on the remote host in the ~/.ssh/authorized_keys file. We will come to this later.

On your local system, the ~/.ssh/known_hosts file is created. This is a file that contains the SSH fingerprints for remote hosts that you have connected to.
To view the file, simply run the command:
$ cat ~/.ssh/known_hosts

Connecting to Remote Linux Passwordless
At this point, you should be able to log into the remote host without a password. To give it a try, try logging in normally as you would.
$ ssh [email protected]
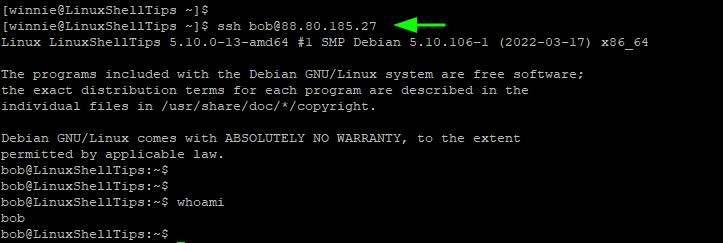
This time around you will be dropped immediately to the remote host’s shell.

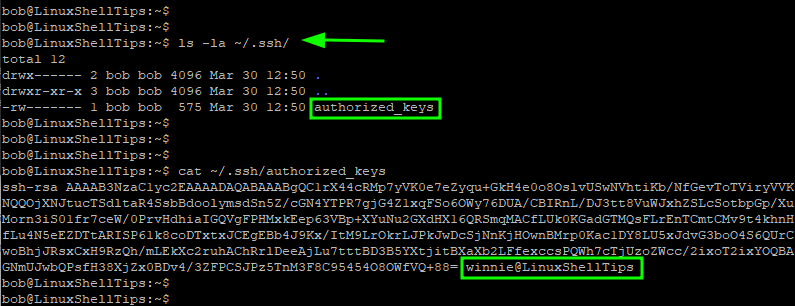
As we mentioned earlier on, the public key is saved in the authorized_keys file on the remote host. You can confirm this as shown.
$ ls -la ~/.ssh/
To view the file, use the cat command as follows.
$ cat ~/.ssh/authorized_keys

Disable SSH Password Authentication
The SSH public-key authentication has been successfully set up. However, password authentication is still active and this makes your remote host susceptible to brute force attacks.
As such, it’s strongly recommended to disable password authentication. Now login back to the remote host using either root or sudo user. Then open the sshd_config configuration file.
$ sudo vim /etc/ssh/sshd_config
Scroll down and locate the PasswordAuthentication directive. If it commented out, uncomment it and set it to 'no'.
PasswordAuthentication no
Save the changes and exit the file.
To apply the changes made, restart the sshd daemon as shown.
$ sudo systemctl restart sshd
At this point, SSH password authentication has been disabled on the remote server and the only possible way of accessing the remote server is through public-key authentication.
We have successfully configured SSH key-based authentication on the remote host which allows you to log in without a password. This is the safest way of logging into remote hosts provided the private key remains confidential and secret.
