Setting up a firewall on your Linux system is usually one of the top-of-mind tasks that you can implement to fortify your system’s security. A firewall basically filters or regulates network traffic as it passes across your network interface. By so doing, it keeps unwanted traffic at bay and only allows the required traffic to pass through to the system.
Awall is a user-friendly and intuitive interface to the iptables firewall for Alpine Linux. It was made available since the release of Alpine Linux 2.4 and uses a set of predefined policies written in JSON format. These JSON files are referred to as policy files and are found in the /usr/share/awall/mandatory directory.
Common practice requires you to store your custom firewall rules in the /etc/awall/optional directory. These are optional policies and are enabled on a need basis as we shall demonstrate later in this guide.
NOTE: Awall versions prior to 0.2.12 will reference the policy files in the /etc/awall/optional directory while versions 0.2.12 and higher will look for the policy files from the /etc/awall/optional and /usr/share/awall/optional directories. At the time of writing this guide, the latest version is Awall 1.10, which means that the latter statement will apply.
In this guide, we will demonstrate how you can set up an Awall firewall on Alpine Linux.
Step 1: Update Alpine Linux Package Lists
It’s always a good idea to refresh local repositories before installing new software packages. Therefore, log into your Apline Linux instance and refresh the local package index using the following apk command as shown.
$ apk update

Step 2: Install Iptables in Alpine Linux
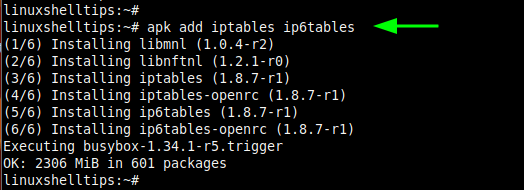
The next step is to install Iptables for both IPv4 and IPv6 protocols as follows.
# apk add ip6tables iptables

Step 3: Install Awall on Alpine Linux
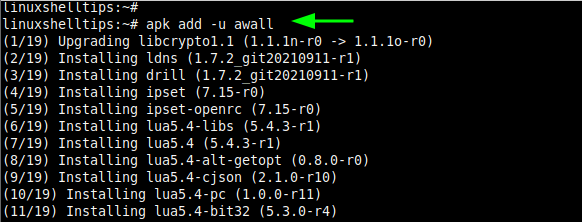
Awall firewall is provided by the Alpine Linux main repository for a wide selection of architectures including x86_64, x86, and aarch64 architectures. Therefore, proceed and install the Awall firewall using the apk command as shown.
# apk add -u awall

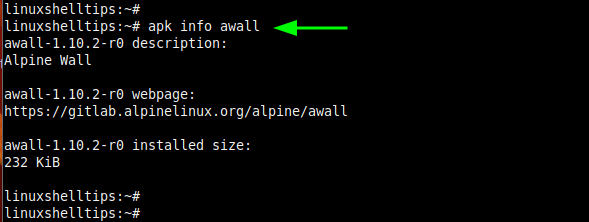
To confirm Awall is installed, run the command:
# apk info awall

As we have mentioned earlier, Awall ships with a predefined set of Firewall policies in JSON format in the /usr/share/awall/mandatory directory. You can list the policies as follow.
$ ls -l /usr/share/awall/mandatory

However, according to best practices, custom policies should be placed in the /etc/awall directory.
Step 4: Load Kernel Modules and Start Iptables
Next, ensure that the iptables kernel modules are loaded using the following command.
# modprobe -v ip_tables
# modprobe -v ip6_tables

With the kernel modules loaded, enable iptables to start on boot as shown.
# rc-update add iptables
# rc-update add ip6tables

Step 5: Create Firewall Policies Using Awall
Next, we are going to create a few firewall policies and place them in the /etc/awall/optional/ directory.
First, on the list, we will create a rule called server.json that drops all the incoming & outgoing connections.
# cat /etc/awall/optional/server.json
Paste the following lines of code.
{
  "description": "An awall policy that drops all incoming and outgoing traffic",

  "variable": { "internet_if": "eth0" },

  "zone": {
    "internet": { "iface": "$internet_if" }
  },

  "policy": [
    { "in": "internet", "action": "drop" },
    { "action": "reject" }
  ]

}
Save and exit. Next, we will create a policy that allows incoming SSH connections on port 22 with a maximum login limit of 3 attempts to thwart brute force attacks.
{

    "description": "Allow incoming SSH access (TCP/22)",

    "filter": [
        {
            "in": "internet",
            "out": "_fw",
            "service": "ssh",
            "action": "accept",
            "src": "0.0.0.0/0",
            "conn-limit": { "count": 3, "interval": 60 }
        }
    ]
}
Save and exit the file.
Next, we will define a firewall policy that allows ICMP ping requests.
{

    "description": "Allow ping-pong",

    "filter": [
        {
              "in": "internet",
              "service": "ping",
              "action": "accept",
              "flow-limit": { "count": 10, "interval": 6 }
        }
    ]
}
If you have a web server in place, consider defining a rule for opening the HTTP and HTTPS ports.
{
    "description": "Allow incoming Apache (TCP 80 & 443) ports",
    "filter": [
        {
            "in": "internet",
            "out": "_fw",
            "service": [ "http", "https"],
            "action": "accept"
        }
    ]
}
Lastly, we are going to allow outgoing connections for some of the most commonly used protocols such as HTTP, HTTPS, DNS, SSH, NTP, and ICMP ping.
{

    "description": "Allow outgoing connections for http/https, dns, ssh, ntp, ssh and ping",

    "filter": [
        {
            "in": "_fw",
            "out": "internet",
            "service": [ "http", "https", "dns", "ssh", "ntp", "ping" ],
            "action": "accept"
        }
    ]
}
Save the changes and exit.
To list all the firewall policies in place, run the command:
# awall list

Step 6: Enable Firewall Policies and Activate Awall
To activate the firewall policies, run the following commands:
# awall enable server
# awall enable ssh
# awall enable ping
# awall enable  outgoing
# awall enable webserver
Finally, to activate the Awall firewall, run the command:
# awall activate

Step 7: Disabling a Firewall Policy
Suppose you want to disable a firewall policy that you no longer want. To do this, use the following syntax:
# awall disable policy-name
For example, to disable the ping policy, run the command:
# awall disable ping
To persist the changes, run the command:
# awall activate
Step 8: Disabling Awall and Iptables Firewall
If you no longer want to use Awall and iptables, then, disable the Iptables as shown. This stops Iptables for both IPv4 and IPv6.
# rc-service iptables stop
# rc-service ip6tables stop
Next, disable all the Awall policy rules that were created earlier on.
# awall disable server
# awall disable ssh
# awall disable ping
# awall disable outgoing
# awall disable webserver
And finally, uninstall the iptables firewall from your Alpine Linux system.
# rc-update del ip6tables
# rc-update del iptables
This was a roundup of how to set up and use Awall with iptables firewall on Alpine Linux. For additional command options, visit the help page as follows.
# awall help
Credit: cyberciti.biz and Alpine Wall Wiki

You stole this from nixCraft without giving any credit. You have zero talent just running multiple Linux sites like tecmint and stealing content. Shame on you
@Vivek,
I seriously didn’t know about it that our author “Winnie Ondara” took the content from your site, even after repeatedly warned about our writing guidelines to author. I am extremely sorry for that, I have added credit at the bottom of the article…
Also, you talking about talent, which does not exist in reality, we are all equal as human beings… This is hard work that always pays off… That’s why tecmint is booming, and I believe in Karma.
A great quote – “I don’t believe in talent I believe in hard work“.
@Vivek, First of all, it is not true that I copied content from your site. I made reference to the Alpine Linux Wiki Page, which I’m sure you also made reference to and this explains the similarity between my content and your content. Secondly, I executed the commands in my Alpine Linux box and took the screenshots myself. Your accusation is uncalled for.