Ubuntu has four standard repositories where software packages are stored: Main, Universe, Restricted, and Multiverse.
- Main: Free and Open Source Software supported by Canonical.
- Universe: Community maintained Free and Open Source Software.
- Restricted: Software that is not totally free.
- Multiverse: Non-free software.
Out of these four, ‘Main’ is enabled by default, and ‘Restricted’ can be enabled by the user during installation. ‘Universe’ and ‘Multiverse’ can be enabled from the ‘Softwares and Updates’ tool, or by directly modifying the source file (‘/etc/apt/sources.list’) for apt.
If your source file has been broken or corrupted, no apt command can run, and you will not be able to install or upgrade any software.
Let’s see how to restore default repositories in such a case.
Restoring Default Ubuntu Repositories
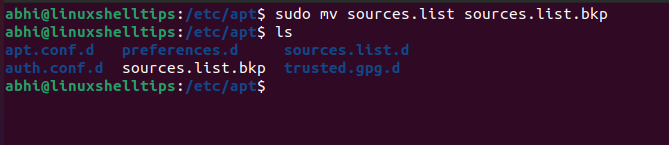
First, go to the directory where the source file is located.
$ cd /etc/apt

Now, backup the broken source file. For this, simply rename the file in the same directory.
$ sudo mv sources.list sources.list.bkp
Now create an empty source file with the original name.
$ sudo touch sources.list
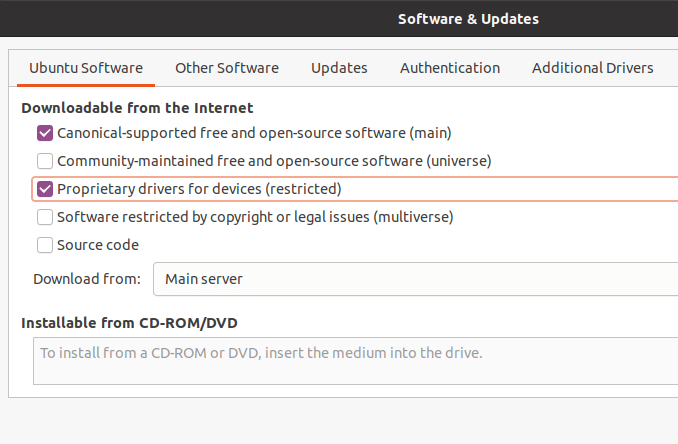
Now, click on the left top corner of your desktop, search for ‘Software and Updates‘ and open it.

Enable ‘Main‘ by clicking on the checkboxes in front of the respective items. You can also similarly enable ‘Restricted‘, ‘Universe‘ and ‘Multiverse‘, should you wish to do so. Enter a password when prompted.
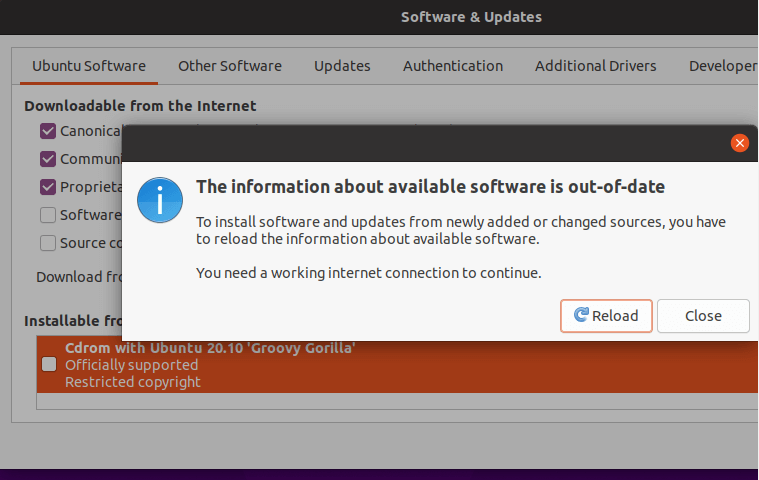
Close the window. Click on ‘Reload‘ when prompted, to fetch the package list from the repositories.
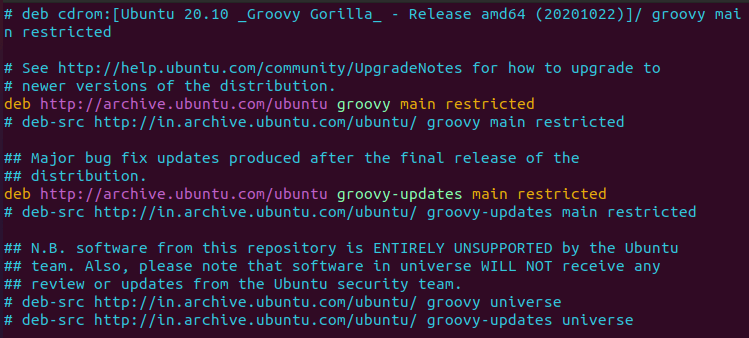
Go back to the terminal. Open the ‘sources.list‘ file again and verify if ‘Main‘ and ‘Restricted‘ repositories have been added.
$ vim /etc/apt/sources.list
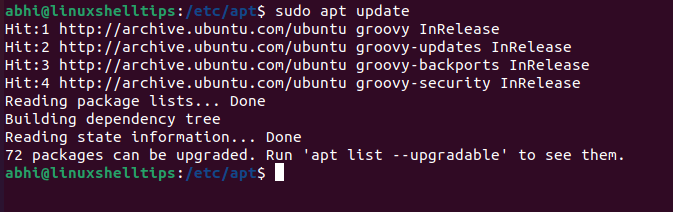
Finally, verify if ‘apt update‘ runs properly.
$ sudo apt update
Conclusion
In this article, we saw how to restore the source file for apt, i.e., the list of repositories, back to default.
It is always a good idea to keep a backup of the original source file, before changing anything manually in it. This way, if anything stops working after the change, you can always restore the backup file and run a quick ‘apt update’ to get the apt working again.
If you have any questions or feedback, let us know in the comments below!
This won’t work when your release is an old unsupported one right…