You might ask yourself, why do I need a two-way/bidirectional file synchronization solution? The terminal-based nature of osync makes it an ideal file synchronization solution that can be executed in three modes:
- manually
- via scheduled tasks
- via a daemon (triggered when new file changes occur)
This stateful synchronizer acts as a rsync wrapper. Osync is attributed as stateful because it is not obligated to monitor the targeted files for changes. This attribute also makes it agentless.
Between two runs, osync will compare replica file lists. These runs can be local-to-local or local-to-remote. The local-to-local replication run takes approximately 2 seconds whereas the local-to-remote replication run takes approximately 7 seconds.
Osync Features
Prominent Osync feature highlights:
- Local-to-Local and Local-to-Remote synchronization support.
- Full script time control.
- Email alerts
- Running as a daemon or on schedule
- Directory monitoring
- Logging facility
- Handles multiple sync tasks through the batch runner and failed sync tasks through a rerun option
- Resume scenarios to handle fault tolerance
- Extended attributes and POSIX ACL synchronization
- Command execution for before/after runs
- Multiple backups and soft deletions handling
If you need speedy execution, you might want to disable some of the osync features like disk space checks and attribute preservation. A target/initiator sync schema is also applicable under osync.
A preexisting target/initiator replica is shielded from multiple concurrent sync processes through pidlocks. Osync’s primary design prevents it from deleting user/system data. Soft deletes or conflictual files are preserved through created backups.
Install Osync in Linux
A stable or latest version of osync can be found on Github. You first need to have git installed before you can retrieve and install the osync file synchronization tool from Github.
Use one of the following installation guides as per your Linux operating system distribution.
Install Osync in RHEL-based Distors
$ sudo yum install git
$ sudo git clone -b "stable" https://github.com/deajan/osync
$ cd osync
$ sudo bash install.sh
Install Osync in Debian-based Distors
$ sudo apt install git
$ sudo git clone -b "stable" https://github.com/deajan/osync
$ cd osync
$ sudo bash install.sh
Install Osync in Arch Linux
$ sudo pacman -S git
$ sudo git clone -b "stable" https://github.com/deajan/osync
$ cd osync
$ sudo bash install.sh
Install Osync in OpenSUSE Linux
$ sudo zypper install git
$ sudo git clone -b "stable" https://github.com/deajan/osync
$ cd osync
$ sudo bash install.sh
While cloning osync from Github, removing the -b "stable" option from the git clone command will retrieve osync’s latest dev snapshot.
How to Use Osync in Linux for Two-Way File Synchronization
As already mentioned, there are three approaches to using osync.
- Quick Sync Mode
- Configuration File Mode
- Daemon Mode
Local-Local and Local-Remote File Sync Using Quick Sync Mode
This approach is however convenient for users seeking to achieve fast syncs between directories. For local-to-local directories, consider the following osync syntax:
$ osync.sh --initiator="/path/to/directory1" --target="/path/to/directory2"
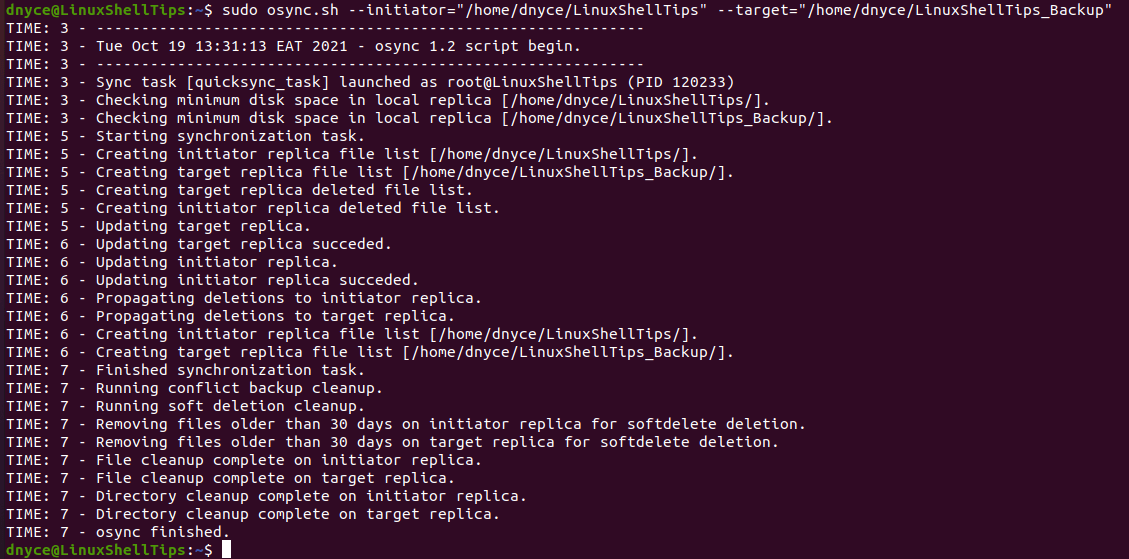
As example implementation is as follows:
$ sudo osync.sh --initiator="/home/dnyce/LinuxShellTips" –target="/home/dnyce/LinuxShellTips_Backup"

For local-to-remote directories, you might need to first configure your machine for SSH passwordless access.
$ sudo ssh-keygen -t rsa
$ sudo ssh-copy-id [email protected]
$ sudo ssh [email protected]
The local-to-remote Quick Sync syntax is as follows:
$ osync.sh --initiator="/path/to/another/directory" --target="ssh://user@host/IP:22//path/to/directory2"
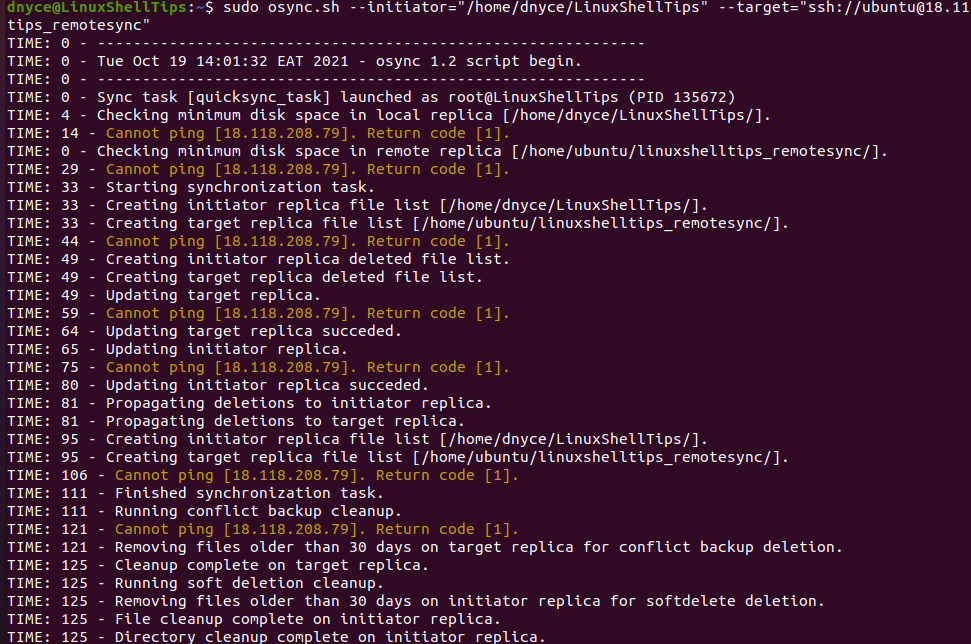
An example implementation would look like the following:
$ sudo osync.sh --initiator="/home/dnyce/LinuxShellTips" --target="ssh://[email protected]:22//home/ubuntu/linuxshelltips_remotesync"

And finally…

Do not worry about osync finished with warnings, It’s just that I disabled pinging on my server. However, your osync command can include the following command options to help you diagnose critical errors.
--summary --errors-only --no-prefix
For example:
$ osync.sh --initiator="/path/to/another/directory"--target="ssh://user@host/IP:22//path/to/directory2" --summary --errors-only --no-prefix
Configuring a Cron Job to Automate File Sync
We could automate the Quick Sync mode tasks through cron jobs.
$ sudo su
$ crontab -e
Adding the following two cron jobs for local-to-local and local-to-remote directories will automate our osync tasks.
 */5        *        *        *        * osync.sh --initiator="/home/dnyce/LinuxShellTips" –target="/home/dnyce/LinuxShellTips_Backup"
 */5        *        *        *        * osync.sh --initiator="/home/dnyce/LinuxShellTips" --target="ssh://[email protected]:22//home/ubuntu/linuxshelltips_remotesync"
Osync is an ideal two-way synchronization solution for local-to-local and local-to-remote directories. The directory syncs you create are a perfect backup plan for critical data in case of accidental deletion or evidence of corrupt files.

When I tried osync using the below command file permissions are creating with the sync user.
How do fix this issue?
initiator directory file:
-rw-r--r--. 1 root root 0 Mar 10 14:07 1.txttarget directory file:
-rw-r--r--. 1 wnsync wnsync 0 Mar 10 14:07 1.txt@Robert,
It should be a good write-up, considering numerous chunks of the review have been copied from the readme.md page from the projects’ git repository…
I have been using Osync for years. This is the best write-up I have seen on Osync in years.