Both MySQL and MariaDB are attributed as open-source relational database management systems (RDBMS). Since MySQL is broken down to either community or enterprise release.
MariaDB became a drop-in replacement to parade all the structured query language (SQL) features offered by MySQL but at an open-source cost.
So whether you are using MySQL Enterprise Edition, MySQL Community Edition, or MariaDB, this article is for you. By the end of your read, you should be comfortable with the use of the powerful structured query language mimicked by these RDBMS.
Install MySQL Server in Linux
MySQL or MariaDB is available in the official repository and can be installed using the package manager as shown.
----------- MySQL -----------
$ sudo apt install mysql-server     [On Debian, Ubuntu and Mint]
$ sudo apt install mysql-server   [On RHEL/CentOS/Fedora and Rocky Linux/AlmaLinux]

----------- MariaDB -----------
$ sudo apt install mariadb-server   [On Debian, Ubuntu and Mint]
$ sudo dnf install mariadb-server   [On RHEL/CentOS/Fedora and Rocky Linux/AlmaLinux]
MySQL Pre-Configuration Setup
Provided that you have a MariaDB or MySQL installation, the first step is always to start, enable, and check on the status of your MySQL. Enabling your MySQL ensures that it is always running even after successfully restarting your Linux system.
To start MySQL, run the command:
$ sudo systemctl start mysql/mysqld
OR
$ sudo systemctl start mariadb
To enable MySQL, run the command:
$ sudo systemctl enable mysql/mysqld
OR
$ sudo systemctl enable mariadb
To check on MySQL status, run the command:
$ sudo systemctl status mysql/mysqld
OR
$ sudo systemctl status mariadb
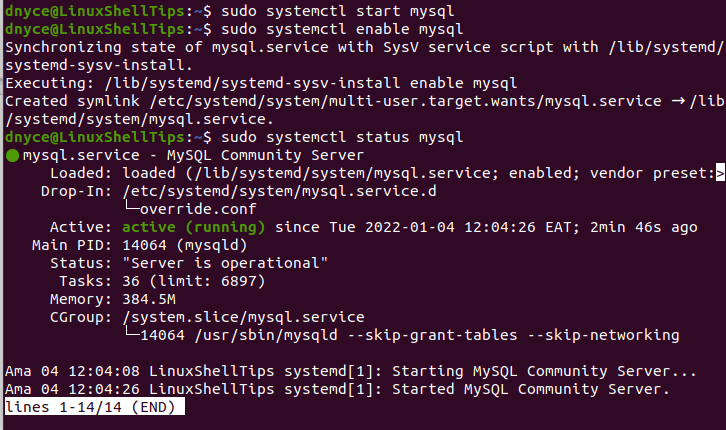
Now that we are certain MySQL is up and running, it is time to configure a few things. For a fresh MySQL/MariaDB installation, you might want to run the following script to secure MySQL installation:
$ sudo mysql_secure_installation
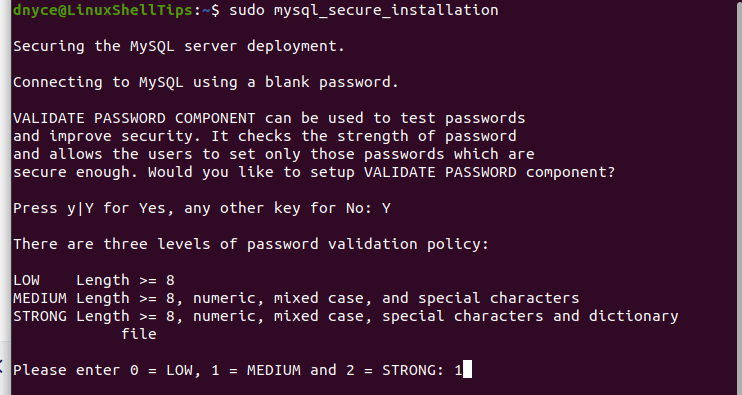
You should then proceed with the prompted options to appropriately configure your MySQL installation.
MySQL Database Management Commands
To connect to your MySQL database, adhere to the following syntax rule.
$ mysql -u [username] -p
First, time database access is via the root user as demonstrated below.
$ mysql -u root -p

Now that we are inside the MySQL database shell, we can execute several SQL queries.
Create a New MySQL User
To create a new MySQL user, run the following SQL command.
MariaDB [(none)]> CREATE USER 'your_user'@'localhost' IDENTIFIED BY 'your_user_password';
To grant this user the same privileges as the root user, we will execute:
MariaDB [(none)]> GRANT ALL PRIVILEGES ON *.* TO 'your_user'@'localhost';
MariaDB [(none)]> EXIT;
To connect to the DB console with this user, first quit MySQL and Re-enter with the new user credentials.
$ mysql -u your_user -p

Working with MySQL Databases
To show all active MySQL databases, run the command:
MariaDB [(none)]> SHOW DATABASES;
To create a new MySQL database, run:
MariaDB [(none)]> CREATE DATABASE IF NOT EXISTS database_name;
To delete a MySQL database you are no longer using, run:
MariaDB [(none)]> DROP DATABASE IF EXISTS database_name;
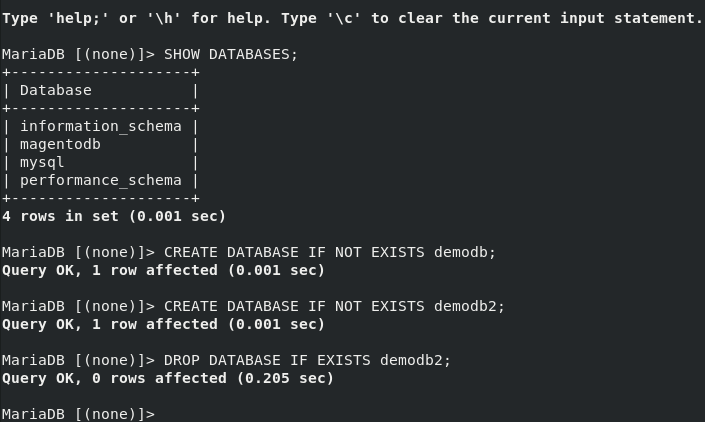
To switch to a specific MySQL database, run:
MariaDB [(none)]> USE database_name;
Working with MySQL Database Tables
Provided that you are connected to a specific database, you can list the MySQL tables associated with the database with the following command:
MariaDB [(none)]> USE database_name;
MariaDB [(none)]> SHOW TABLES;
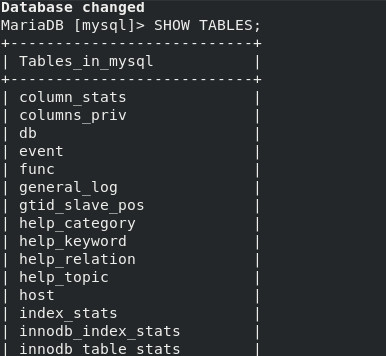
To create a new database table, you also need to provide its column definitions as demonstrated below.
CREATE TABLE IF NOT EXISTS table_name(
column_list
);
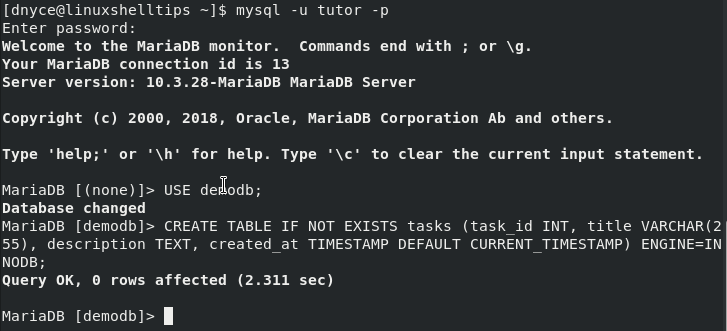
To delete an existing database table, refer to the following command syntax:
MariaDB [(none)]> DROP TABLE IF EXISTS table_name;
To add a new column to an existing database table, implement the command syntax:
MariaDB [(none)]> ALTER TABLE table_name ADD COLUMN column_name;
To delete a database table column, implement:
MariaDB [(none)]> ALTER TABLE table_name DROP COLUMN column_name;
If your database table needs a primary key, you can include one with the command:
MariaDB [(none)]> ALTER TABLE table_name ADD PRIMARY KEY (column_name);
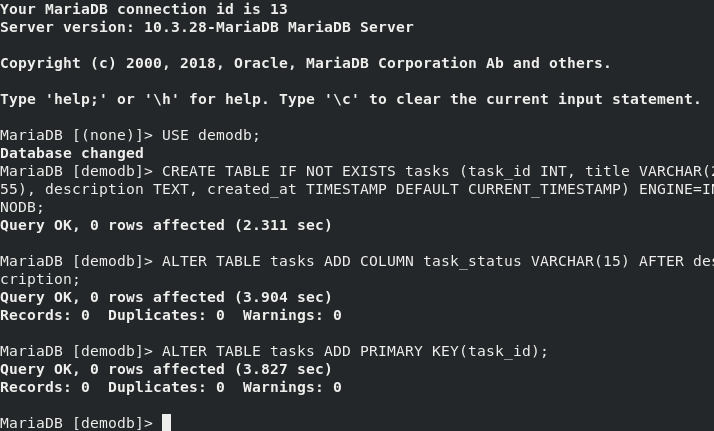
To remove the primary key assigned to a database table, run:
MariaDB [(none)]> ALTER TABLE table_name DROP PRIMARY KEY;
To view the columns associated with a specific database table, run:
MariaDB [(none)]> DESCRIBE table_name;
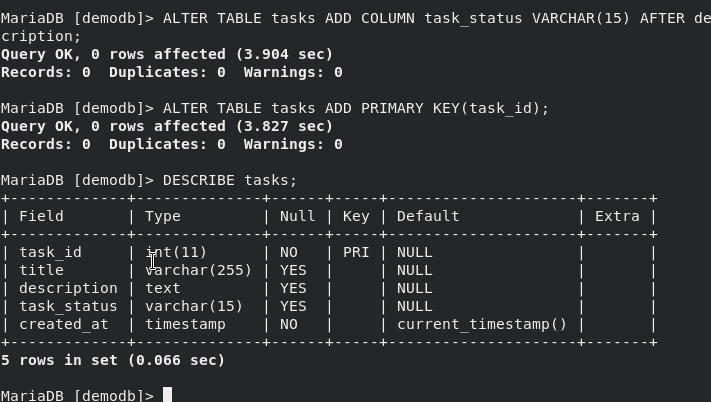
To view specific column information, run:
MariaDB [(none)]> DESCRIBE table_name table_column;
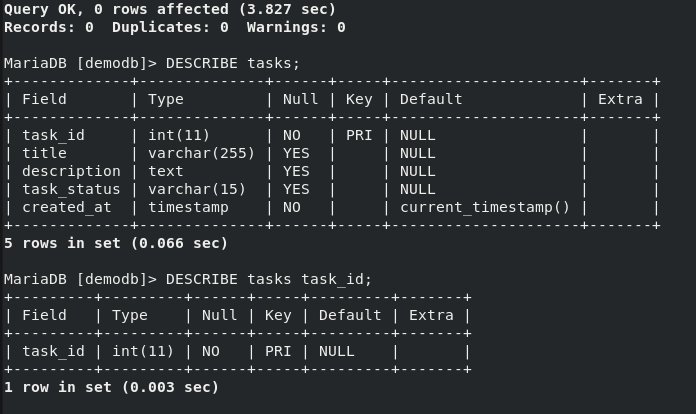
Querying MySQL Database Data
Once you have identified the various tables under your database, you can perform several interesting queries.
To query all the data associated with a specific database table, run:
MariaDB [(none)]> SELECT * FROM table_name;
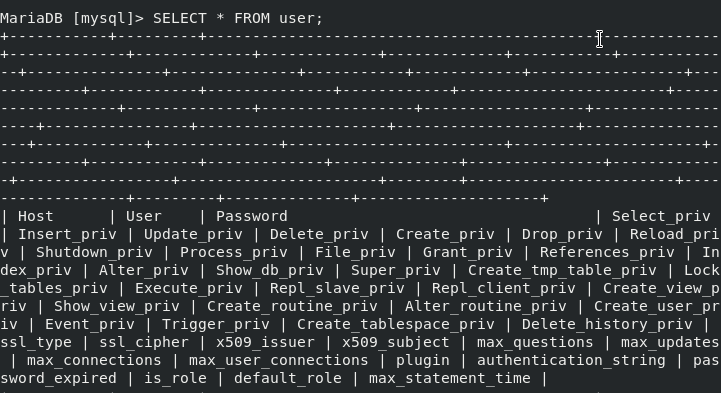
To query one or more table column data, run:
MariaDB [(none)]> SELECT column_name1, column_name2, column_name3 FROM table_name;
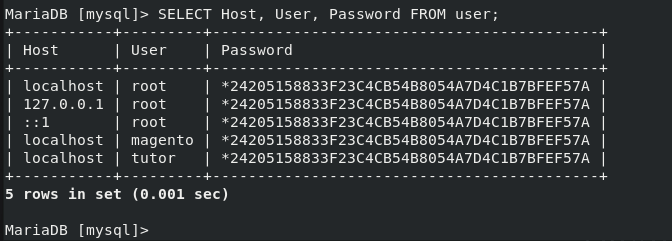
If your database table query has duplicate rows, you can exclude them with the command:
MariaDB [(none)]> SELECT DISTINCT COLUMN FROM table_name;
To insert a new database table record:
MariaDB [(none)]> INSERT INTO table_name(column_list) VALUES(value_list);

To Update existing database table record:
MariaDB [(none)]> Update table_name SET column1=value1;

Database Backup and Restore
Here, we have to acknowledge the use of the mysqldump command-line client program. The first step is to identify the databases and database tables you wish to backup or restore.
MariaDB [(none)]> show databases;
MariaDB [(none)]> show tables;
To back up a single MySQL database, reference the syntax:
$ sudo mysqldump -u [db_username] -p[db_password] [database_name] > [generated_db_backup.sql]
The above command syntax implementation will be:
$ sudo mysqldump -u root -pid@pa55word demodb > demodb.sql

If you were dealing with more than one database, the command will look like the following:
$ sudo mysqldump -u root -pid@pa55word --databases demodb mysql > demodb_mysql.sql
To back up all MySQL databases:
$ sudo mysqldump -u root -pid@pa55word --all-databases > all_databases.sql
To back up a single database table called tasks:
$ sudo mysqldump -u root -pid@pa55word demodb tasks > demodb_tasks.sql
To back up multiple database tables (user and host):
$ sudo mysqldump -u root -pid@pa55word mysql user host > mysql_user+host.sql
To restore a MySQL database or database table(s), use the mysql command instead of the mysqldump command and switch the > symbol with the < symbol.
For instance, to restore a single MySQL database called demodb, implement the command:
$ sudo mysql -u root -pid@pa55word demodb < demodb.sql
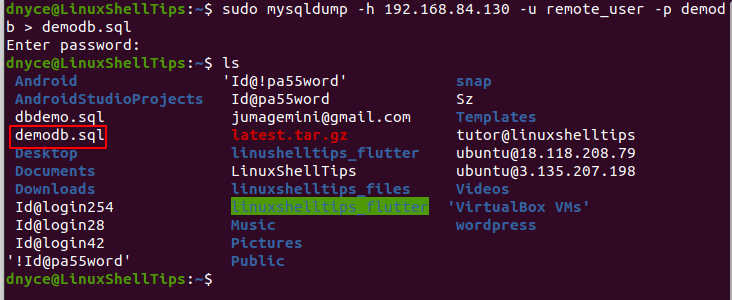
To backup your database data from a remote server to a local machine, you need to know the IP address of the remote server hosting MySQL. For instance, to locally back up a single database on a remote server, the command to implement should be as follows:
$ sudo mysqldump -h 192.168.84.130 -u remote_user -p dbdemo > dbdemo.sql
You will be prompted for the database user password for the backup process to begin. Ensure that you have allowed remote access to the MySQL server.
Some useful MySQL related articles to read:
- How to Allow Remote Access to MySQL Database Server
- How to Get a List of MySQL User Accounts in Linux
- How To Import and Export MySQL Databases in Linux
- How to Add a New MySQL User with GRANT Permissions
- How to Backup All MySQL Databases from Command Line
With this brief article, you should comfortably implement the needed MySQL commands to keep your database-driven projects going.
