Nginx’s popularity is not solely tied to its being an open-source web software application but also in its adaptation as a modular and high-performance server. These attributes make it an ideal candidate for a web server, load balancer or reverse proxy role.
Nginx’s role as a web server makes it operable through port 80 and its primary directory for serving web files is /usr/share/nginx/html/ in RHEL 8 Linux.
[ You might also like: How to Sync Two Web Servers in Linux Automatically ]
Install Nginx in RHEL 8
To install Nginx on your RHEL 8 system, you need to have root access or Sudoer privileges. The next step is to run a system update check on the system.
$ sudo yum update
Afterward, you can proceed and execute the following command to install the Nginx web software application.
$ sudo yum install nginx
The next step is to enable and start the firewalld service so that port 80 (HTTP) and port 443 (HTTPS) are accessible to Nginx.
$ sudo firewall-cmd --permanent --add-port={80/tcp,443/tcp}
$ sudo firewall-cmd --reload
We now need to enable and start Nginx so that it automatically runs even after system boot.
$ sudo systemctl enable nginx
$ sudo systemctl start nginx
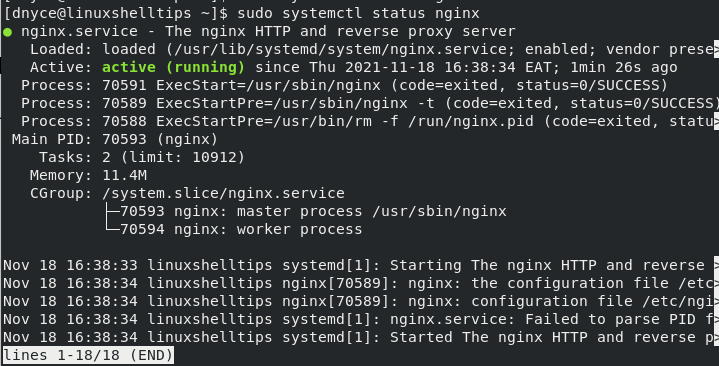
Now check on Nginx status to see if it is running.
$ sudo systemctl status nginx

Now that you have Nginx installed, enabled, and running, we need to figure out how to use it to host web pages. First, visit the following URL to make sure the Nginx default page is loading.
http://YOUR-IP-ADDRESS
OR
http://localhost
Hosting a Website with Nginx in RHEL
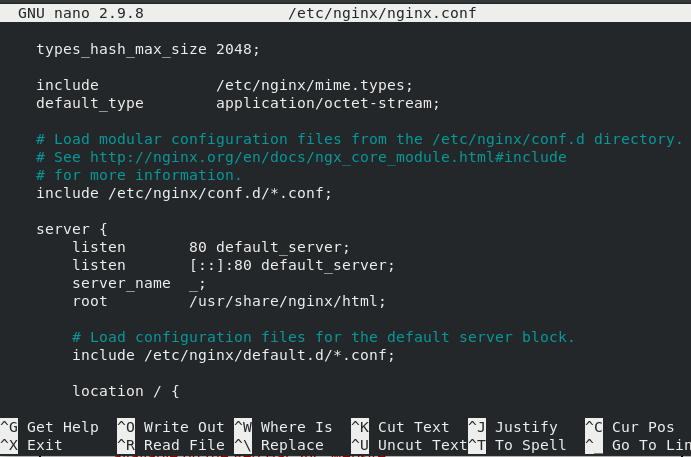
To configure Nginx to provide the basic web server functionality, you will need to reference/edit the file /etc/nginx/nginx.conf.
$ sudo nano /etc/nginx/nginx.conf
This file gives you an idea of how a basic Nginx server block should look like.

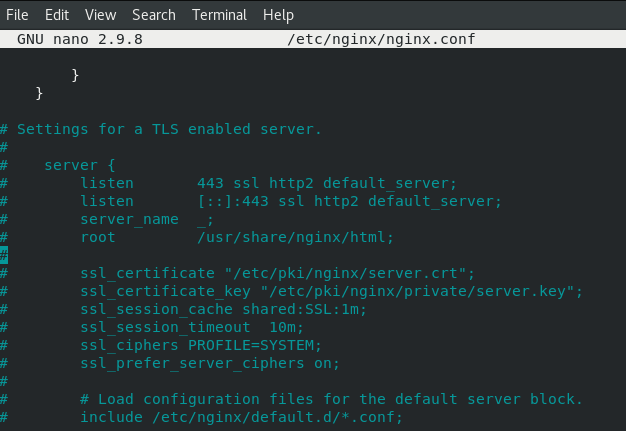
It even has a commented-out configuration for a TLS enabled server as depicted below.

For instance, if we have two domain names (e.g. ubuntumint.com and linuxshelltips.net) that need to serve web files via this Nginx server, we will create their associated server blocks in the following manner.
Creating Nginx Server Blocks
 server {
    server_name ubuntumint.com;
    root /var/www/dubuntumint.com/;
    access_log /var/log/nginx/ubuntumint.com/access.log;
    error_log /var/log/nginx/ubuntumint.com/error.log;

  }

   server {
    server_name linuxshelltips.net;
    root /var/www/dlinuxshelltips.net/;
    access_log /var/log/nginx/linuxshelltips.net/access.log;
    error_log /var/log/nginx/linuxshelltips.net/error.log;

  }
Make sure the mentioned directories that hold the web files accessible for the two domain names also exist.
$ sudo mkdir -p /var/www/ubuntumint.com
$ sudo mkdir -p /var/www/linuxshelltips.net
Also, create the log directories.
$ sudo mkdir /var/log/nginx/ubuntumint.com/
$ sudo mkdir /var/log/nginx/linuxshelltips.net/
Create some sample web data to be displayed via each of these domain names:
$ sudo nano /var/www/ubuntumint.com/index.html
Add the following lines to the index.html file.
<!DOCTYPE html>
<html>

<head>
  <title>LinuxShellTips.com</title>
</head>

<body>

  <h1>LinuxShellTips.com</h1>
   <p>I am a Paragraph</p>

</body>
</html>
Next, open the second index.html page.
$ sudo nano /var/www/linuxshelltips.net/index.html
Add the following lines to the index.html file.
<!DOCTYPE html>
<html>

<head>
  <title>LinuxShellTips.net</title>
</head>

<body>

  <h1>LinuxShellTips.net</h1>
   <p>I am a Paragraph</p>

</body>
</html>
The final step is to restart Nginx.
$ sudo systemctl restart nginx
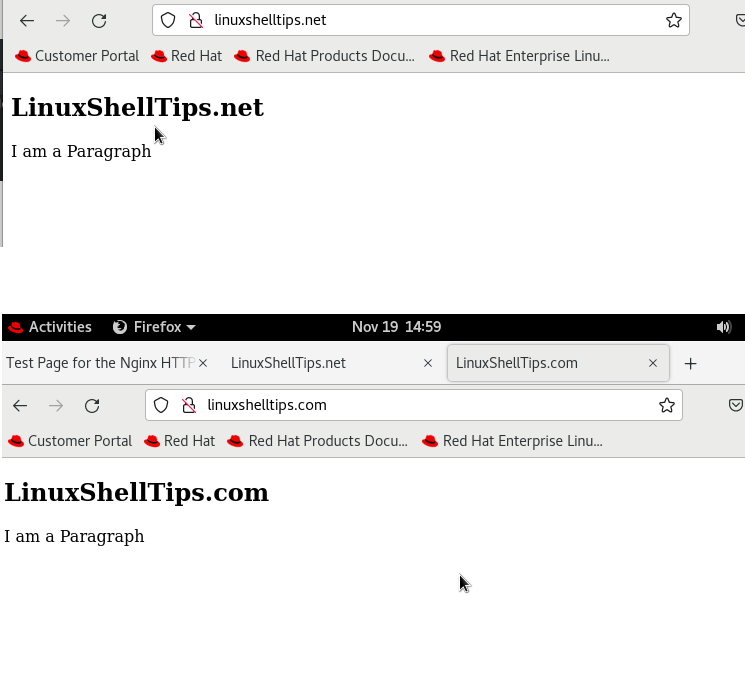
With the Nginx web server up and running, we can simultaneously access these two domains from our browser and then note what happens.
http://ubuntumint.com
http://linuxshelltips.net

Secure Nginx with Let’s Encrypt on RHEL 8
To secure websites hosted on Nginx with HTTPS, you need to install the Certbot tool which will offer you a free Let’s Encrypt SSL certificate.
$ sudo dnf install epel-release
$ sudo dnf install certbot python3-certbot-nginx mod_ssl
Once Certbot is installed, you can run the following command to get your free SSL certificates for your domains.
$ sudo certbot --nginx -d ubuntumint.com
$ sudo certbot --nginx -d linuxshelltips.net
The acquired certificates will be reachable within a subdirectory named after your domain in the /etc/letsencrypt/live directory.
Now that your certificates are installed, you can verify your domain SSL certificate status at the following URL.
https://www.ssllabs.com/ssltest/analyze.html?d=ubuntumint.com
https://www.ssllabs.com/ssltest/analyze.html?d=linuxshelltips.net
Nginx web server gives you the flexibility of dealing with more than one domain name through its server block configuration setup. It is one tool that will take you through the Ins and Outs of web server administration in an effortless manner.

FYI,
python3-certbot-apache needs to be python3-certbot-nginx.
@John,
Thanks, updated the command in the article…