Nginx is an open-source web server that, apart from being a web server, can also serve as a load balancer, reverse proxy, and HTTP cache. It provides a wealth of features and modules that make it better than its counterpart, Apache.
In this article, we will walk you through the installation of the Nginx web server on Alpine Linux.
Install Nginx Webserver in Alpine Linux
The first step is to update the repository indexes. To do so, proceed and run the following apk command.
# apk update
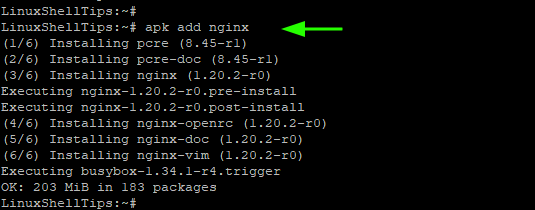
With repositories up to date, install Nginx as shown.
# apk add nginx
The command installs Nginx and associated Nginx packages as listed in the output below.

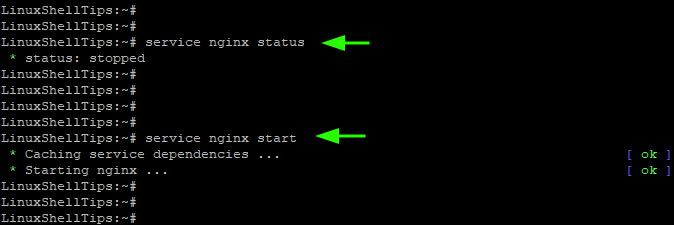
By default, Nginx does not start automatically when installed and you can confirm this using the command:
# service nginx status
To start Nginx, run the command:
# service nginx start

As mentioned, you can check if Nginx is running as shown.
# service nginx status

* status: started
From the output, Nginx has already started.
You can further run the netstat command to confirm that Nginx is listening on port 80.
# netstat -tulpn | grep :80

Configure Nginx Server Block to Host Website
So far, Nginx has successfully been installed. However, if you wish to host multiple domains or websites, you need to configure an Nginx server block.
Server blocks allow you to host multiple sites on a single server, which is particularly convenient if you are working on a tight budget.
For this to work, ensure that you have a registered domain that is pointed to the public IP address of your Alpine instance. For demonstration, we will use the domain name, mytestsite.com.
The first step is to create the website directory in which the website documents will reside. We will create it in the document root /var/www/ directory as follows.
# mkdir -p /var/www/mytestsite.com/html
Inside the website directory, we will create a sample index.html file for testing purposes.
# nano /var/www/mytestsite.com/html/index.html
Copy and paste the code block shown.
<!DOCTYPE html>
<html lang="en">
  <head>
    <title>Server block</title>
  </head>
  <body>
    <h1>Success! The Nginx server block is running!</h1>
  </body>
</html>
Save and exit.
To steer clear of getting permission errors, we will set the ownership of the document root to the nginx user as shown.
# chown -R nginx: /var/www/mytestsite.com
The next step is to create a server block. For modern Alpine Linux releases, the default Nginx server block configuration file is located in the /etc/nginx/http.d/ directory. This is the default.conf configuration file and you can verify this using the command
# ls /etc/nginx/http.d/

Now, we will create our own server block file “www.mytestsite.com.conf” as follows.
# nano /etc/nginx/http.d/www.mytestsite.com.conf
Add the following server block configuration to it.
server {
    listen 80;
    listen [::]:80;

    root /var/www/mytestsite.com/html;

    index index.html;

    server_name mytestsite.com www.mytestsite.com;

    access_log /var/log/nginx/mytestsite.com.access.log;
    error_log /var/log/nginx/mytestsite.com.error.log;

    location / {
        try_files $uri $uri/ =404;
    }
}
Save the changes and exit.
To verify that the configurations are okay and without any errors, run the command:
# nginx -t
If everything went well, you should get what we have here.

To apply or enforce all the changes, restart Nginx:
$ sudo service nginx restart
Now head back to your browser and browse your domain name:
http://mytestsite.com

And this wraps up our guide. We have installed Nginx on Alpine Linux and went further and configure a Server block.

Hi,
To apply or enforce all the changes, restart Nginx:
Should probably be: