The list of web servers available to the Linux community has made their associated knowledge more dynamic and transparent. The open-source nature of these web servers makes it easy for Linux users to exploit the performance height of each one of them.
However, when it comes to picking a web server, we also have to consider other important factors like minimal memory usage and effective CPU-load management. One such open-source and performant web server that meets this profile description is Lighttpd.
Lighttpd is attributed with an advanced feature set like URL-Rewriting, Auth, SCGI, FastCGI, and Output Compression. In this article guide, we are going to work on the installation and configuration of the Lighttpd web server on your RHEL 8 operating system.
Firstly, ensure that you are a root user or have Sudo user privileges on the RHEL 8 system you are using.
Installing Lighttpd in RHEL 8
Ensure that your RHEL 8 operating system is up-to-date.
$ sudo dnf update
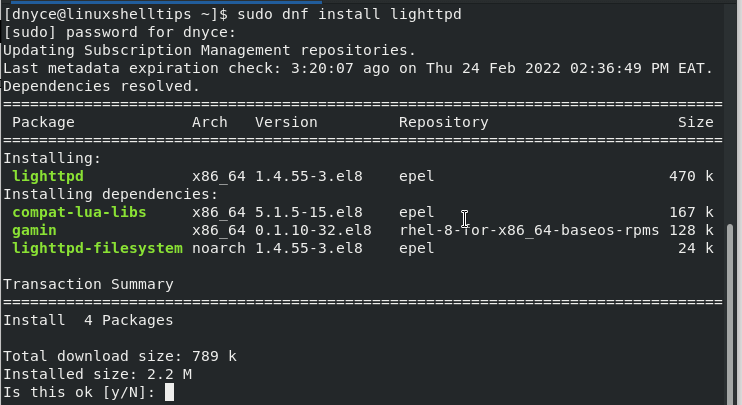
Now that your RHEL 8 system is up-to-date, we can proceed to download and install Lighttpd via the dnf package manager.
$ sudo dnf install lighttpd

After its successful installation, you can start, enable, and check the status of the Lighttpd web server with the following command sequences.
$ sudo systemctl start lighttpd
$ sudo systemctl enable lighttpd
$ sudo systemctl status lighttpd
With Lighttpd up and running, we should be able to access its default landing page from a web browser.
http://localhost
OR
http://server-ip-address

Hosting a Single Website with Lighttpd
First, make the /var/www/lighttpd directory readable, as your website pages will reside inside this directory.
$ sudo chmod -R 755 /var/www/lighttpd

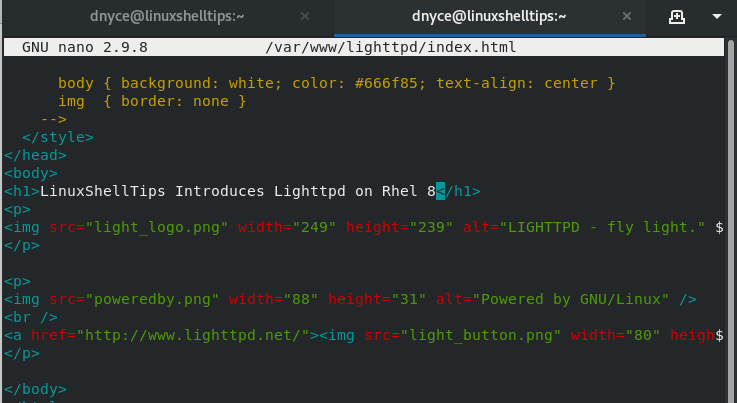
For example, we could edit the index.html page and view the reflected changes on a web browser.
$ sudo nano /var/www/lighttpd/index.html

The resulting web view will look like the following:

Hosting Multiple Websites Via Virtual Host in Lighttpd
You will need to create your website directories inside the /var/www directory. For instance:
$ sudo mkdir /var/www/linuxshelltips.lan.network
Make this directory writable:
$ sudo chmod -R 755 /var/www/linuxshelltips.lan.network
Create your sample webpage inside this directory:
$ sudo nano /var/www/linuxshelltips.lan.network/index.html

Create a Virtual Host configuration file for this website:
$ sudo nano /var/www/linuxshelltips.lan.network.conf
Since this section assumes you will be implementing several virtual host configurations for different websites, we should move the above configuration file to the /etc/lighttpd/vhosts.d directory:
$ sudo mv /var/www/linuxshelltips.lan.network.conf /etc/lighttpd/vhosts.d/
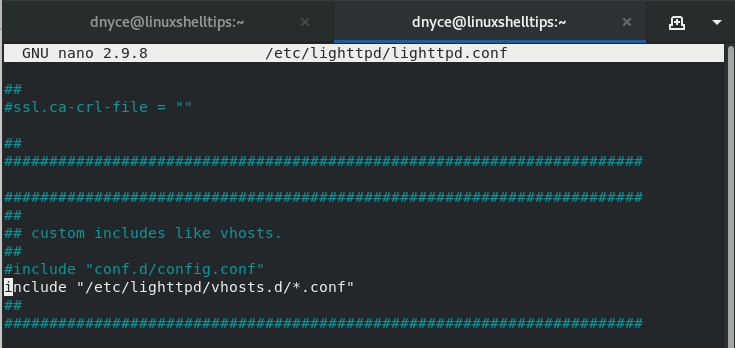
We now need to again open the Lighttpd web server’s main configuration file and include the path to the above-created configuration file inside it.
$ sudo nano /etc/lighttpd/lighttpd.conf
Scroll to the bottom of this file and uncomment the below-highlighted line.

The above-uncommented line implies that all future virtual host configuration files created inside /etc/lighttpd/vhosts.d directories are automatically recognized from the above Lighttpd main configuration file without the need of including them individually whenever you host a new site.
Save and close the Lighttpd configuration file, restart Lighttpd.
$ sudo systemctl restart lighttpd
and try accessing your new site from a web browser via its domain name.
http://your-domain.com
The web-view should look like the following:

You can mock the above-discussed virtual host configuration steps for other sites you wish to host.
With this tutorial guide, you are free to experience the lightweight nature, performance, and applicability of the Lighttpd web server in hosting and serving both single and multiple websites.
