Server management does not have to feel like rocket science thanks to Cockpit’s contributive footprints. This server management software makes it flexibly easy for anyone to manage their Linux servers either locally or remotely.
Through a web browser interface, Cockpit yields real-time information regarding your server machine status. Such system information includes but is not limited to system running processes, networking, system storage, applications, file system statistics, and CPU load.
Cockpit also gives you superuser control like remote shutdown or remote reboot of your server machine. Moreover, Cockpit only gains control of your server resources once you are signed in to its web interface and begin interacting with its web-based control panel.
Installing Cockpit Server Management in Rocky Linux
Before you install and use Cockpit to manage your local or remote Linux server, make sure you upgraded to the latest Rocky Linux distribution. Also, make sure you have root user privileges or you are a Sudoer user on the Rocky Linux system you are using.
First, run a system update on your Rocky Linux system to make sure all the latest performance dependencies are met.
$ sudo dnf update
Since Rocky Linux is an RHEL-based distribution, we might need to reference extra software packages hosted by the EPEL repository. Run the following command to confirm the installation of the EPEL repository on your Rocky Linux system.
$ sudo dnf install epel-release
Now that your Rocky Linux system is up-to-date and the EPEL repository is enabled, it’s time to retrieve and install the Cockpit server manager software.
$ sudo dnf install cockpit

If you are using the latest Rocky Linux distribution, Cockpit should already be pre-installed on your system.
Next, start Cockpit by executing the following command.
$ sudo systemctl start cockpit
The above command only starts Cockpit. However, when the Rocky Linux system server shuts down or restarts, we will have to execute the above command every time we want to use Cockpit.
To bypass this obstacle, we should enable Cockpit so that it keeps running even after the server system shuts down or restarts.
$ sudo systemctl enable cockpit.socket
Now check on Cockpit status to make sure it is up and running as expected.
$ sudo systemctl status cockpit
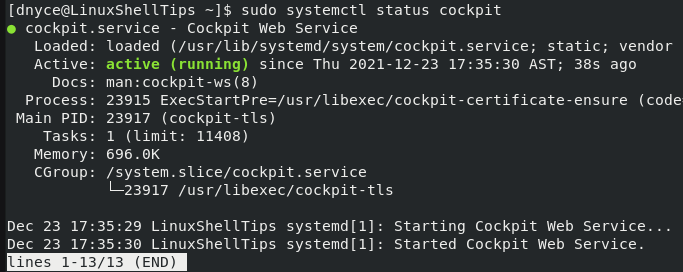
Next, you need to open Cockpit‘s default HTTP port 9090 on your system Firewall.
$ sudo firewall-cmd --permanent --zone=public --add-service=cockpit
$ sudo firewall-cmd --reload
Accessing and Using Cockpit Server Management Tool
Since Cockpit is web-based, it is by default associated with port 9090. Therefore, if you were to access Cockpit from your web browser for any use case, you first need to identify the IP address of your active server.
$ ifconfig
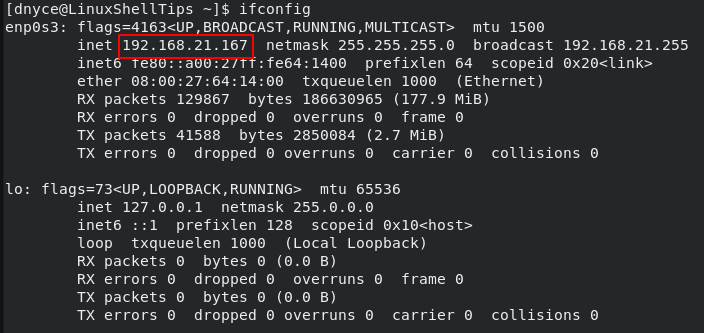
Based on the above screen capture output, let us attempt first-time access to Cockpit.
http://192.168.21.167:9090
You will be met with the following warning page on your web browser.
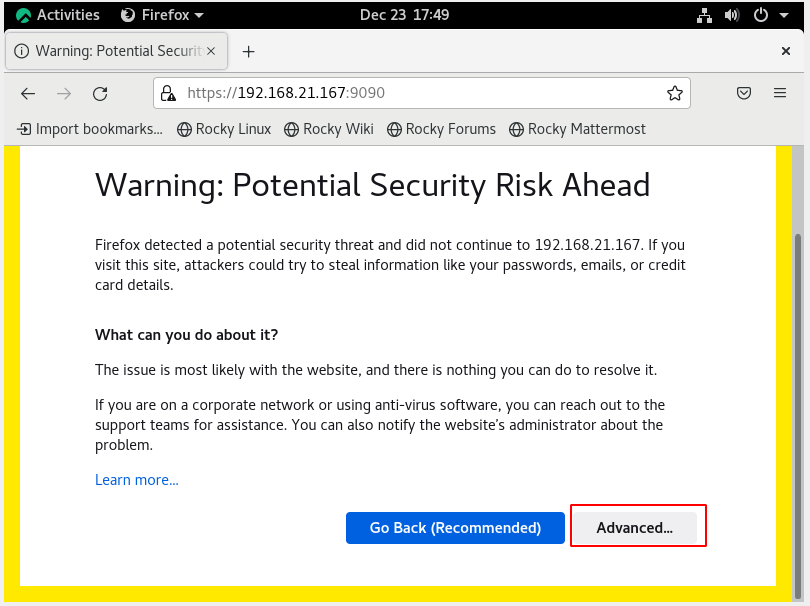
Click on the Advanced tab and scroll down to the next web interface that will appear.
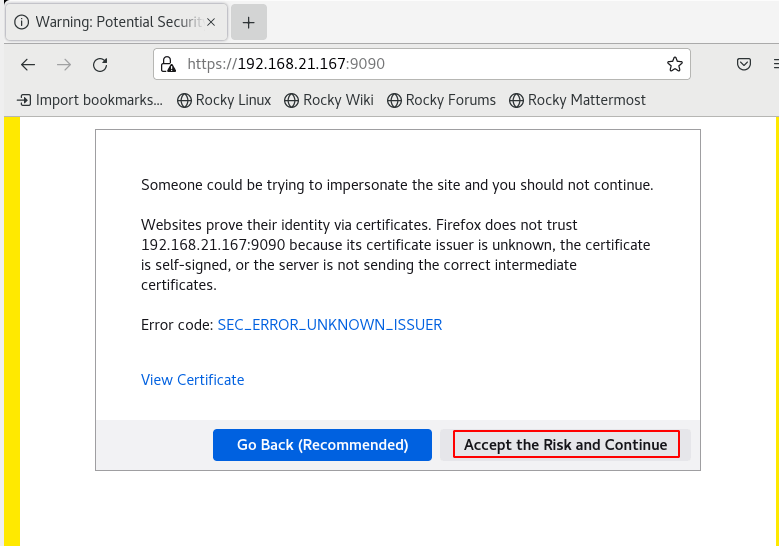
Click on Accept the Risk and Continue tab. You will be redirected to a Login interface similar to the following.
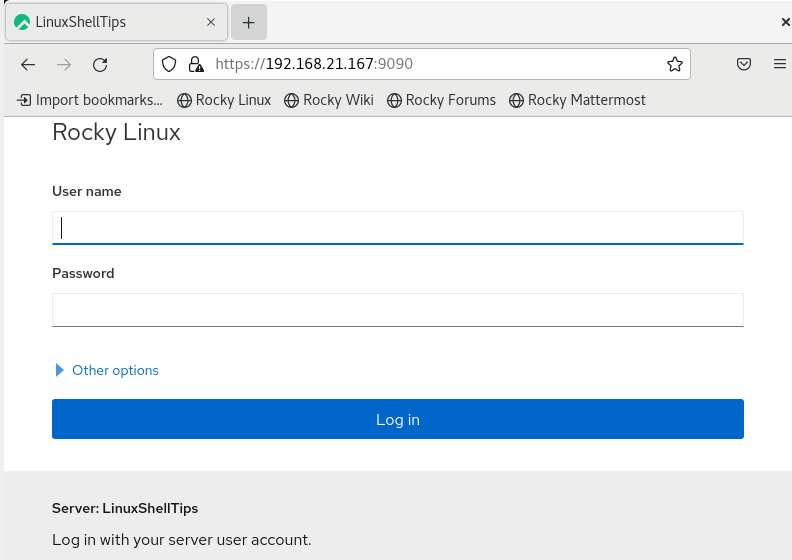
Use your Rocky Linux server username and password credential to gain access.
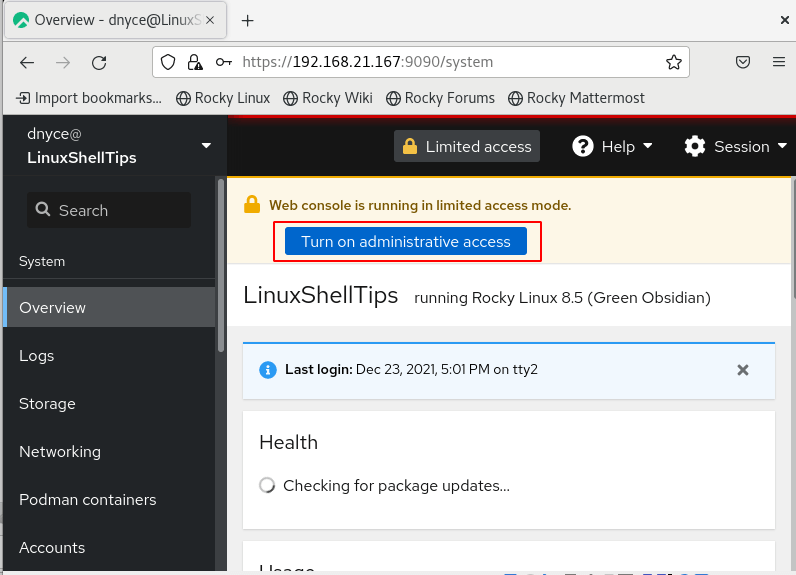
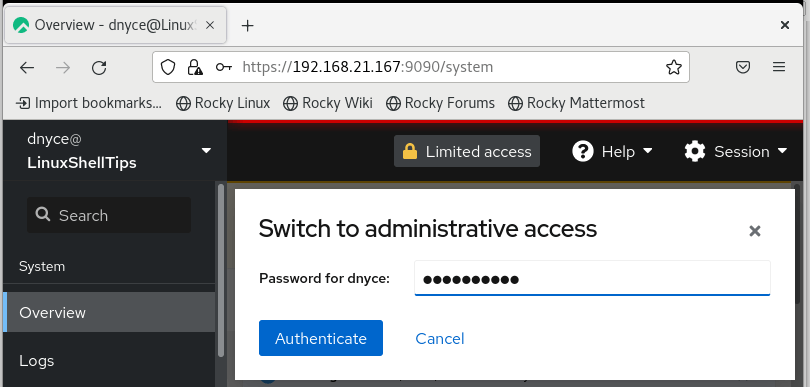
Click on the Turn on Administrative access tab and enter your root password to authenticate your access…
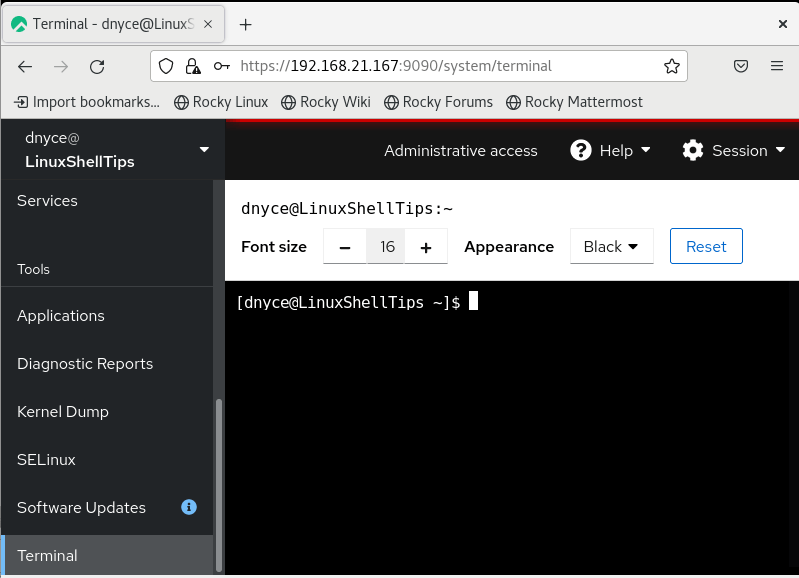
You now have full admin access to Cockpit. From here, you can check and manage system logs, storage, networking, accounts, and services on an easy-to-use interface. Cockpit also provides a usable command-line interface similar to the one on your OS.
Cockpit makes server administration seem like a walk in the park. With this article guide, you should be able to explore the full depth of server administration thanks to Cockpit’s explorable web-based graphical user interface.
