Maintaining accurate time and date settings is critical for systems to run their applications, shell scripts, cron jobs, and any other tasks in a timely fashion. Network Time Protocol (NTP) is a protocol that servers use to synchronize their time with a pool of online servers to maintain accurate time and date.
Chrony daemon (chronyd) has since replaced the default NTP daemon (ntpd) and can be configured to provide accurate time and date.
And just like ntpd, the chronyd can be configured as a client or server. Typical accuracy between systems synchronized over the Internet is within a few milliseconds; and on a LAN, the accuracy is in tens of microseconds.
In this guide, we will walk you through how to install Chrony NTP to synchronize time in AlmaLinux 8/9.
Step 1: Set Timezone in AlmaLinux
To get off the ground, update the system packages and repositories as shown.
$ sudo dnf update
If you are planning to configure your server as an NTP server from which other client systems will synchronize their time, it’s imperative that set the correct time and date settings.
To verify the system’s current time and date settings including the timezone, run the following command.
$ timedatectl
The command displays critical information such as local time, UTC time, RTC time, and time zone as shown below.

Timezones are stored in the /usr/share/zoneinfo directory. To set your system to the correct time zone, for example, Europe/Paris, run the command:
$ sudo timedatectl set-timezone Europe/Paris
In addition, you can verify your current timezone by viewing the /etc/localtime file as follows.
$ ls -l /etc/localtime

Step 2: Install Chrony NTP Server on AlmaLinux
Having verified that the time and date settings on your server are accurate, proceed and install Chrony as follows.
$ sudo dnf install chrony -y
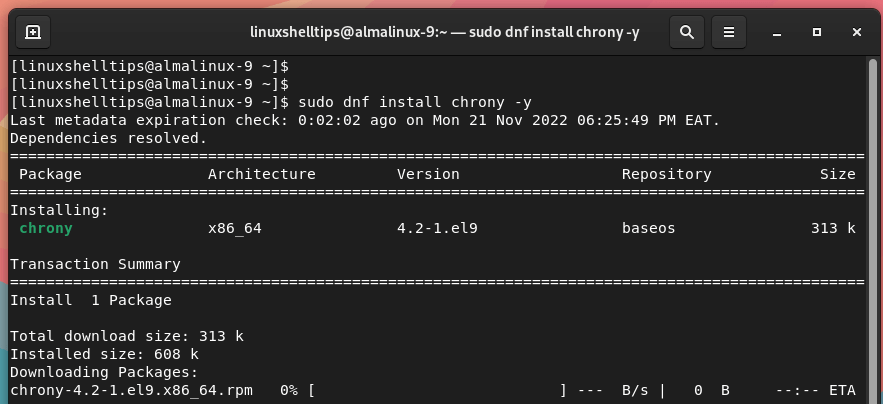
Once the installation is complete, start and enable the Chronyd service to start on system startup.
$ sudo systemctl start chronyd
$ sudo systemctl enable chronyd
Be sure to confirm that the Chrony daemon is running as follows.
$ sudo systemctl status chronyd
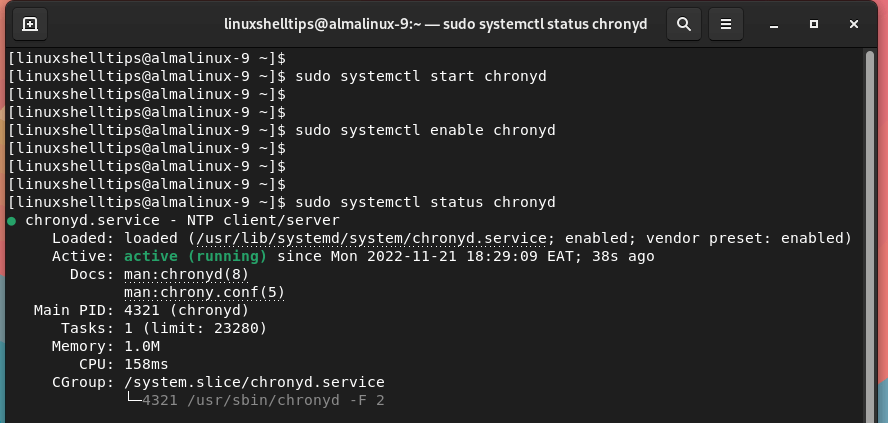
Step 3: Configure Chrony NTP on AlmaLinux
After the successful installation of Chrony, the next step is to make a few changes to its default configuration file which is the /etc/chrony.conf file. The file contains NTP settings including NTP pools.
It’s in this file that you define your preferred NTP pools. In my case, I will use the NTP pools closest to my country (Kenya) and timezone (EAT) using kenya ntp pool.
To find a list of NTP pools closest to your region, visit the NTP homepage and select your preferred region.
In my case, I used the following NTP pools.
server 3.ke.pool.ntp.org
server 3.africa.pool.ntp.org
server 1.africa.pool.ntp.org
Access the configuration file.
$ sudo vim /etc/chrony.conf
Next, comment out the first NTP pool and add your preferred list of NTP pools as shown.

Save the changes and exit the configuration file.
Next, enable NTP synchronization.
$ sudo timedatectl set-ntp true
Then restart the Chrony daemon to apply the changes.
$ sudo systemctl restart chronyd
Next, run the following command to track how the chronyd daemon is tracking:
$ chronyc tracking
This displays statistics about system time and offsets as provided below.
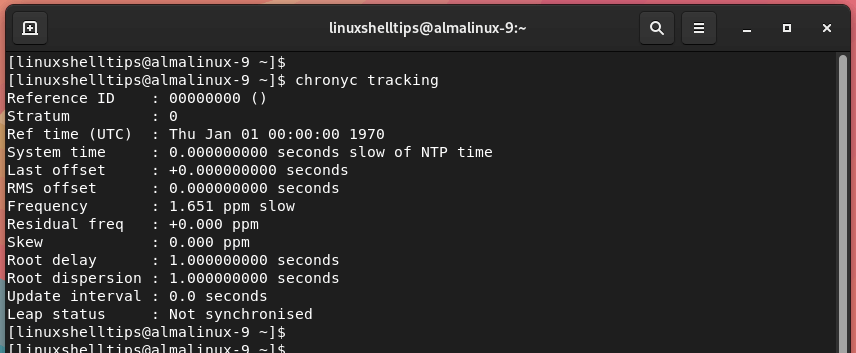
Step 4: Allow NTP Client to Synchronize Time with Chrony Server
For clients to synchronize time and date with the server, you need to go an extra step and allow the client access to the configuration file.
So, head back to the configuration file.
$ sudo vim /etc/chrony.conf
Add the following line to specify your network subnet. In my case, the subnet is 192.168.2.0/24, and make sure that all your clients are in the same subnet.
allow 192.168.2.0/24

Save the changes and exit the configuration file.
Be sure to confirm the online NTP servers that the Chronyd daemon is using for time synchronization.
$ chronyc sources

For more verbose or detailed output pass the -v flag as shown.
$ chronyc sources -v
If you have a firewall installed and enabled, consider allowing NTP traffic.
$ sudo firewall-cmd --add-service=ntp --permanent
$ sudo firewall-cmd --reload
Step 5: Configure NTP Client Side Configuration
The last section requires us to configure a client that will synchronize time and date settings from the NTP server. As before, ensure that the client is in the same timezone as the NTP server. In this case, Africa/Nairobi according to your setup.
You can manually set the timezone as follows.
$ sudo timedatectl set-timezone Africa/Nairobi
Be sure to replace Africa/Nairobi with your time zone.
Thereafter, install Chrony as follows.
$ sudo dnf install chrony
Once installed, start and enable the Chrony daemon.
$ sudo systemctl start chronyd
$ sudo systemctl enable chronyd
Next, we need to configure the client to sync date and time settings from the NTP server. As such, modify the configuration file:
$ sudo vim /etc/chrony.conf
Comment out the pool address and append the line below. The IP address should correspond to the IP of the NTP chrony server.
server 192.168.2.103
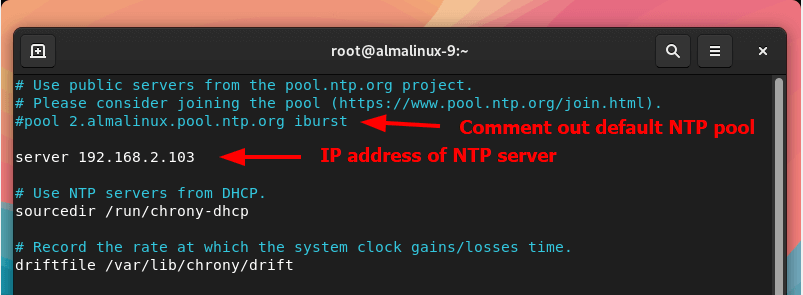
Save the changes and exit the configuration file.
Next, start the NTP synchronization
$ sudo timedatectl set-ntp true
Then restart the Chrony daemon to effect the changes.
$ sudo systemctl restart chronyd
Once done, verify the time synchronization as follows.
$ sudo chronyc sources
From the output below, we can see that the client is obtaining the time and date settings from the AlmaLinux NTP server.

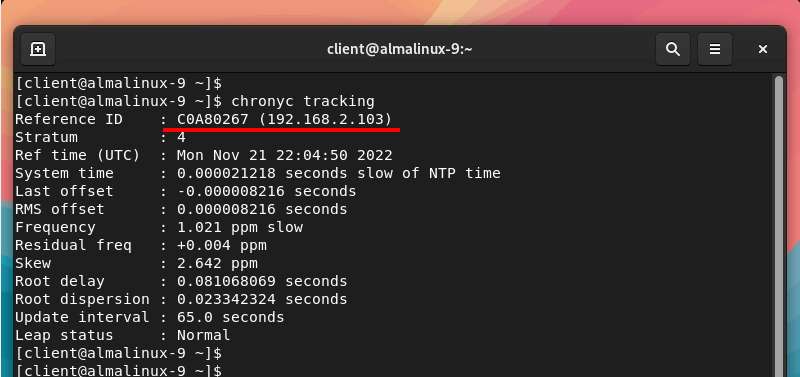
To confirm Chrony tracking run the command:
$ chronyc tracking
Back at the server, you can verify the NTP clients. You should see your NTP client listed as indicated below.
$ sudo chronyc clients

Chrony is a powerful time synchronization tool that is an implementation of the NTP protocol. In this guide, we installed the Chrony NTP server on AlmaLinux and configured a client system to synchronize time using the NTP server.
That is all for this guide. Your feedback is much welcome.
