In the previous article, we have seen how to install Virtualbox in different flavors of Linux. Now it’s time to choose and install a Guest OS. You can check the official page to check the list of supported Guest OS. I choose CentOS 7 with a Minimal install you can choose whatever OS you prefer.
Note: The support for CentOS 7 remains unchanged, which means updates and security patches will be available until June 30, 2024. Whereas CentOS 8 support will end at the end of 2021.
Download CentOS 7 Linux
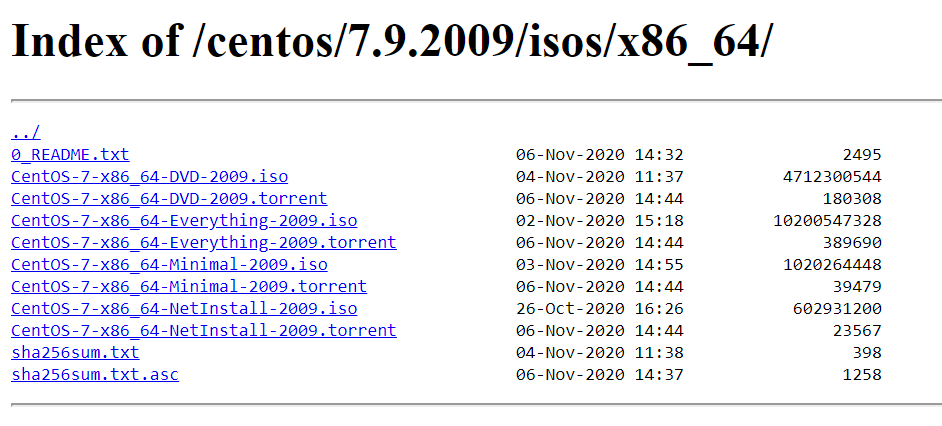
First, we have to download the CentOS 7.9 iso file from the official site. There are different options to download. I choose to download the Minimal version via torrent.
Create New CentOS 7 Virtual Machine
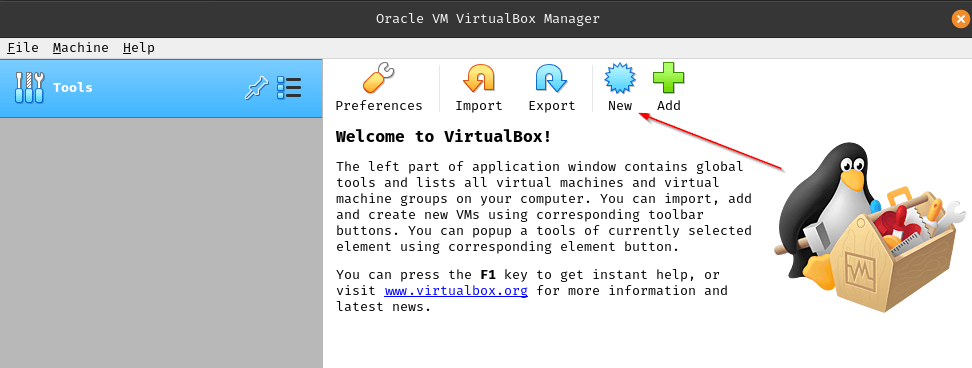
Once the iso file is downloaded you can start building the Guest OS. Open Virtualbox and press “New” icon or press “CTRL+N”.
The first step is to configure the hardware profile for your CentOS Guest OS. You will configure disk space, Number of Ram, CPU Cores, etc.. at this stage.
There are two modes you can use.
- Guided Mode (Default)
- Expert Mode
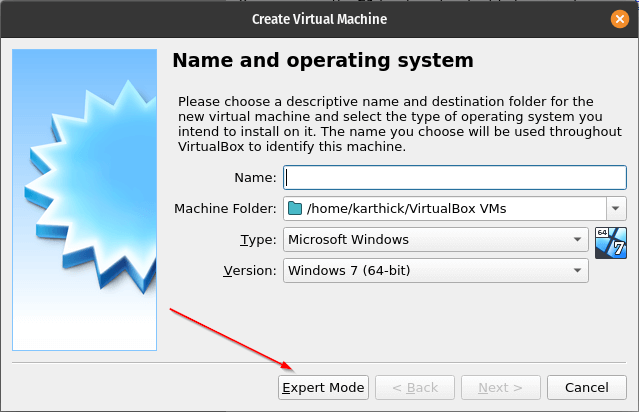
The difference between both these modes are, Guided Mode will show each configuration item in a different window while expert mode will show it in a single window. To use the expert mode you have to choose “Expert Mode” as shown in the below image.
Expert Mode Virtual Machine Setup
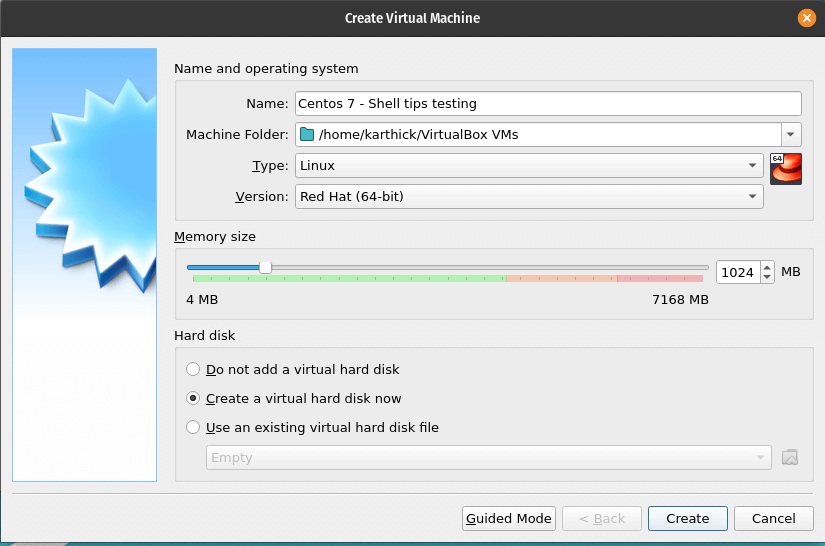
This is where you will decide which Guest OS flavor (Windows, Linux, BSD, macOS) you choose to install, what will be the RAM size and how to create/attach the hard disk file.
- Name – Name for your Guest VM.
- Machine Folder – Location where your VM files will be placed.
- Type – Type of operating system(Linux, Windows, BSD).
- Version – Different versions like Redhat Linux, Ubuntu Linux, Windows Server, etc.
- RAM – You can control RAM allocation for your VM using the slider or just enter a value in the Value tab.
- Hard Disk – Create a new virtual hard disk for your VM. Virtualbox gives you the flexibility to either create a new disk or use an existing disk that is already created.
In this step you will decide what will be the size of your Virtual Hard Disk (.vdi file) and file type and allocation method.
- Hard Disk Types – Virtualbox supports different Hard disk file types, you should know which one should be used.
- VDI (Virtual Box Disk Image) – VDI is the native format for VirtualBox and other virtualization platforms don’t support this format. But you have tools (qeny-img) to convert VDI to other formats easily.
- VHD (Virtual Hard Disk) – This is the native format of Microsoft Virtual PC.
- VMDK (Virtual Machine Disk) – This is the native format for VMware. The advantage with this format is if you use both Virtualbox and VMware parallelly you can choose this format.
There are other 3 formats HDD, QCOW, QED which you should not worry about at this stage since using these formats are very rare.
- File Location – Location where your Disk file will be created.
- File Size – Set size for your disk file.
- Allocation Type – You can set if your disk file should be of fixed size or dynamically allocated. Always choose dynamic allocation. The advantage of dynamic allocation is it will not occupy the entire allocated space. It will allocate a minimum size of 2MB as shown in the below image and will continue to grow till the maximum allotted file size which is 25 GB in this case.

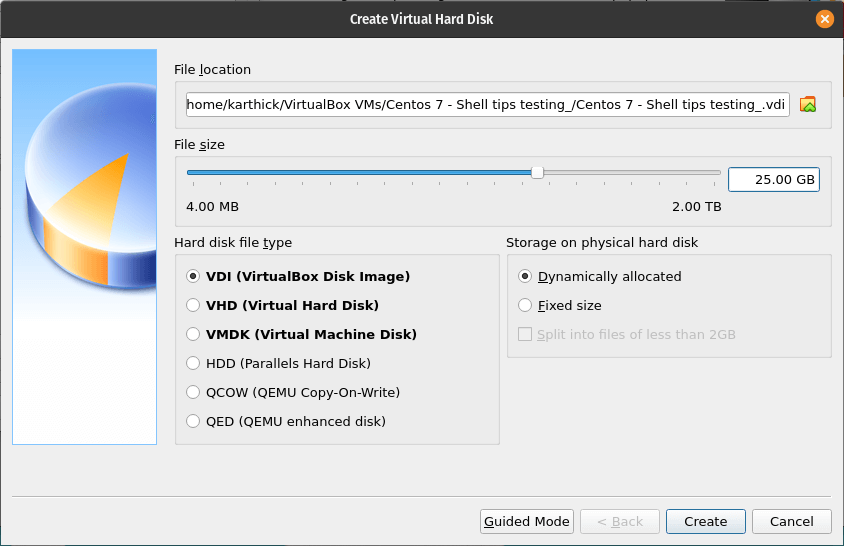
Once you have configured all the parameters press the “Create” button and your VM hardware profile will be created.
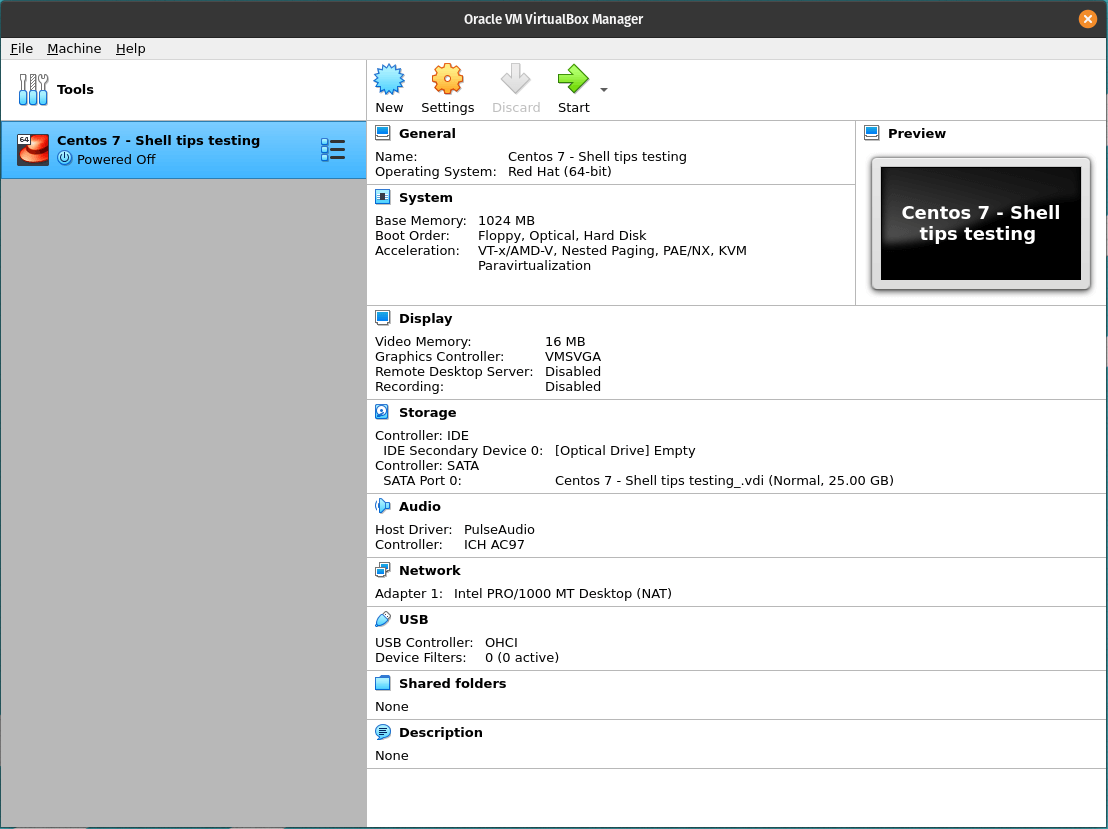
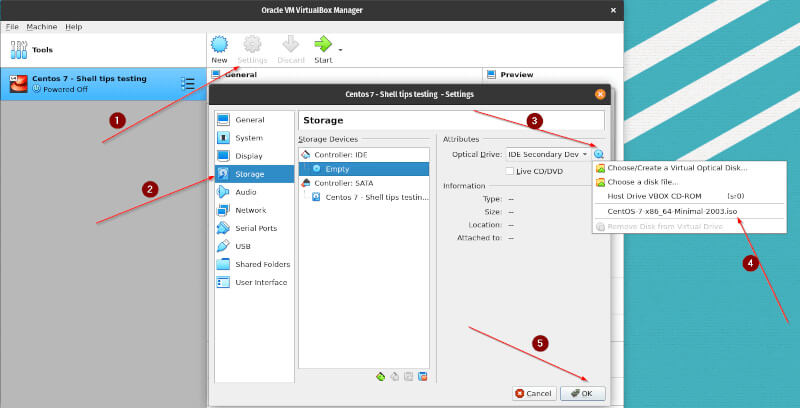
Now you have to map the downloaded centos 7 iso file with the created VM so once the machine gets booted it will pick the iso file for installation of the OS. Follow the procedure as shown in the below image to attach the iso file.
NOTE: Whatever steps are shown till now will be the same irrespective of the type of Guest Operating system you choose to install.
Now press the “Start” icon to start the VM.

Install CentOS 7 on VirtuaBox VM
1. Choose “Install Centos 7” to start the installation.
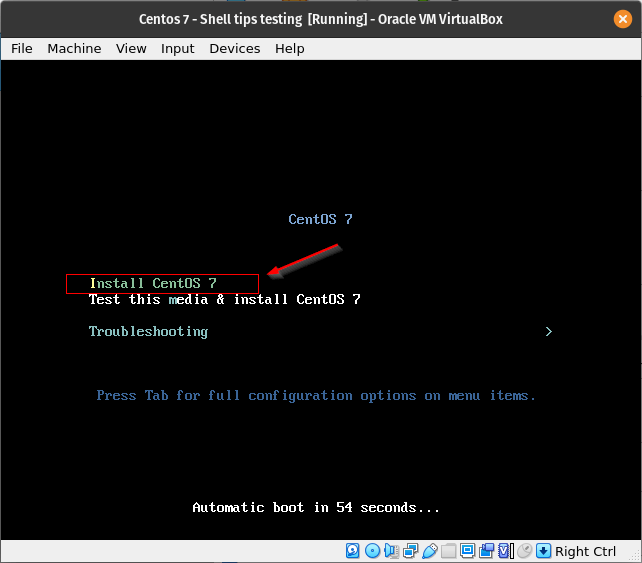
2. Choose Language and press continue.
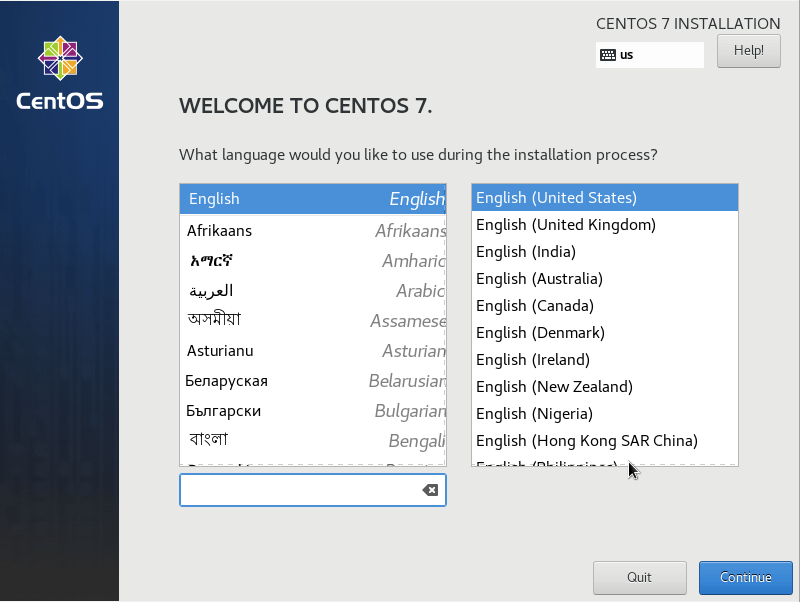
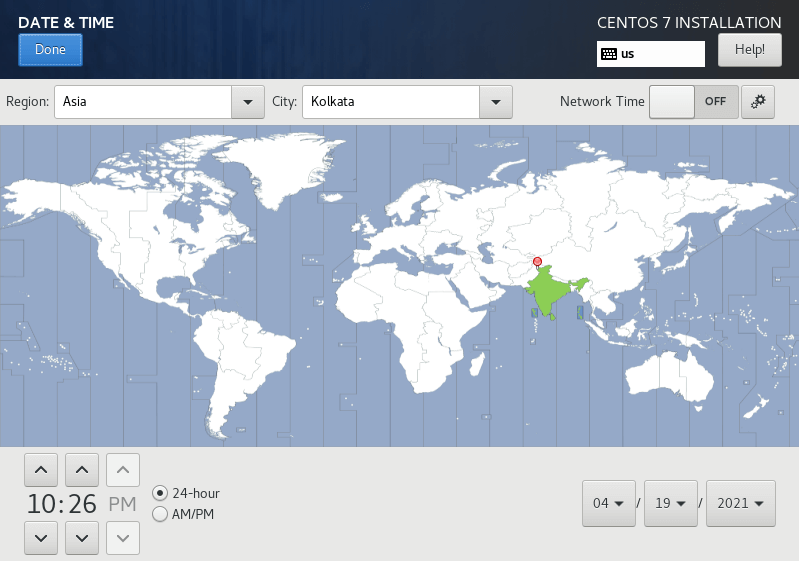
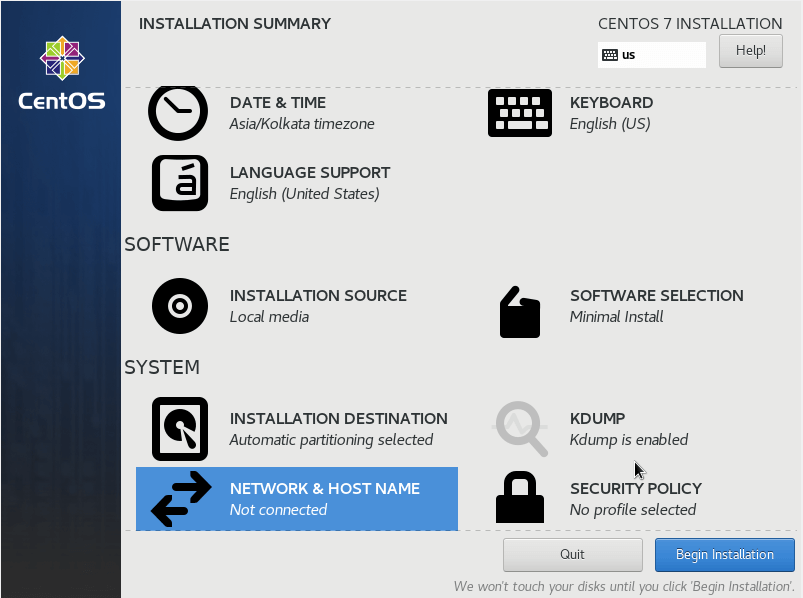
3. This is where you will choose to configure important parameters related to your OS. First set Date and Time zone. You can configure NTPD and opt to use Network time.
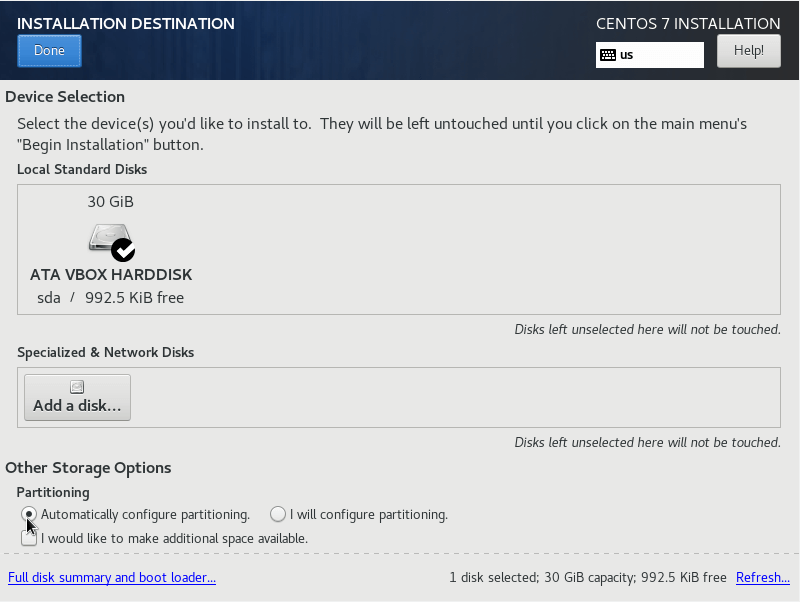
4. An important step for any OS installation is how you partition your Hard disk. You can partition your disk under “Installation Destination”. I am not partitioning my disk since this is a test machine that will be destroyed once the demonstration is completed. So select “automatically configure partitioning”.
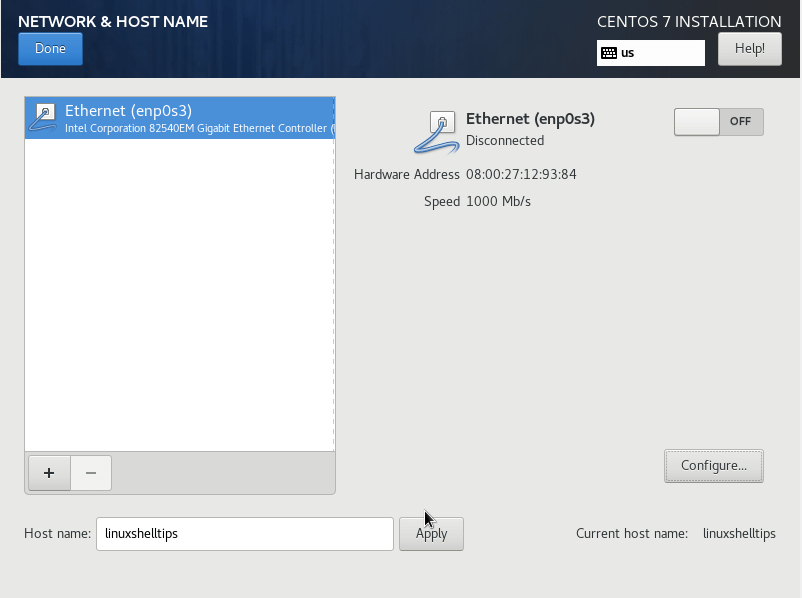
5. You can configure your network and hostname under the “Network and Hostname” section.
6. Once all the configuration has been set, you can press “Begin Installation”.
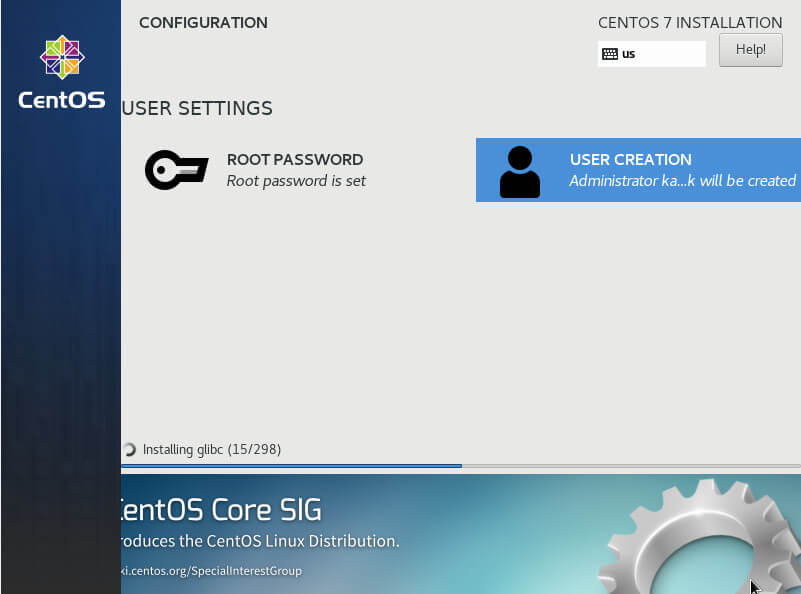
7. Your installation will be started and in the next step, you have to set a password for the root user. You can also create additional users too.
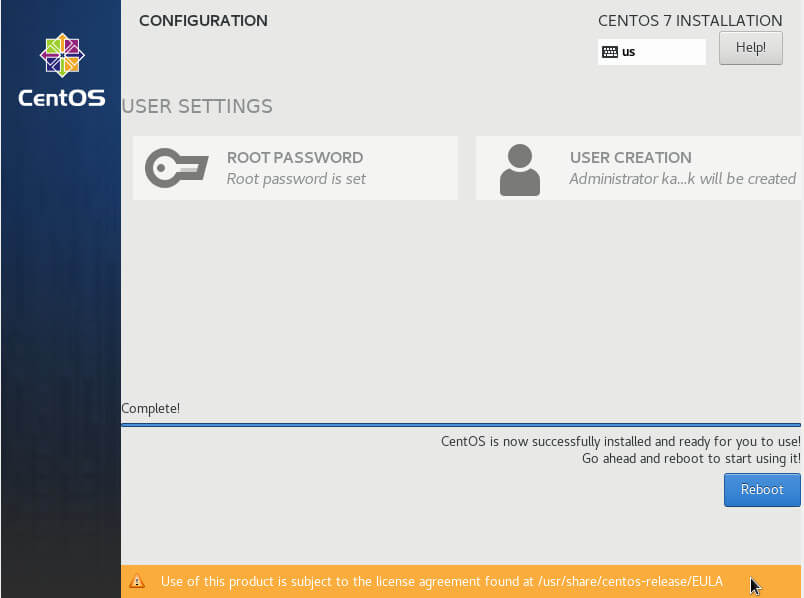
8. Reboot the machine once the installation is completed and you have successfully installed your first Guest OS on VirtualBox.
You are not done yet. There are few more packages you need to install to enable important features of VirtualBox which we will see in the next article.

Please describe the installation source and how to get local media?