In today’s interconnected world, secure remote access to servers is essential for efficient management and administration. A key tool for managing remote servers is Secure Shell (SSH).
SSH protocol enables users to safely connect and administer their Ubuntu workstations. Not only Ubuntu Servers or workstations you can remotely connect to any computer or server which has SSH enabled.
This page acts as a thorough instruction manual for setting up SSH on Ubuntu. These detailed instructions will enable you to effectively connect to and administer your Ubuntu server from a distance.
What is SSH?
Secure Shell is known as SSH, which is a network protocol that gives users a safe means to connect to and control remote computers over a secure network.
Users can use SSH to create a secure, encrypted connection between their local computer and a remote server, allowing them to safely run commands, transfer data, and carry out different administrative duties.
Simply put, you can access and manage resources on the remote computer by using the terminal on your current computer.
Install OpenSSH Server in Ubuntu
To dive into the world of SSH you will need a system with the Ubuntu operating system installed which should be fully updated.
Don’t forget you will also need a good internet connection as we are going to install new packages and connect remotely to another computer.
For me, I have Ubuntu server on my desktop and Ubuntu OS on my laptop. I will be connecting to the Ubuntu server using my Laptop.
To install the OpenSSH server in Ubuntu, you need to install openssh-server package, which enables secure remote server management on an Ubuntu computer.
First, we will update the repository cache using the following apt command.
$ sudo apt update
Next, install openssh-server by executing the following command.
$ sudo apt install openssh-server
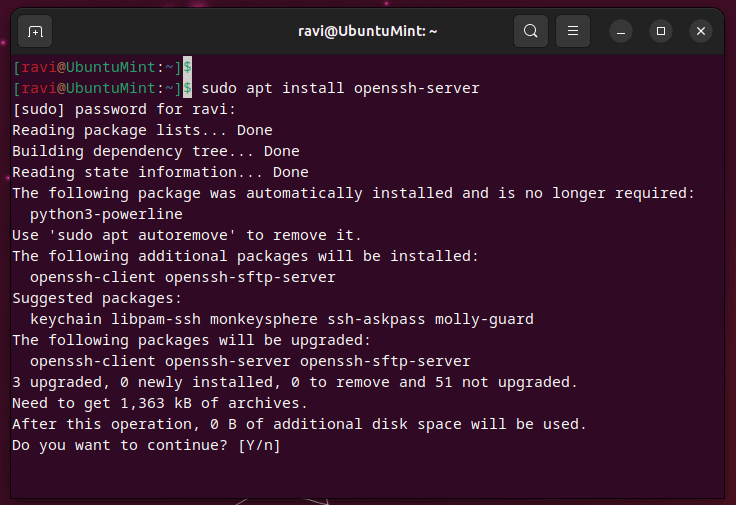
After being installed, the openssh-server package configures your Ubuntu system’s SSH server so that it may accept incoming SSH connections from distant clients.
The SSH server use techniques like encryption and authentication to shield your sensitive data from dangers to ensure that communication between the client and server is secure. It provides a solid and trustworthy method for controlling and managing your Ubuntu server from a distance.
Configuring OpenSSH Server
For the best security and customization, configuring the SSH configuration is essential to secure your SSH.
$ sudo nano /etc/ssh/sshd_config
There are a number of parameters that can be changed in the SSH configuration file to suit your needs.
- Port – To improve security, change the standard SSH port (22).
- PermitRootLogin – Whether to enable or disable root SSH login is determined by PermitRootLogin.
- PasswordAuthentication – Activate or deactivate password-based authentication.
If you want to apply a setting just uncomment the line and change its value from yes or no respectively.
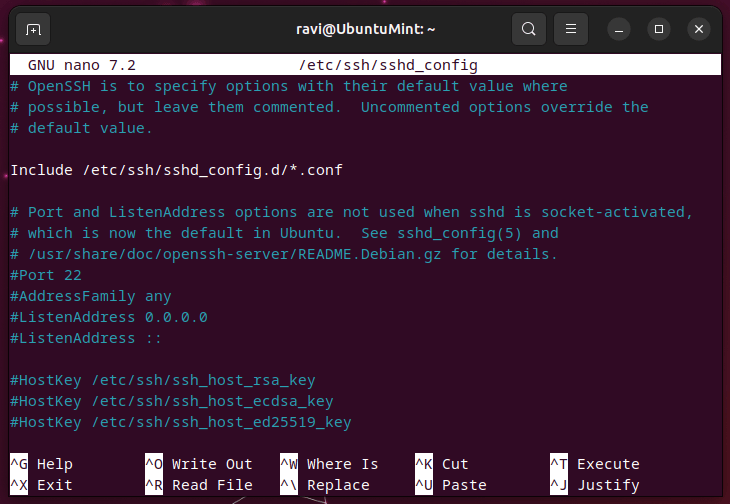
Then, hit Ctrl+O, and Enter to save the changes and close the text editor by pressing Ctrl+X.
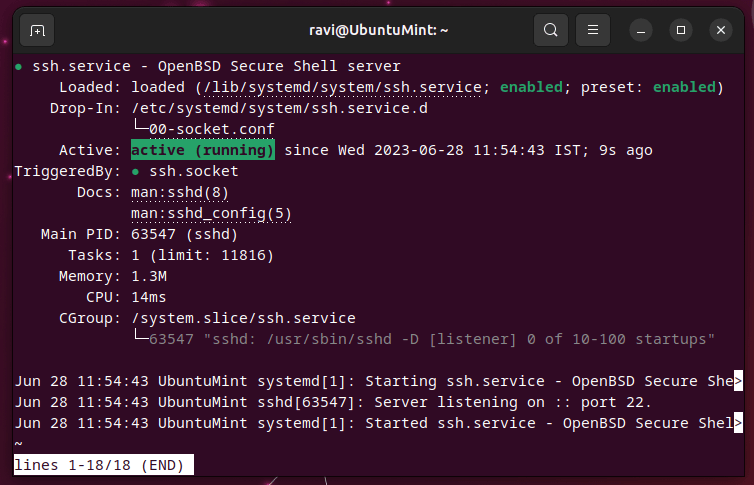
The SSH service must be restarted after the OpenSSH Server configuration is done in order for the modifications to take effect. To make sure everything is operating properly, you should check the SSH status as well.
$ sudo systemctl restart ssh
$ sudo systemctl enable ssh
$ sudo systemctl staus ssh
Install OpenSSH Client in Remote Linux
On the Client side also you will need a different ssh package such as openssh-client, which is used to establish secure encrypted connections to remote servers.
$ sudo apt install openssh-client
Now, open a terminal on a client machine and attempt to connect to your Ubuntu server using SSH. Make sure to replace ‘your_username‘ with your Ubuntu username and ‘your_server_ip‘ with the IP address of your Ubuntu machine/server:
$ ssh your_username@your_server_ip
To determine the IP address of your Ubuntu machine, you can run ip command as shown.
$ ip addr show
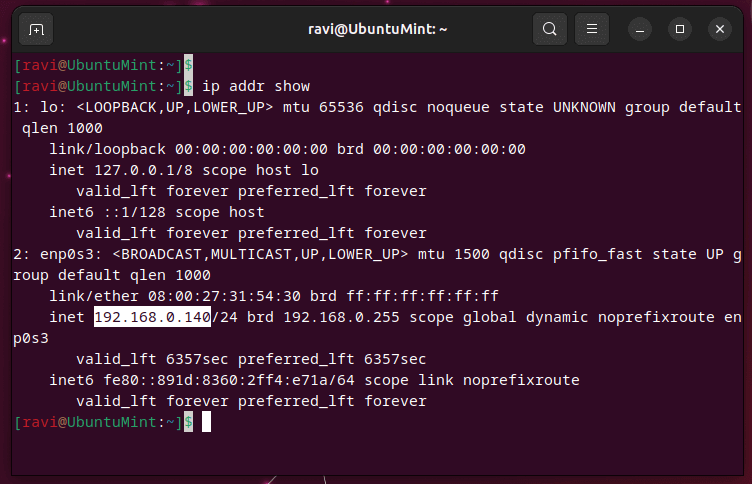
The ip command will display information about the network interfaces on your machine. Look for the line starting with “inet” or “inet6” followed by an IP address.
I will connect to my Ubuntu server using my laptop:
$ ssh [email protected]
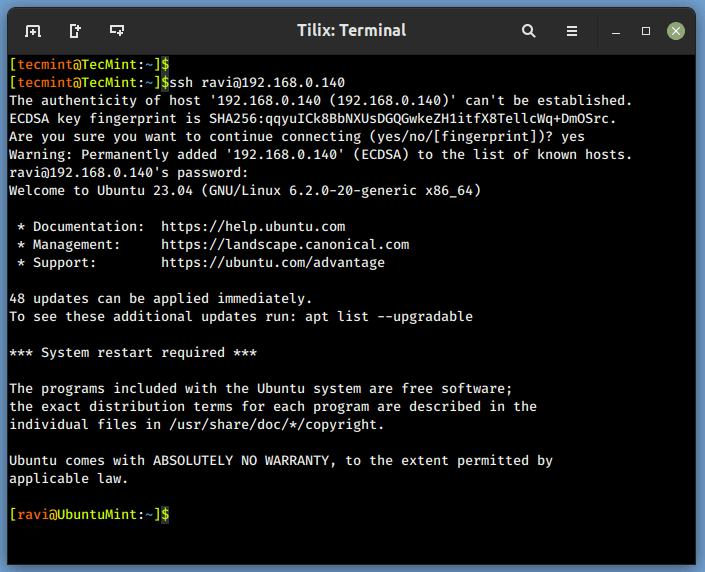
Your Ubuntu user password will need to be entered if the connection is successful. You will be able to access your Ubuntu computer remotely once you have successfully authenticated.
There you have it! Your connection to your Ubuntu server has been established successfully.
How to SSH Into Ubuntu Without a Password
Having a hard time repeatedly typing the password when connecting to your favorite machine? Me too! You can also set up a password-less login to your Ubuntu system with ssh.
1. On the client machine, open a terminal and generate an SSH key pair by running the command. Make sure to press Enter for default settings or you can specify your own values. After this, new keys will be generated.
$ ssh-keygen -t rsa -b 4096
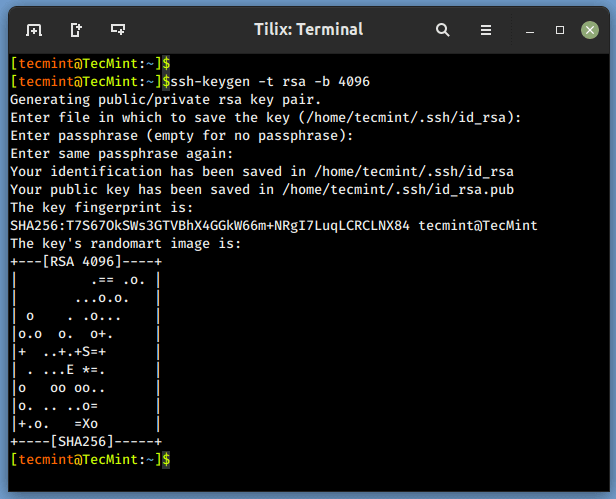
2. Now, we need to copy the public key to the remote machine using the command with the same username and ip:
$ ssh-copy-id [email protected]
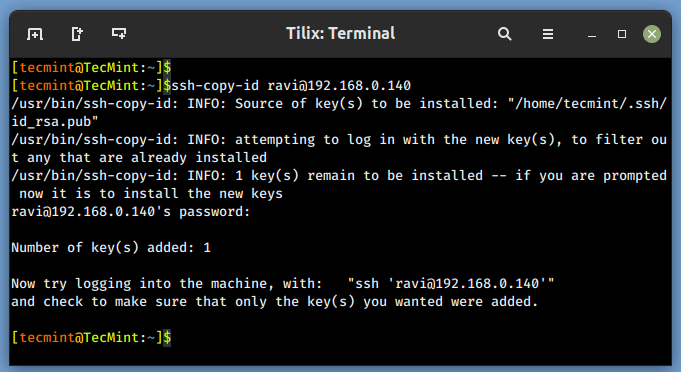
Enter the password for the last time!
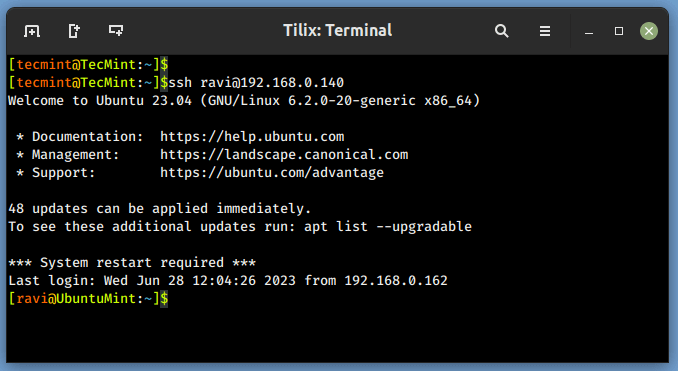
3. Now, when you again try to connect to your Ubuntu remote machine it will not prompt you for a password and you directly get logged in. This is because you are authenticated using the private key on the client machine.
$ ssh [email protected]
Conclusion
By enabling SSH on your Ubuntu machine, you unlock the power of secure remote server management. This comprehensive guide has equipped you with the knowledge to install and configure the OpenSSH Server, restart and test the SSH service, configure SSH keys for authentication, and optionally disable password-based authentication.
With these newfound skills, you can confidently and securely access and manage your Ubuntu server remotely, ensuring smooth administration and heightened security.
