When installed or running applications and/or services want to communicate (send and receive data), they need to be assigned a specific/default port. These ports facilitate multiple communication sessions within a defined network address.
When you successfully install your WordPress site on a local or server machine, you have the option of it being powered by popular web servers like Apache and Nginx.
[ You might also like: How to Block Access to wp-admin and wp-login in Nginx/Apache ]
These web servers default to the use of port 80 to perform their web serving tasks. However, port 80 is not exclusively reserved for these web servers. Other application packages like Skype, Qlik, and many web-orientated applications and services also fancy port 80 as their default port.
Why Change WordPress Port?
When too many applications depend on a specific port, its performance and speed are bound to be affected. For a website owner or administrator, you might not appreciate the performance of your site especially when the website is attracting more and more visitors on a daily basis.
Also, port conflict might be another contributing factor. Consider this scenario. You might have two different WordPress websites and wish both of them to run at the same time.
For this scenario to be possible, you will need one site to run under the Apache web server and the other to run under the Nginx web server. However, since both Apache and Nginx default to port 80, you should be able to figure out how to make one of these two web servers run under a different port.
Changing WordPress Port in Apache Web Server
You first need access to Apache’s virtual server block file associated with your WordPress site. This configuration file should look something like the following:
$ sudo nano /etc/apache2/sites-available/wordpress.conf
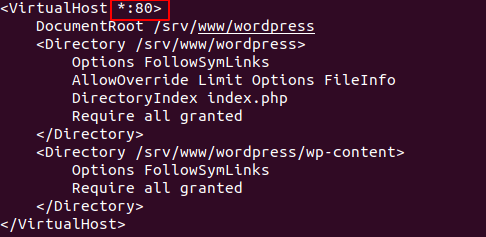
From this Apache’s virtual host configuration file associated with the WordPress site, we have identified that it is running under the highlighted port 80. Let us attempt to change this port number value to a different figure like 8000.
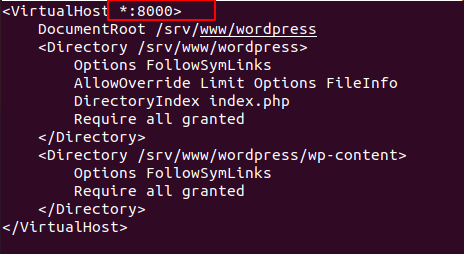
Next, for the above port to be considered by Apache, we also need to edit its ports configuration file with the same value.
$ sudo nano /etc/apache2/ports.conf
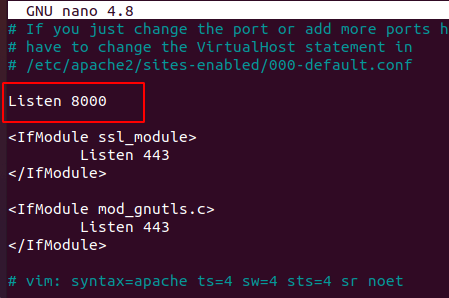
Save and close the file and then restart the Apache webserver.
$ sudo systemctl restart apache2
or
$ sudo systemctl restart httpd
In your WordPress wp-config.php file, add the following two lines that also point to your domain name and the new port values.
define('WPSITEURL','http://localhost:8000/');
define('WPHOME','http://localhost:8000/');
The MySQL database should also be updated to reflect the new WordPress URL associated port values. You must first switch to your WordPress database before running the following SQL query.
update wp_options set option_value='http://localhost:8000' where option_name='siteurl';
update wp_options set option_value='http://localhost:8000' where option_name='home';
Now try accessing the WordPress site via the new port number.
http://localhost:8000
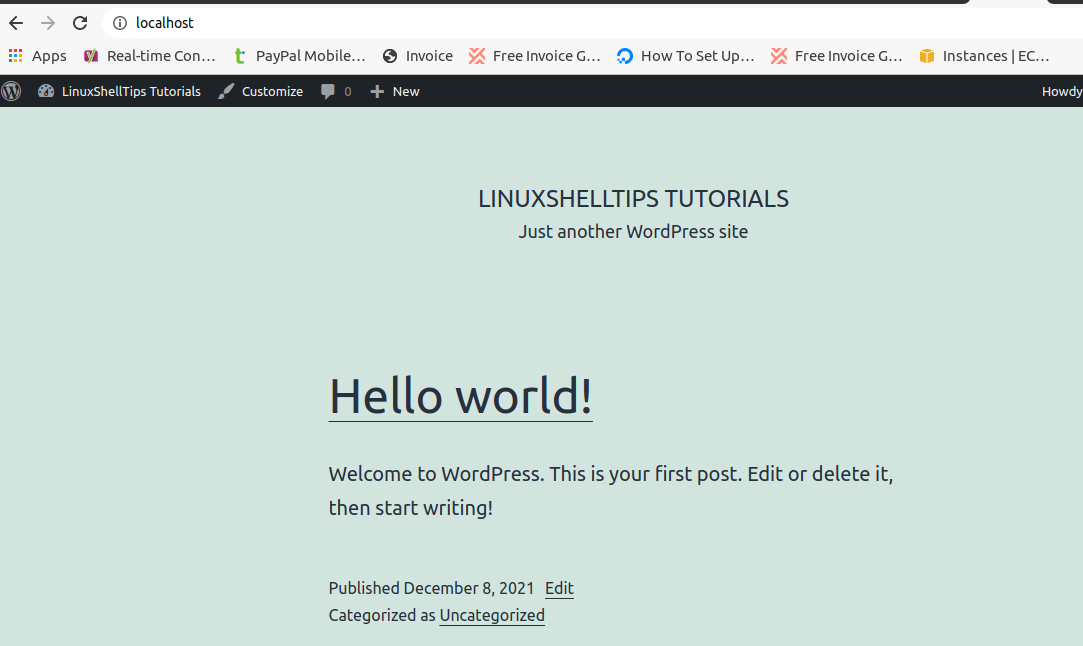
If you try accessing the WordPress site under a different port number other than the one set, you will get a “This site can’t be reached” error.
Changing WordPress Port in Nginx Web Server
Under Nginx, we need to access and configure the server block associated with your WordPress site. This virtual server block configuration file should have content similar to the following:
$ sudo nano /etc/nginx/conf.d/linuxshelltips.conf
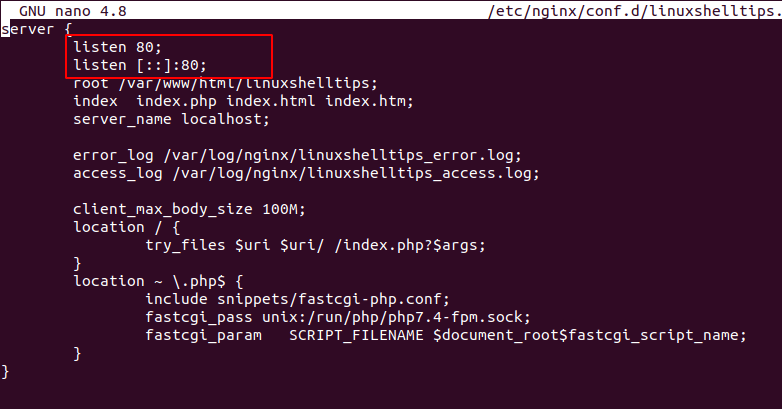
As you can see, the default listening port on this configuration file is 80. To make WordPress use a different under Nginx, we can edit this port value to something else like 8080.
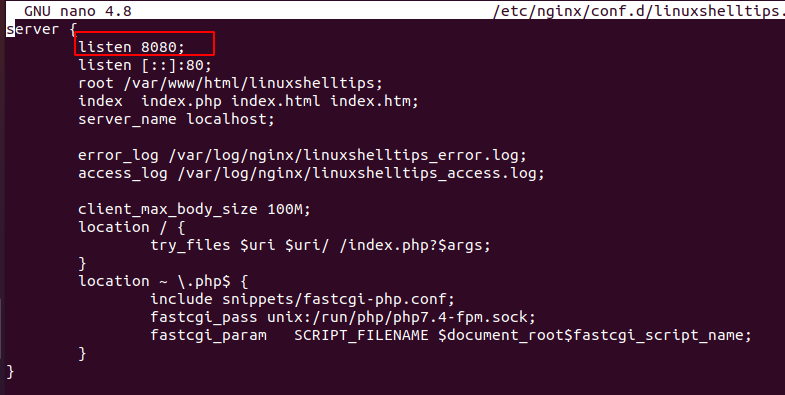
The final step for this new WordPress Port to be effective is to restart the Nginx server.
$ sudo systemctl restart nginx
In your WordPress wp-config.php file, add the following two lines that also point to your domain name and the new port values.
define('WPSITEURL','http://localhost:8080/');
define('WPHOME','http://localhost:8080/');
The MySQL database should also be updated to reflect the new URL associated port values. You must first switch to your WordPress database before running the following SQL query.
update wp_options set option_value='http://localhost:8080' where option_name='siteurl';
update wp_options set option_value='http://localhost:8080' where option_name='home';
To test if this new port is working, include it in the URL to your WordPress site.
https://localhost:8080

Being able to change your WordPress port value on Nginx and Apache can flexibly enable you to run/manage two WordPress sites at the same time especially when you want to gauge their performance.

Great tutorial, but how do we do this with an SSH cert?