As a WordPress site admin, you have no choice but to adhere to the number one rule for successful website administration; always create regular data backups for your site. This rule should never be taken as a consideration but as a mandate.
[ You might also like: How to Backup WordPress Database via MySQL ]
With the internet stretching its web daily to reconnect and reconfigure the entire globe to a single unit, you can never really be certain of the status of your WordPress site while it is online.
However, if you regularly backup your WordPress site’s data, you are guaranteed the following exceptional benefits:
- Quick user and system file access.
- Unexpected power failures won’t compromise the state of your files and data.
- A fail-safe from virus attacks that might affect the integrity of your files and data.
- Server and computer hard drive failures won’t halt your site operations.
- You have a plan B against operating system failures.
Backup WordPress Database Using phpMyAdmin
The phpMyAdmin site is an ideal frontend that makes MySQL/MariaDB database management tasks easier. With it, you do not have to stress about typing long SQL queries on a command-line interface to get anything done. You only need to interact with GUI tabs and buttons.
The first step is to log in to your phpMyAdmin web interface. The appropriate URL syntax to use is:
http://domain_name_or_ip_address/phpmyadmin
Since being on a localhost environment, my URL to phpMyAdmin will be something like the following:
http://localhost/phpmyadmin
Use your MySQL/MariaDB database user credentials to log into the server. It is good database admin practice to not use your MySQL/MariaDB root user credentials to access the phpMyAdmin interface. You can create an alternate user with the same database privileges as the root user by referencing the following command sequences.
$ mysql -u root -p
MariaDB ([none])> CREATE USER 'linuxshelltips_star'@'localhost' IDENTIFIED BY 'Pa55word';
MariaDB ([none])> GRANT ALL PRIVILEGES ON *.* TO 'linuxshelltips_star'@'localhost' WITH GRANT OPTION;
Now log in to your phpMyAdmin dashboard.
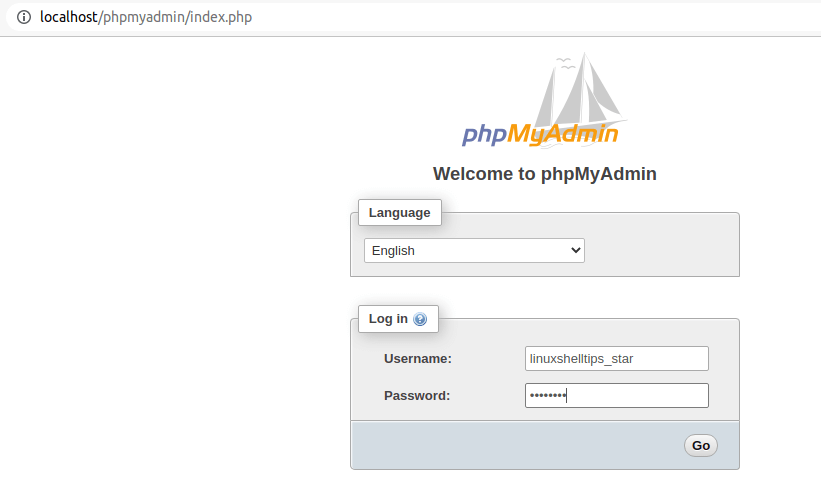
The resulting interface should resemble the following screen capture.
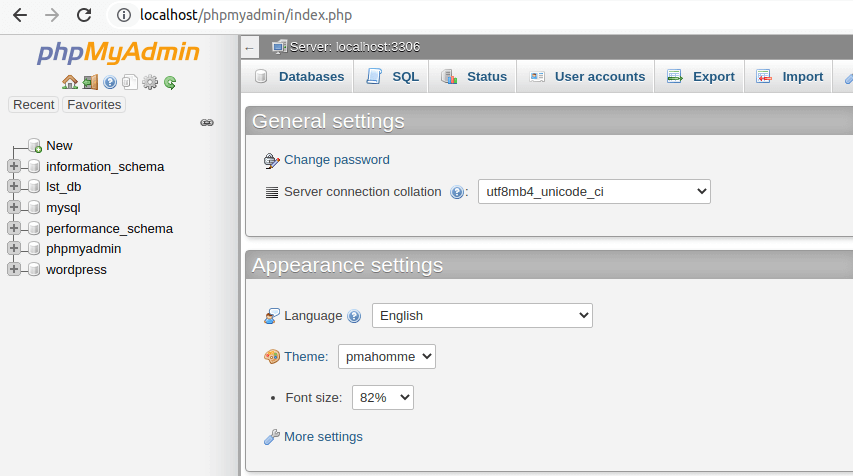
On the left side of the phpMyAdmin window, you should see several listed databases. Trace the one associated with your WordPress site and click on it.
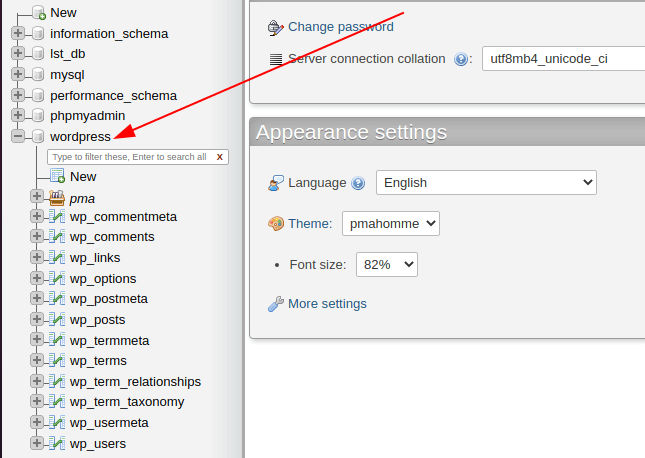
You should get a visual representation of all the database tables associated with your WordPress site. WordPress uses the prefix “wp_” to name its database tables.
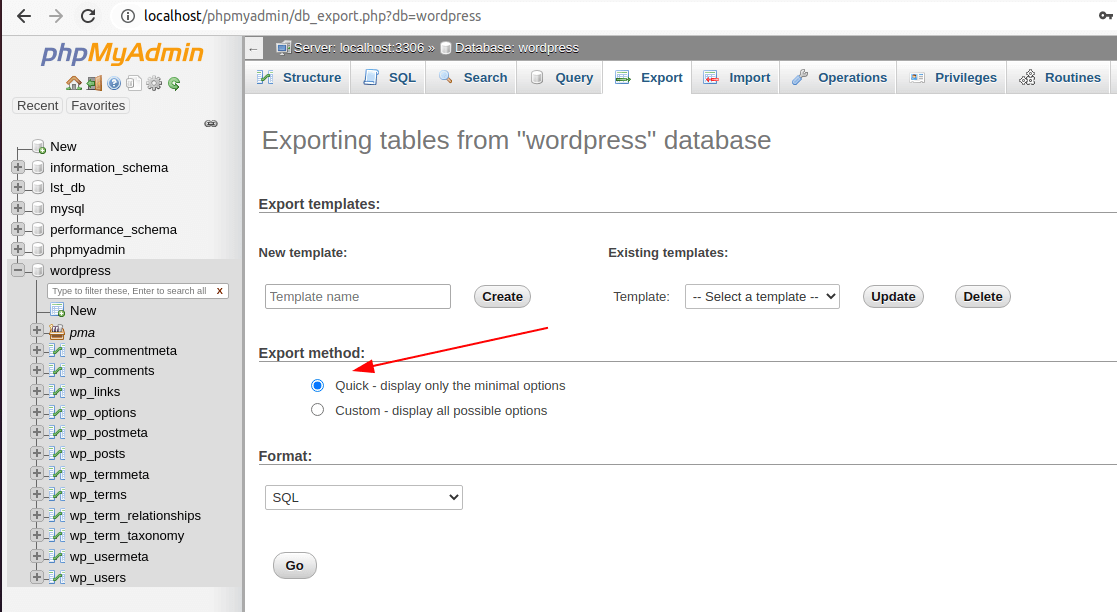
The next step is to trace the Export tab on your phpMyAdmin dashboard.
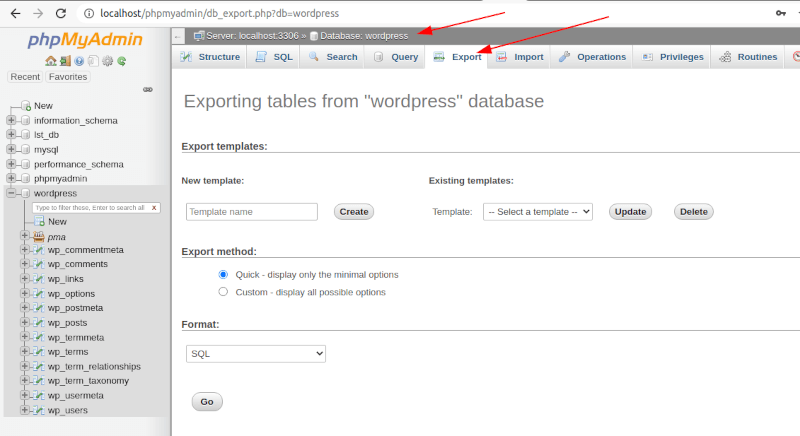
From here, we are going to consider two approaches to creating a site’s database copy.
Option 1: Backup WordPress Database Using the Quick Export Method
This database backup method is ideal for individuals that want to create a copy of their entire WordPress database. After selecting your export method; in this case, SQL, hit the [Go] button to create a database copy of your WordPress site.
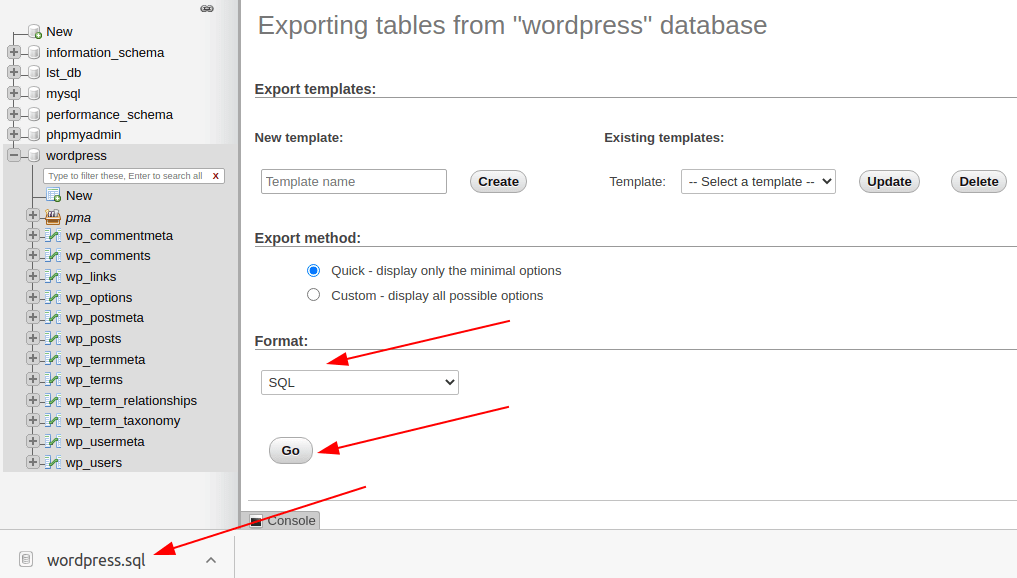
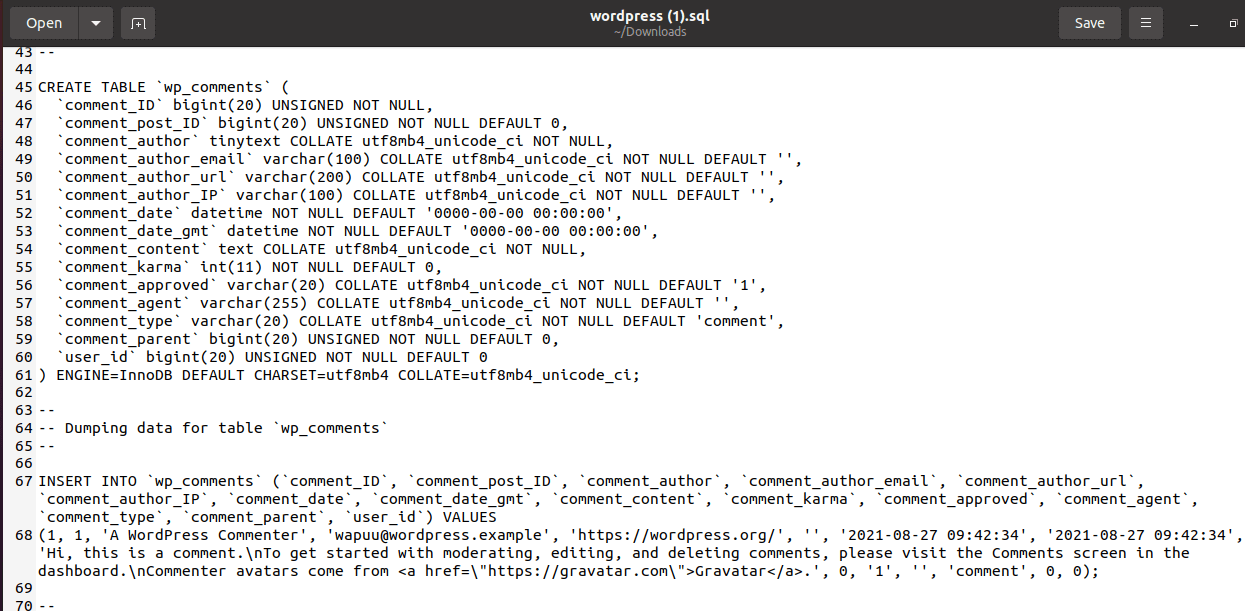
Your database file copy will be downloaded to your machine.
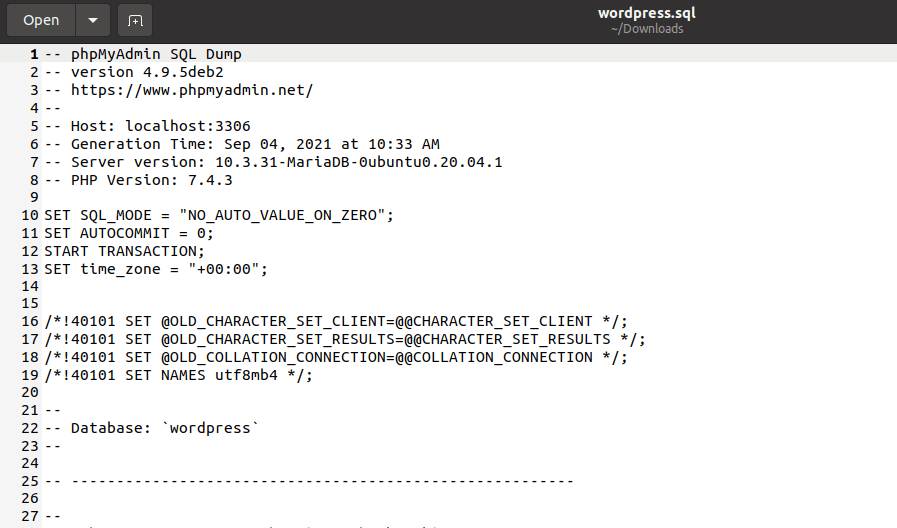
From here, you can create a directory structure that will accommodate all the database backup files you will be exporting through phpMyAdmin.
Option 2: Backup WordPress Tables Using the Custom Export Method
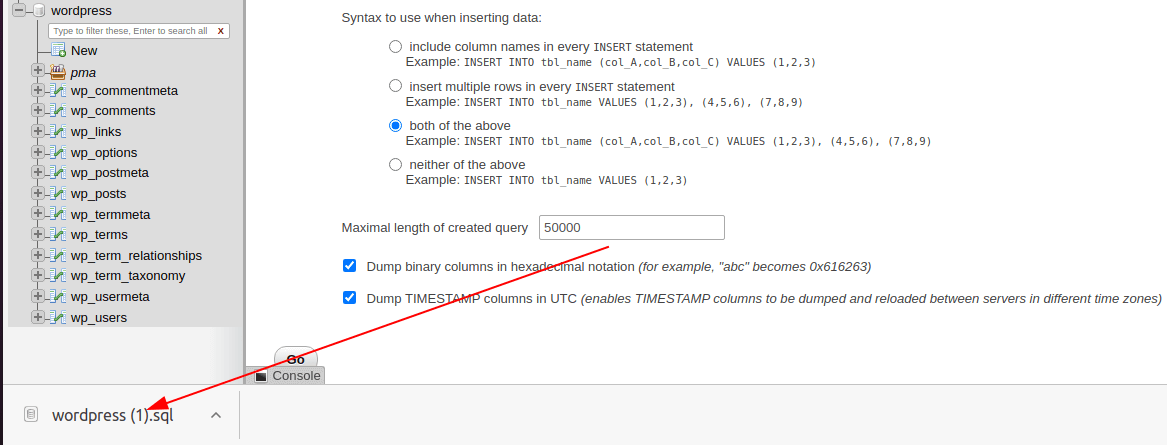
Go with this database export method if you do not need to back up the whole WordPress site data. In this case, you only need the data copy of some crucial database tables. For example, to create database copy related to the wp_comments, wp_posts, and wp_users WordPress database tables, you would implement this action as per the following screen capture.
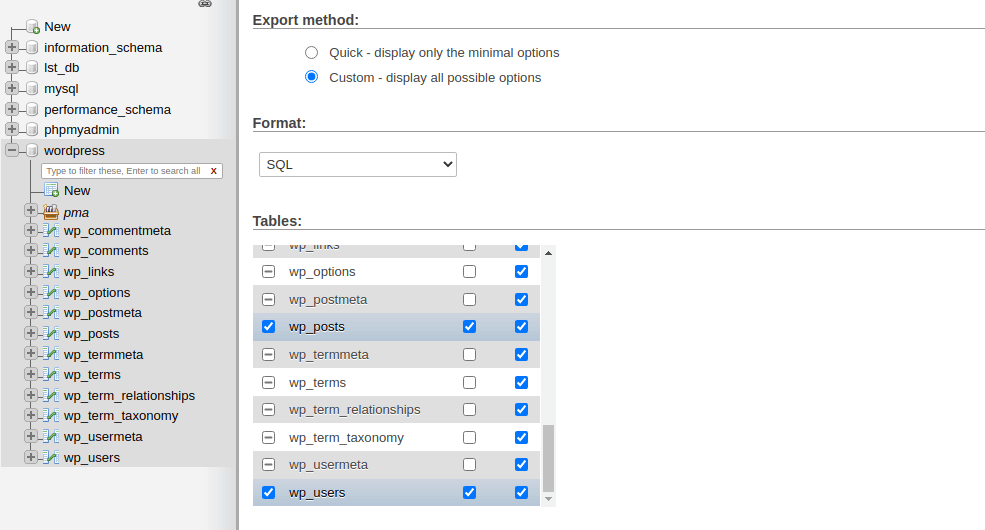
Afterward, scroll down and hit the [Go] button.
The importance of regular database backup in regards to your WordPress site should never be underestimated. This routine promotes easy data access, data security, and data integrity. It is the perfect plan B for the worst-case scenario.
