The command line interface (CLI) is an effective tool for users to connect with their systems effectively in the world of Linux and Ubuntu.
Although Bash, the default shell, does the job, there are several shells that offer better features and more individualized customization choices.
Zsh, which offers superior functionality and usability, is one such well-liked substitute. The command line experience on Ubuntu can be enhanced greatly by the visually appealing Powerlevel10k theme.
This post will walk you through setting up the Powerlevel10k theme and installing Zsh on an Ubuntu machine.
Install ZSH on Ubuntu
Before diving into the installation process let us check if our system is up-to-date by running the following apt command.
$ sudo apt update && sudo apt upgrade -y
Once your Ubuntu system is updated and upgraded, you need to install git to fetch the theme from Github and curl for fetching and downloading a framework for zsh.
$ sudo apt install git curl
We can now move forward with installing Zsh because the system is ready. Zsh is included in Ubuntu’s default repositories, which will simplify our installation process.
But before that let’s check what shell is currently running in your system.
$ echo $SHELL

/bin/bash
Finally run the following command to install zsh in your Ubuntu system.
$ sudo apt install zsh
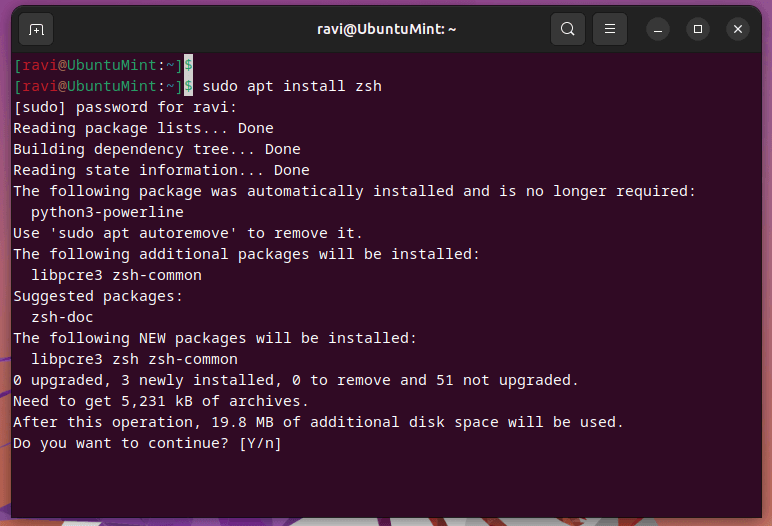
Zsh shell is installed but it is still not the default shell for your terminal.
$ echo $SHELL

/bin/bash
To change the default shell from bash to zsh for the current user account run the chsh command:
$ chsh
Enter your account password and give the new login shell path as “/bin/zsh”.
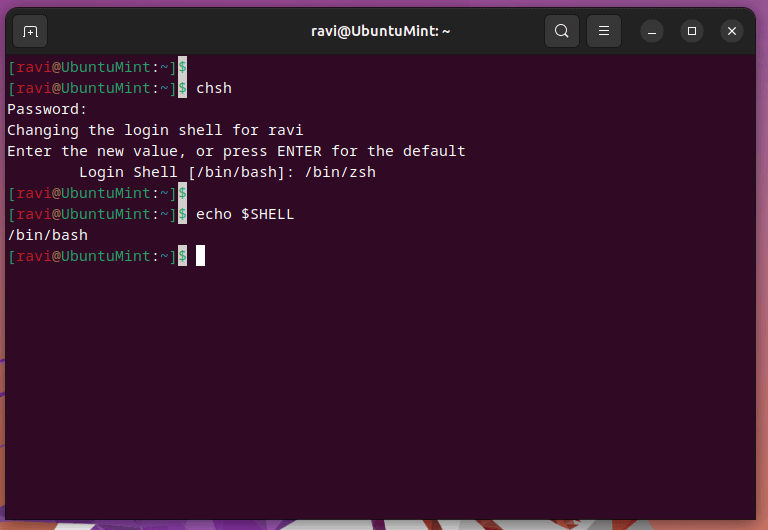
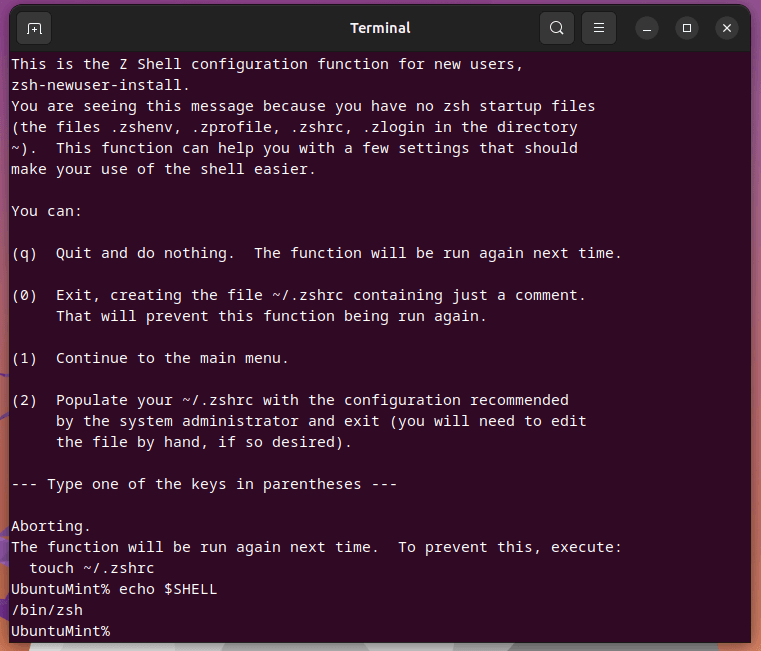
You will need to log out and log in again to apply the changes in your shell. Once you logged in the default shell has been changed to zsh.
$ echo $SHELL
Install Nerd Fonts in Ubuntu
Powerlevel10k’s terminal theme uses a variety of unique symbols and icons to improve the visual appeal and usefulness of the terminal prompt, hence Nerd Fonts are necessary.
The glyphs for many programming languages, version control systems, file kinds, and other indications are among these symbols and icons.
These specialized symbols and icons are frequently not supported by standard system fonts. On the other side, Nerd Fonts are patched fonts that feature a variety of extra glyphs and symbols taken from many well-liked icon sets, like Font Awesome, Devicons, and Powerline.
The Powerlevel10k theme can display the appropriate symbols and icons properly thanks to these fonts.
There are lots of Nerd fonts available but MesloLGS NF works perfectly with the theme. You can download the font by clicking each of the four links below:
After downloading all four files, open any file manager and locate where the fonts you have downloaded.
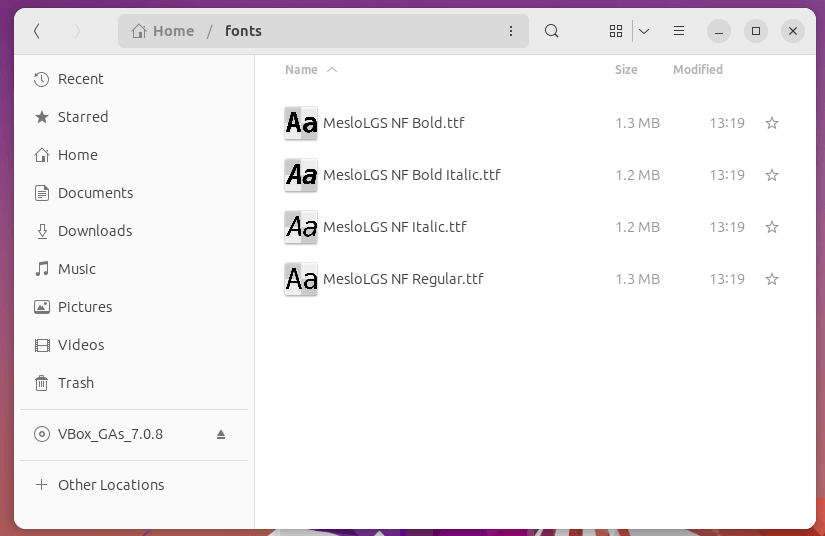
Double Click on each font, and a font manager will open click “Install” on the top right corner of the window.
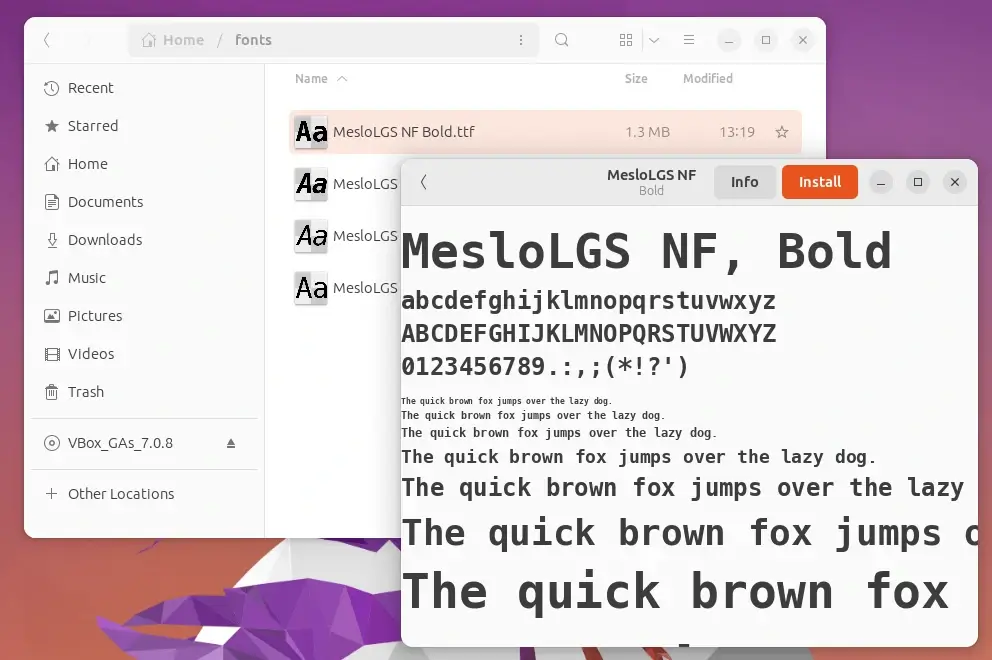
Don’t forget to do this for all four font files.
Change Ubuntu Terminal Font
After installing the fonts you will need to manually change the default font to the nerd font of the terminal. To do this click on the three dots on the top right of the terminal. Then go to Preferences –> Profiles.
Click on the font section and search for “MesloLGS NF” and select it.
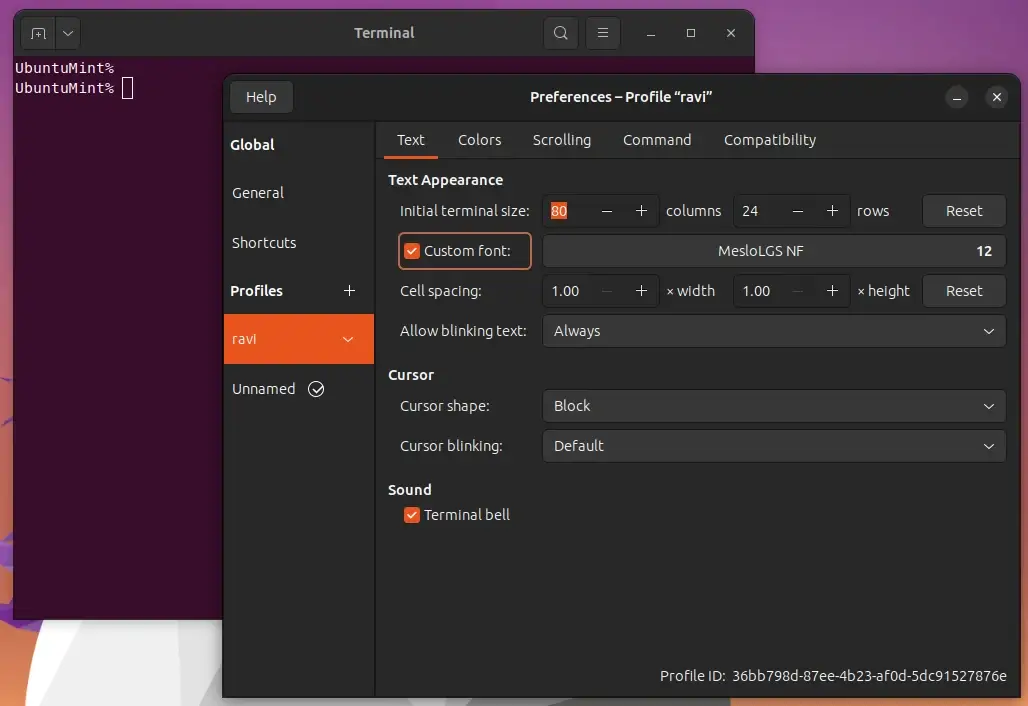
Now you can close the preferences settings.
Setting Up Oh-My-Zsh in Ubuntu
Oh My Zsh is a wonderful platform for managing your Zsh settings that is open-source and community-driven. It includes a number of items in addition to hundreds of functionalities, tools, plugins, and themes that are useful.
Oh My Zsh is installed by running the curl or wget command in your terminal.
$ sh -c "$(curl -fsSL https://raw.githubusercontent.com/ohmyzsh/ohmyzsh/master/tools/install.sh)"
OR
sh -c "$(wget https://raw.githubusercontent.com/ohmyzsh/ohmyzsh/master/tools/install.sh -O -)"
After running this command oh-my-zsh gets installed and activated.
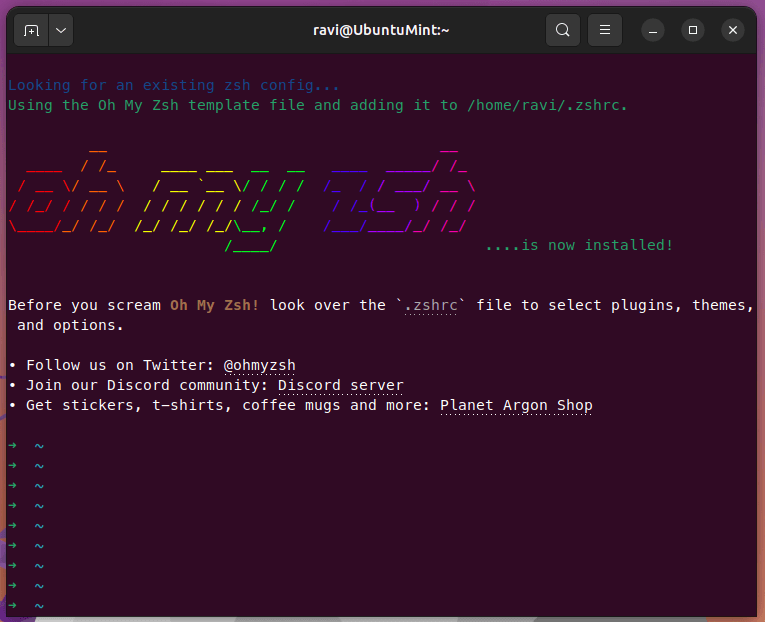
$ cd
Install Powerlevel10k Theme in Ubuntu
After setting up Zsh and Oh-My-Zsh, let’s install the Powerlevel10k theme to improve the command line’s aesthetics and usability.
The powerlevel10k theme is not available in the Ubuntu repository, so we need to install it from GitHub as shown.
Go to the Powerlevel10k git page, then scroll down to the “Installation” section and click on “Oh My Zsh”.
NOTE: I have provided the full installation procedure because the following command may change in the future. So go to the official website and copy the command from there.
$ git clone --depth=1 https://github.com/romkatv/powerlevel10k.git ${ZSH_CUSTOM:-$HOME/.oh-my-zsh/custom}/themes/powerlevel10k
Now that the theme is cloned in your system. Let us apply it to the Zsh shell by editing the configuration file for Zsh:
$ nano .zshrc
In the file, search for “ZSH_THEME” and change its value from “robbyrussell” to “powerlevel10k/powerlevel10k”.
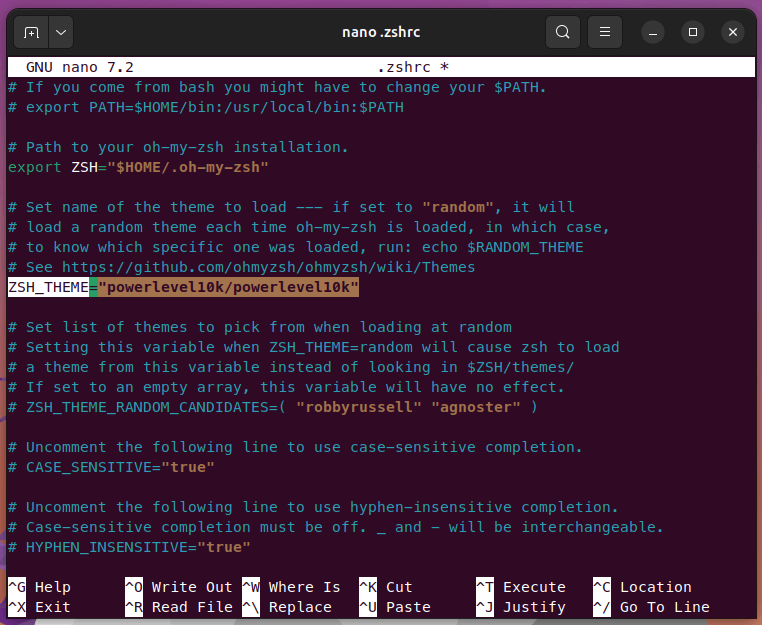
I am using the Nano text editor in Linux. Any editor that you prefer may be used. In nano, after editing hit “CTRL + O + Enter” which will save the file. Then hit “CTRL + X” which will exit the editor.
Now, you can close the terminal.
Configuring Powerlevel10k Theme in Ubuntu
Launch a terminal again and make sure you see the following screen.
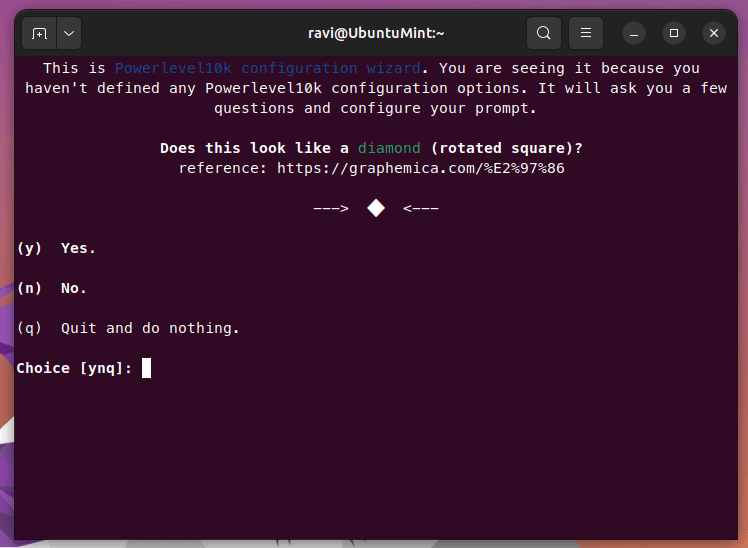
If you see this screen and the diamond is properly visible you have followed the tutorial perfectly.
You will be prompted with how you want the look and feel of the terminal. Just select the options you love and the installation process will move forward automatically.
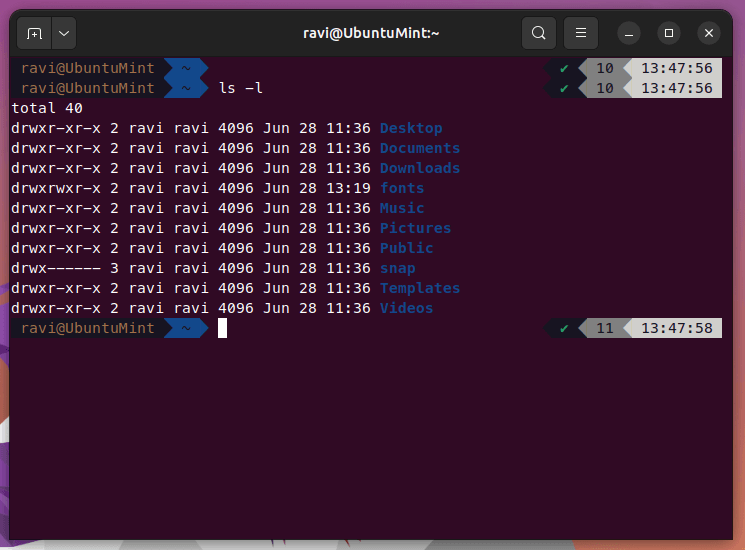
Install Oh My Zsh Plugins (Optional)
Oh My Zsh has plugins that you can use to add a variety of features to your shell by simply turning them on.
Install Auto Suggestions
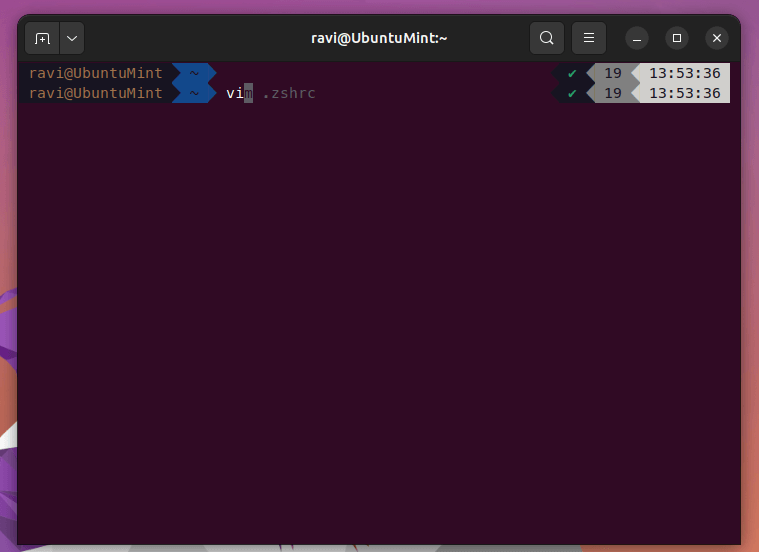
The zsh-autosuggestions plugin suggests commands as you type based on history and completions.
$ git clone https://github.com/zsh-users/zsh-autosuggestions.git $ZSH_CUSTOM/plugins/zsh-autosuggestions
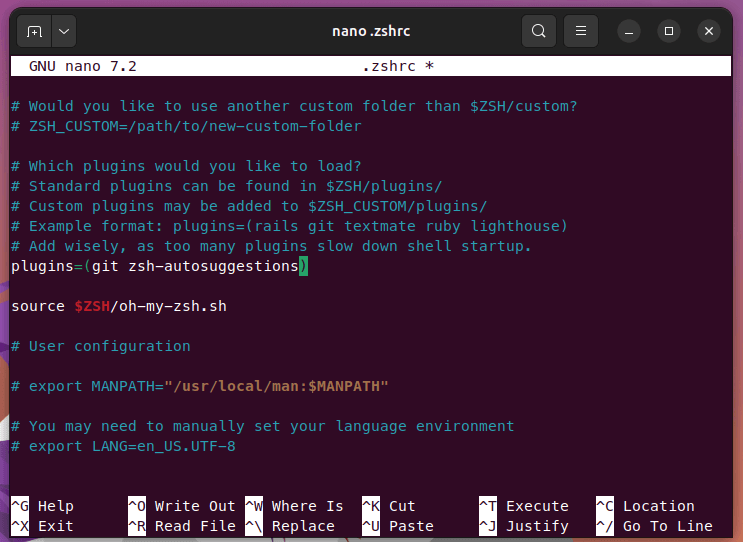
To enable this plugin and open the .zshrc file again.
$ nano .zshrc
Search for “plugins” in that file and add “zsh-autosuggestions” in the array. Don’t add a comma, just add a space. You can enable plugins in this way in zsh.
It suggests the remaining part of the command you are typing using the history of the terminal.
Install Syntax Highlighting
To enable Syntax Highlighting in the terminal, follow the same procedure and add “zsh-syntax-highlighting” in the plugins array.
$ git clone https://github.com/zsh-users/zsh-syntax-highlighting.git $ZSH_CUSTOM/plugins/zsh-syntax-highlighting
It highlights the words in the terminal just like VsCode.
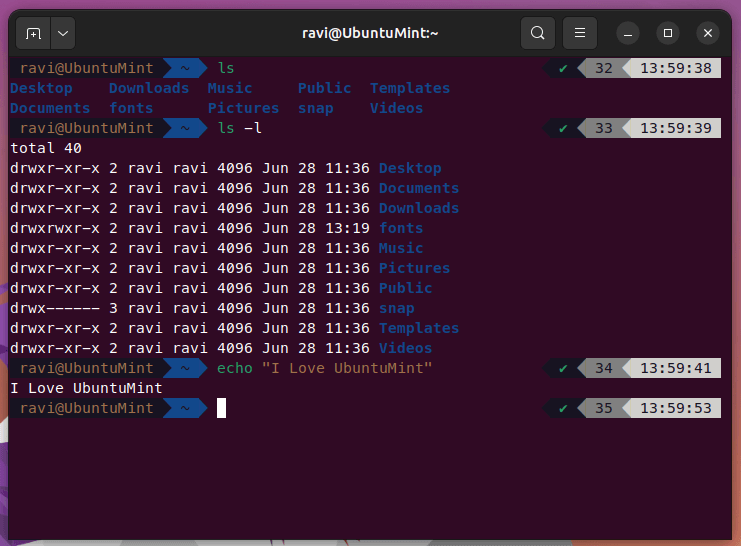
Enable Auto-Correction
To enable autocorrection search “ENABLE_CORRECTION” and remove the "#" to uncomment the line.
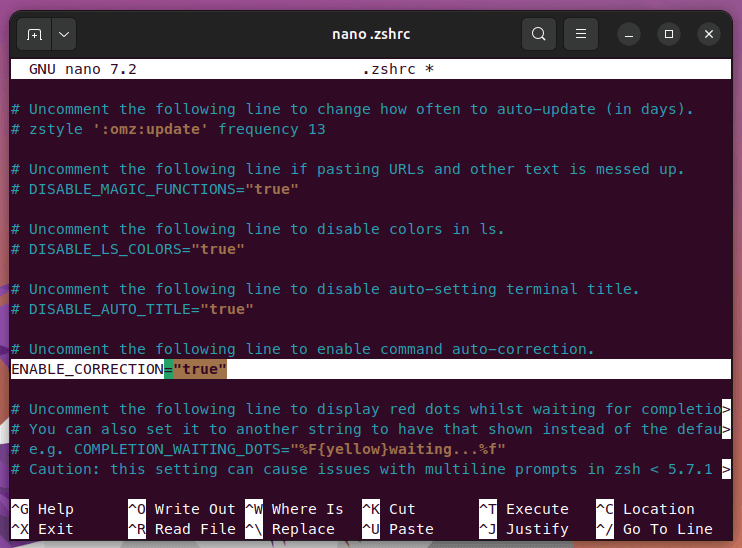
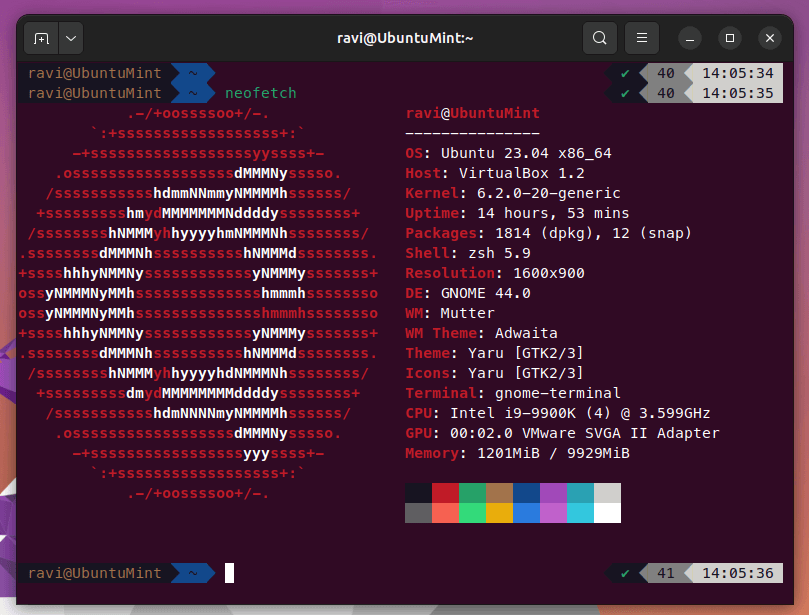
Open a fresh terminal window to make sure everything is configured correctly. If Zsh, Oh-My-Zsh, and the Powerlevel10k theme and all plugins are successfully installed and set up on your Ubuntu system, you should see the Powerlevel10k prompt with your preferred setup using a tool called neofetch.
$ neofetch
Conclusion
You installed Zsh and set up the Powerlevel10k theme on your Ubuntu system successfully by following this tutorial.
While Powerlevel10k improves the look and feel of the command line, Zsh provides a feature-rich replacement for the built-in Bash shell.
To create a unique and effective command line environment, make use of the many customization possibilities. To further improve your experience, don’t forget to investigate extra plugins and themes. Enjoy the strength and adaptability of Powerlevel10k and Zsh on Ubuntu!
