Suppose you are after infinite power and control in web administration. In that case, you have no choice but to consult Nginx, which is a reputable web server and is attributed to have almost infinite configuration footprints, high performance, and component adaptability in modern stacks.
That said, if you are dealing with a high-traffic website and need a web server that is lightweight and fast, you should consider implementing Nginx.
On the other hand, a user agent is simply a software package with the responsibility of retrieving, rendering and interacting with end users’ web content. Popular examples of user agents known to the Linux ecosystem include Curl and Wget.
Sometimes the access that these user agents have to a web server can compromise its integrity. In this case, you need a way of blocking/restricting their access. This article will walk us through valid Nginx configurations for blocking user agents from having access to your web server data/information.
Problem Statement
We must consider a few additional resources for this article to be more practical and relatable.
- A remote machine with Nginx installed on it.
- Identify the IP address (or domain name) mapped to the remote machine (In this case we will be using the IP address 192.168.100.29).
- The host machine should have some user agents like curl and wget installed to test the effectiveness of the Nginx configuration we implemented.
Installing Nginx Web Server in Linux
If you don’t have Nginx installed on your Linux system already, reference one of the following installation guides that math your Linux distribution.
$ sudo apt install nginx      [On Debian, Ubuntu and Mint]
$ sudo yum install nginx      [On RHEL/CentOS/Fedora and Rocky Linux/AlmaLinux]
$ sudo apk add nginx          [On Alpine Linux]
$ sudo emerge -a nginx        [On Gentoo Linux]
$ sudo pacman -S nginx        [On Arch Linux]
$ sudo zypper install nginx   [On OpenSUSE]
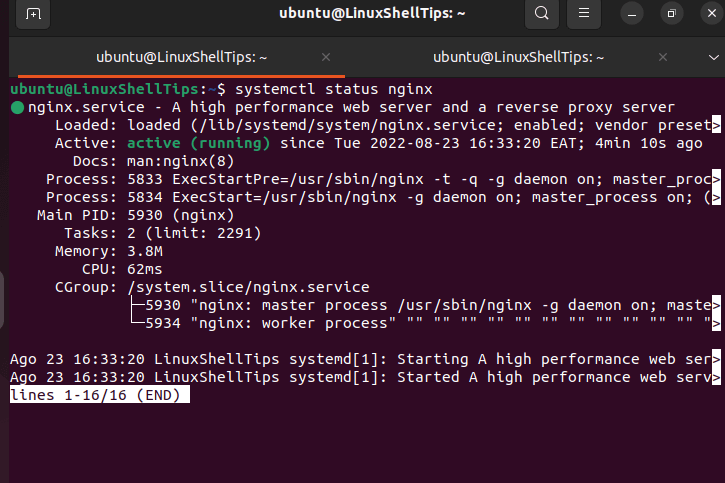
After nginx installation, you can enable, start and verify the status using the following commands.
$ sudo systemctl enable nginx
$ sudo systemctl start nginx
$ sudo systemctl nginx status
Blocking User Agents in Nginx
Using your preferred text editor, access the following default website Nginx configuration file:
$ sudo nano /etc/nginx/sites-available/default
You will see a server block similar to the following:
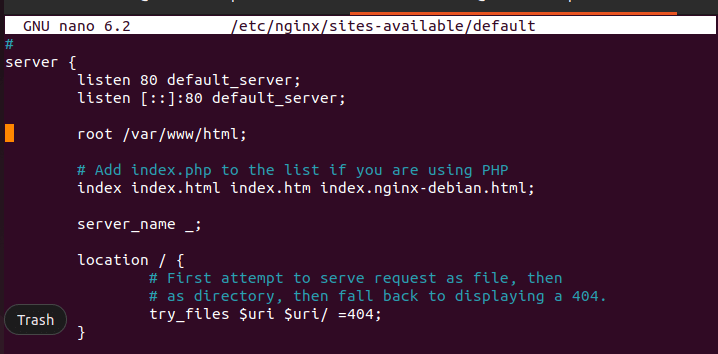
The following code should be imprinted in this file:
if ($http_user_agent ~* (wget|curl) ) {
    return 403;
}
The above code intends to block user-agents wget and curl. If you want to block more than two user agents, you will have to list them in the following manner:
if ($http_user_agent ~* (user-agent1|user-agent2|user-agent3|...) ) {
    return 403;
}
The final outlook of the file /etc/nginx/sites-available/default should be as follows:
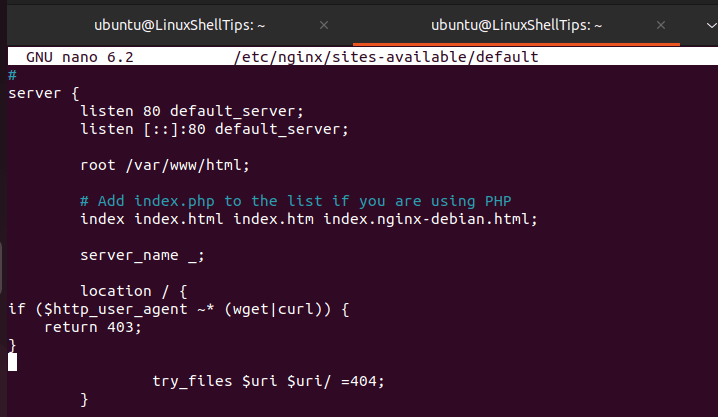
Finally, restart the Nginx web server to take the new configuration changes into effect.
$ sudo systemctl restart nginx
Verify Nginx Blocking User Agents
To test, if nginx blocking user agents, first confirm the IP address of our server:
$ ifconfig
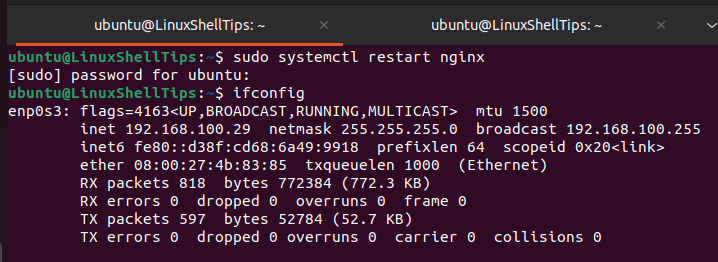
To test if these user agents were blocked, we will use the curl -i command on the host machine to get some information about the nginx web server:
$ curl -i 192.168.100.29
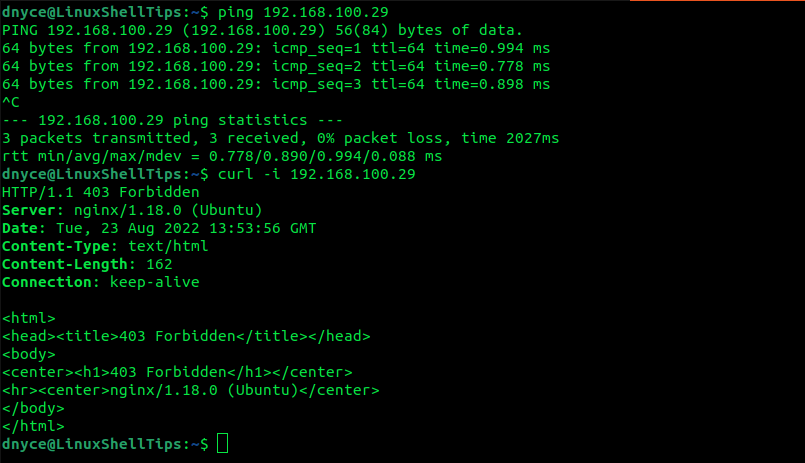
As presented by the screenshot above, the curl user agent has been blocked from accessing server 192.168.100.29 as stipulated by the 403 Forbidden error we implemented.
Blocking user agents via Nginx gives your servers the deserved integrity and privacy.

Blocking user agents means squat – it is trivial to change.