The Apache Tomcat Server is an open-source and reliable web and Java Server Page container that is a popular option for developers building and maintaining dynamic applications based on Java. It is used to implement Java servlet and Java Server Pages (JSP) technologies and WebSocket APIs.
The Apache Tomcat server is not as feature-rich compared to the traditional web servers such as Apache or Nginx. However, when it comes to applications built entirely on JSP, then Apache Tomcat is King.
The latest stable version is Tomcat 10 and it was released on January 10, 2022. It provides support for JSP 3.0, Servlet 5.0, WebSocket 2.0, EL 4.0, and Authentication 2.0 to mention a few.
In this tutorial, we walk you through the installation of Apache Tomcat 10 on Ubuntu 20.04.
Installing Apache Tomcat 10 in Ubuntu 20.04
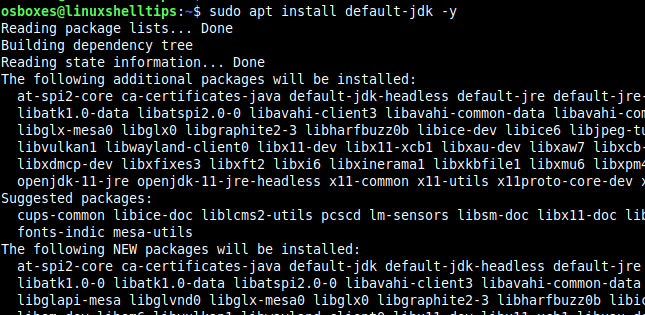
One of the prerequisites of apache tomcat 10 is the java runtime environment version 8 or higher. To install it, run the command:
$ sudo apt install default-jdk -y

Once installed, proceed and verify the java version as follows.
$ java --version

Next, you need to create a new user and group account for running the Tomcat server with the following command.
$ sudo useradd -m -d /opt/tomcat -U -s /bin/false tomcat
With the Tomcat user in place, we can now proceed to download the latest tomcat zip file using the following wget command.
$ wget https://dlcdn.apache.org/tomcat/tomcat-10/v10.0.16/bin/apache-tomcat-10.0.16.tar.gz
Next, extract the contents of the archive file in the /opt/tomcat path as shown:
$ sudo tar xzvf apache-tomcat-10.0.16.tar.gz -C /opt/tomcat --strip-components=1
Next, modify the ownership of the /opt/tomcat directory to the tomcat user and group.
$ sudo chown -R tomcat:tomcat /opt/tomcat/
And apply the permissions to the /opt/tomcat/bin directory as follows.
$ sudo chmod -R u+x /opt/tomcat/bin
Securing Apache Tomcat Admin Dashboard
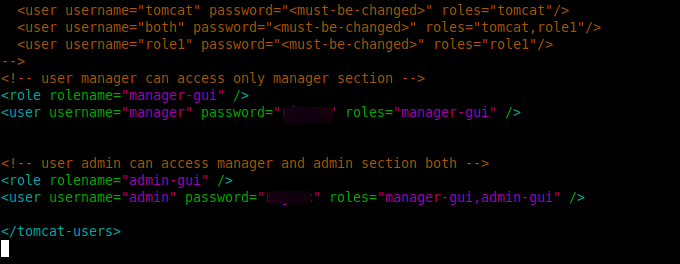
To safeguard access to the admin/manager pages, configure your Tomcat with user accounts. To do so, open your editor and add the following code inside the <tomcat-users>...</tomcat-users> tags in the conf/tomcat-users.xml file.
We recommend updating the password in the configuration below to something safer.
$ sudo nano /opt/tomcat/conf/tomcat-users.xml
Add the following values and ensure you change the password for admin and manager access.
<!-- user manager can access only manager section -->
<role rolename="manager-gui" />
<user username="manager" password="_STRONG_PASSWORD_" roles="manager-gui" />


<!-- user admin can access manager and admin section both -->
<role rolename="admin-gui" />
<user username="admin" password="_STRONG_PASSWORD_" roles="manager-gui,admin-gui" />

Save the changes and exit.
Enabling Apache Tomcat Remote Access
By default, the tomcat service is only accessible from localhost. To allow the tomcat manager and host manager to be accessed from a remote machine, modify the following configuration files.
$ sudo nano /opt/tomcat/webapps/manager/META-INF/context.xml
$ sudo nano /opt/tomcat/webapps/host-manager/META-INF/context.xml
Comment out the ip address section to allow access from anywhere.

Alternatively, specify your server ip address in the allow line part as shown:
allow="127\.\d+\.\d+\.\d+|::1|0:0:0:0:0:0:0:1|192.168.1.1" />
Once that’s done, proceed to the next step.
Creating a Tomcat Systemd File
We will run Tomcat as a systemd service. This implies that we need to create a systemd file for Tomcat 10. To achieve this, first, create a systemd file.
$ sudo nano /etc/systemd/system/tomcat.service
Next, paste the following contents on the file.
[Unit]
Description=Tomcat
After=network.target

[Service]
Type=forking

User=tomcat
Group=tomcat

Environment="JAVA_HOME=/usr/lib/jvm/java-1.11.0-openjdk-amd64"
Environment="JAVA_OPTS=-Djava.security.egd=file:///dev/urandom"
Environment="CATALINA_BASE=/opt/tomcat"
Environment="CATALINA_HOME=/opt/tomcat"
Environment="CATALINA_PID=/opt/tomcat/temp/tomcat.pid"
Environment="CATALINA_OPTS=-Xms512M -Xmx1024M -server -XX:+UseParallelGC"

ExecStart=/opt/tomcat/bin/startup.sh
ExecStop=/opt/tomcat/bin/shutdown.sh

[Install]
WantedBy=multi-user.target
Save the changes and exit.
Then, reload the system daemon for the changes to take effect
$ sudo systemctl daemon-reload
Now, we can start the Tomcat application as shown:
$ sudo systemctl start tomcat.service
Next, enable tomcat to start automatically upon system boots.
$ sudo systemctl enable tomcat.service
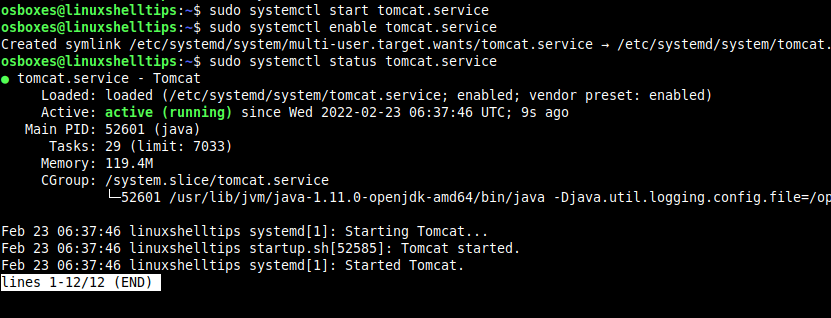
The tomcat service is now running on your system. Verify the status with the command:
$ sudo systemctl status tomcat.service

Accessing Tomcat Web Interface
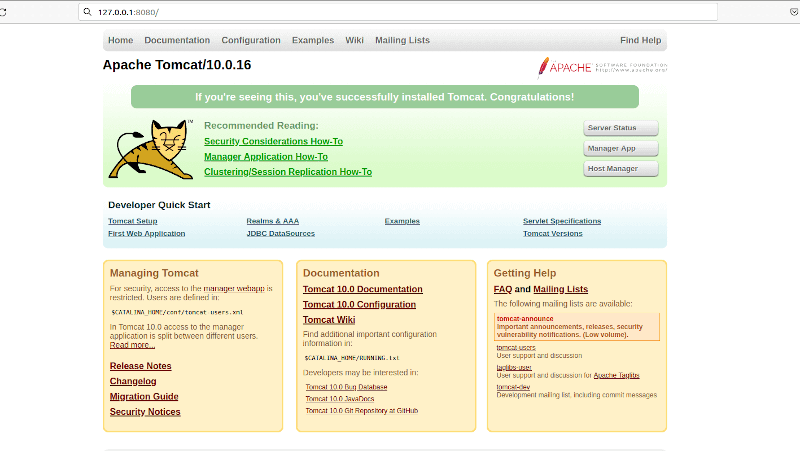
By default, tomcat runs on port 8080. Open your browser and access its web interface on localhost or your specified server ip address:
http://<server-ip>:8080

That’s it with the installation of Apache Tomcat 10 on Ubuntu 20.04. From here you can start building and serving your Java applications using the Tomcat server.
