There are several reasons why you would want to have a new WordPress Admin user to manage and customize your site in relation to privileged actions related to the site’s layout, appearance, and content.
The most common reason is that you underestimated what WordPress could achieve and now you are dealing with impressive user web traffic towards your site.
[ You might also like: How to Install and Use phpMyAdmin in Linux ]
For this reason, you will need more users with privileged Admin roles to manage other users and content published through the WordPress site. A second reason to create a new WordPress admin user is that the role of the previously active Admin user has expired and a new privileged user needs to take charge.
Prerequisites
You are encouraged to access the phpMyAdmin dashboard with an alternate MySQL/MariaDB database user credential instead of the root MySQL/MariaDB user.
You can create this alternate privileged user by referencing the following command sequences in the server if you have access.
$ mysql -u root -p
MariaDB ([none])> CREATE USER 'linuxshelltips_star'@'localhost' IDENTIFIED BY 'Pa55word';
MariaDB ([none])> GRANT ALL PRIVILEGES ON *.* TO 'linuxshelltips_star'@'localhost' WITH GRANT OPTION;
Create WordPress Admin User via phpMyAdmin
The URL syntax for accessing the phpMyAdmin site looks like the following:
http://domain_name_or_ip_address/phpmyadmin
Since am on localhost, I will access the admin site with the following URL.
http://localhost/phpmyadmin
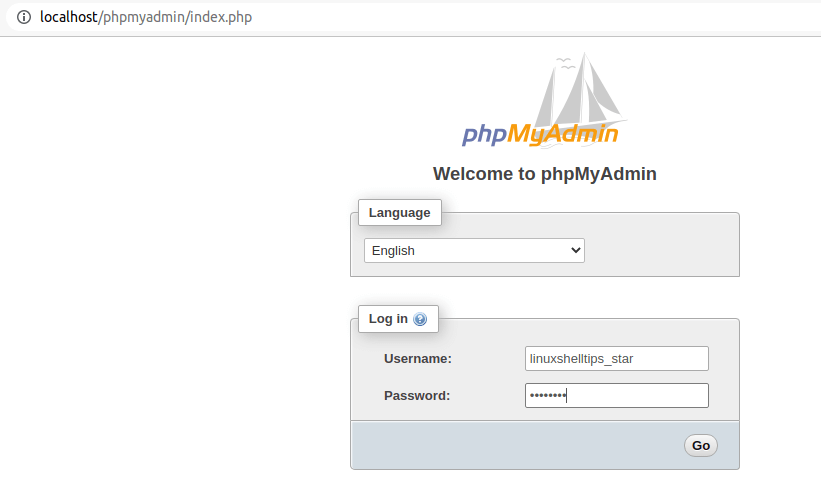
Key in your dedicated database user login credentials and log in to the phpMyAdmin dashboard.
You should be able to see the main phpMyAdmin site’s dashboard area.
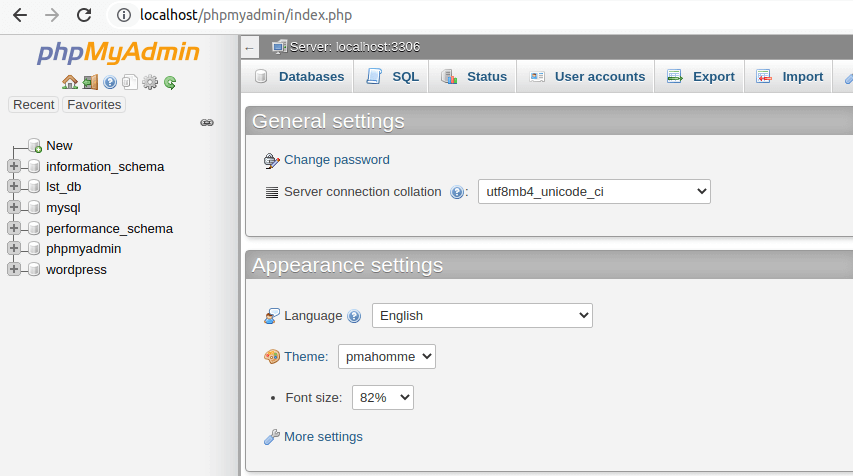
On the left dashboard panel of the phpMyAdmin interface, you will see a list of MySQL/MariaDB databases that you are allowed to manage. Trace the one associated with your WordPress site and click on it.
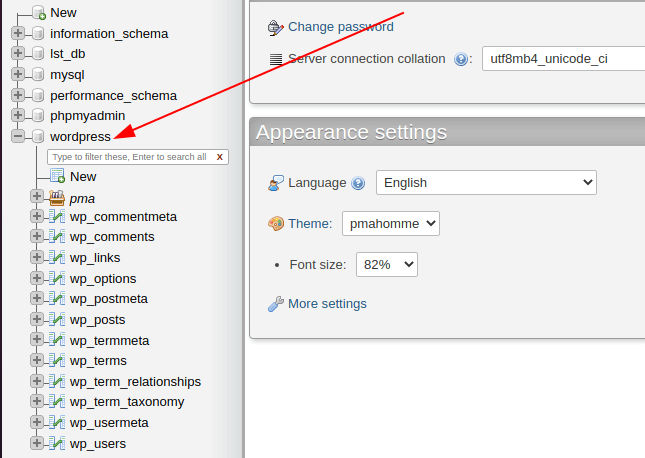
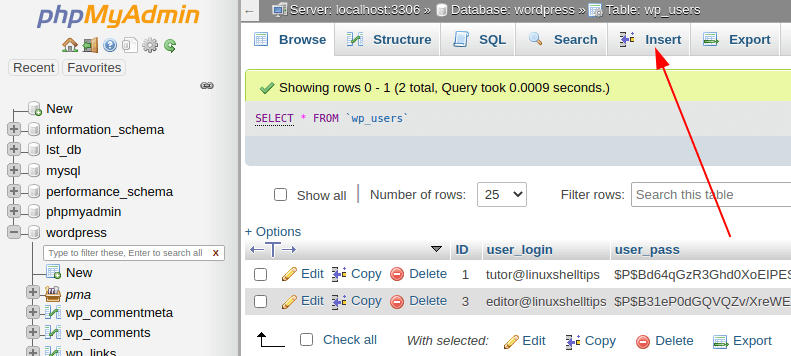
The wordpress database opens a list of linked database tables associated with your WordPress site. Find the table wp_users and click on it. It is the table that holds all the users of your WordPress site. Therefore, if we are going to add a new Admin user entry, the user’s associated credentials will reside on this table.
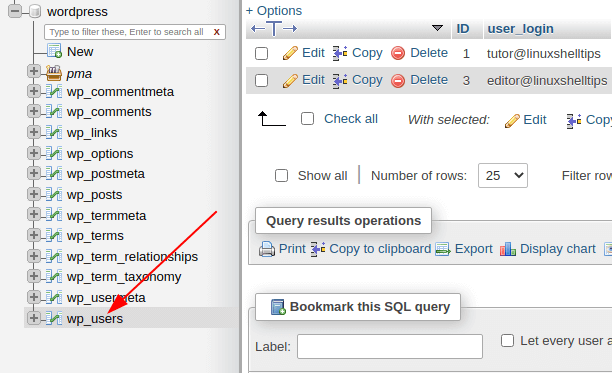
We are now going to use the SQL insert function to add new user details to this wp_users table. Locate this insert tab and click on it.
You will be met with several database table fields that you need to fill out.
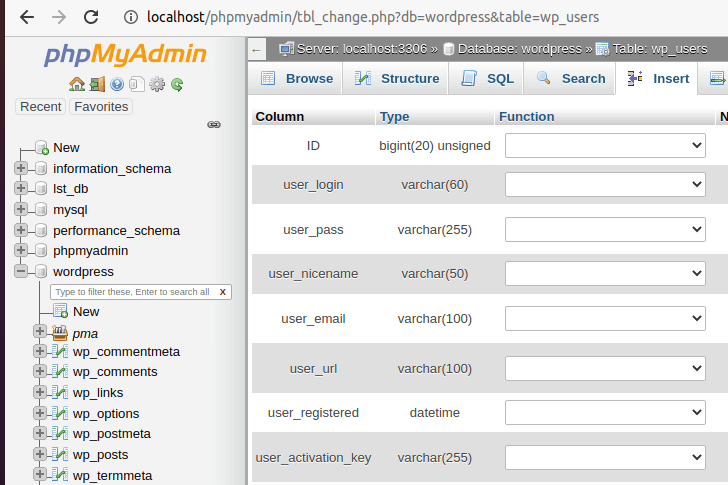
Note that you do not need to fill out all these database table fields. The five important database table fields to consider are:
- user_login: key in the username for the new admin user.
- user_pass: key in the password credential for the new admin user. Should be under MD5.
- user_email: key in the email address associated with the new admin user.
- user_registered: key in the user registration date.
- user_status: It is usually auto-populated with the value 0.
Let us populate the wp_users database table while keeping these key user details in mind.
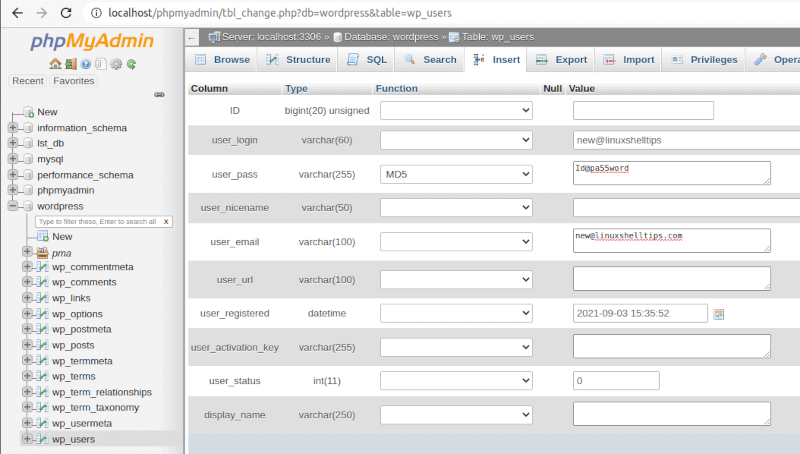
Afterward, click on [Go] to execute this SQL insert query.
INSERT INTO wordpress.wp_users (user_login,user_pass,user_nicename,user_email,user_url,user_registered,user_activation_key,user_status,display_name)
VALUES ('new@linuxshelltips',MD5('Id@pa55word'),'','[email protected]','','2021-09-03 15:35:52','',0,'');
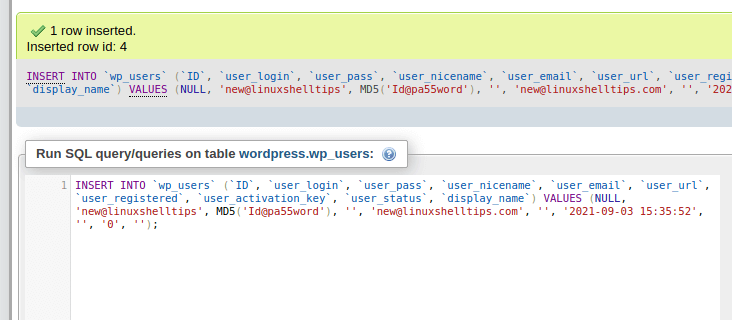
Go back to the wp_users database table and note the ID assigned to this new user.
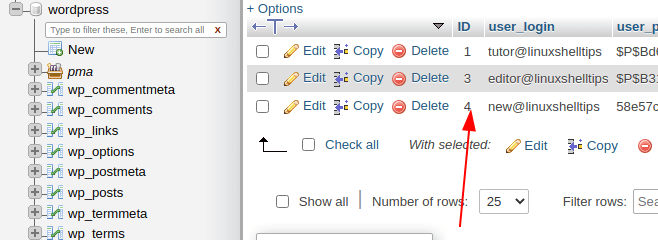
The associated user ID is 4. So far, this WordPress user has no Admin privileges. To make this user an Admin, we need to visit the wp_usermeta table above the wp_users table. This table holds key values to transforming a normal WordPress user into an Admin user.
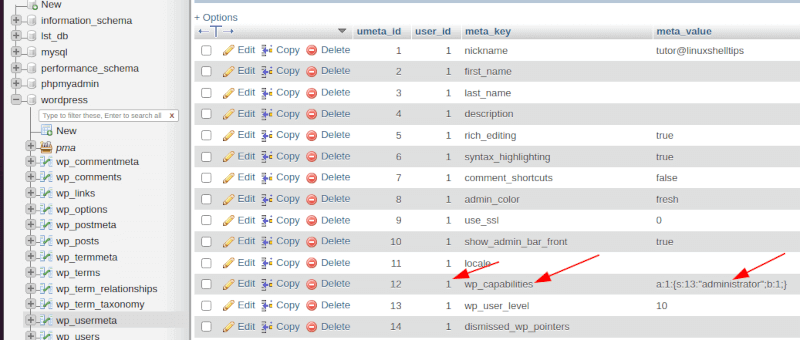
Take note of the meta_key column entry wp_capabilities and meta_value column entry a:1:{s:13:"administrator";b:1;}.
The meta_value column entry might be different on your end. These table entries make the above WordPress user with user_id 1; where ID == user_id, an admin user.
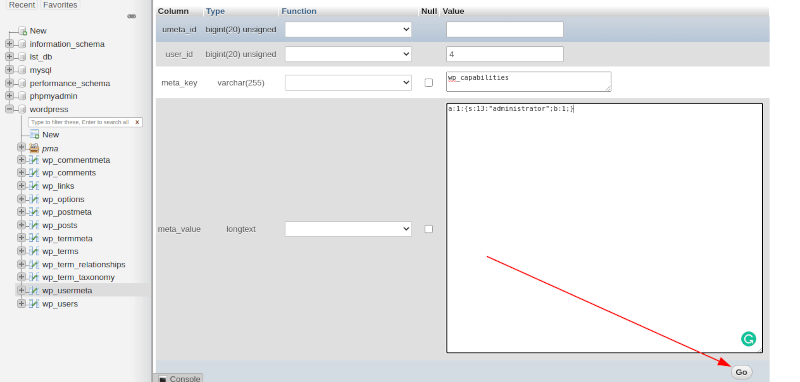
To make our user new@linuxshelltips an admin, we will insert this user’s ID value alongside the meta_key column entry wp_capabilities and meta_value column entry a:1:{s:13:"administrator";b:1;} to the wp_usermeta table.
On my end, I’ll use:
user_id: 4
meta_key: wp_capabilities
meta_value: a:1:{s:13:"administrator";b:1;}
The meta_value could be different on your end, remember to check and Hit on [Go].
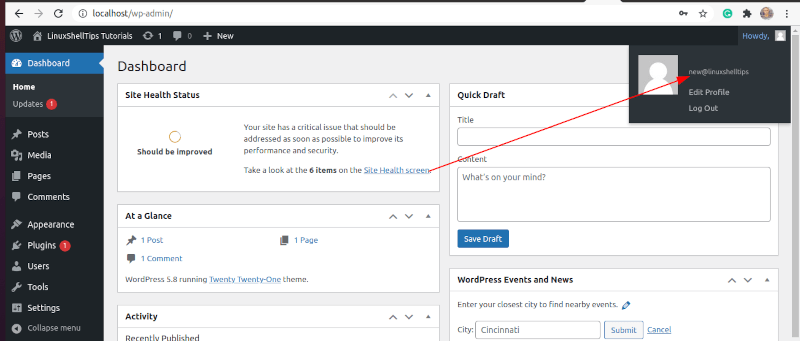
Time to log in to your WordPress site with the new admin user.
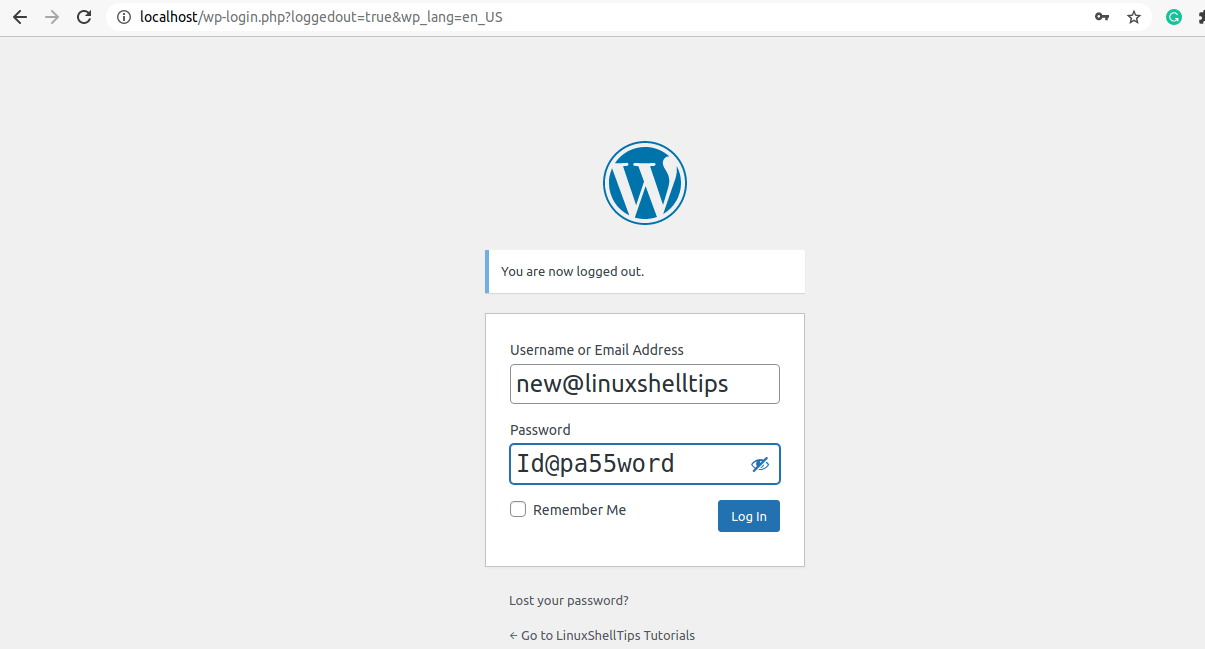
The admin interface login was a success!
With this tutorial, you can now easily create an extra admin user to help you manage your cumulative WordPress site tasks. You do not have to worry about troubleshooting typos like the case of using MySQL command-line to create an admin user.
